
How to Create a Workflow in ClayHR?
Workflows in ClayHR help you automate processes, track progress, and ensure tasks, checklists, and deadlines are completed on time. They remove manual effort, minimize errors, and allow your team to focus on high-value work instead of repetitive coordination. Whether you are designing onboarding, offboarding, candidate hiring flows, or any internal process, workflows make sure every step runs smoothly and consistently.
Steps to Create a Workflow
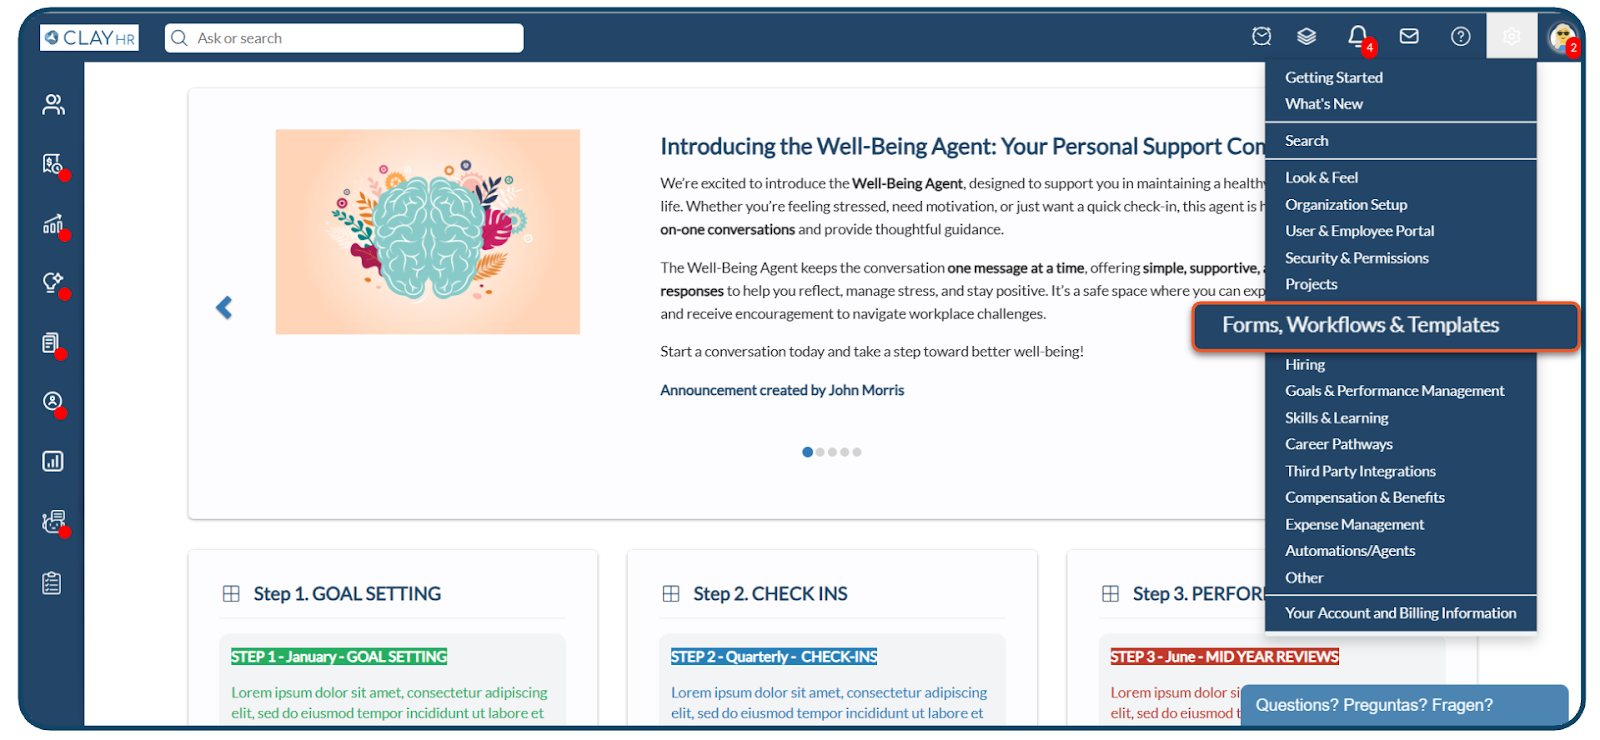
1. Click the Gear Icon in the upper right corner, select “Forms, Workflows & Template”
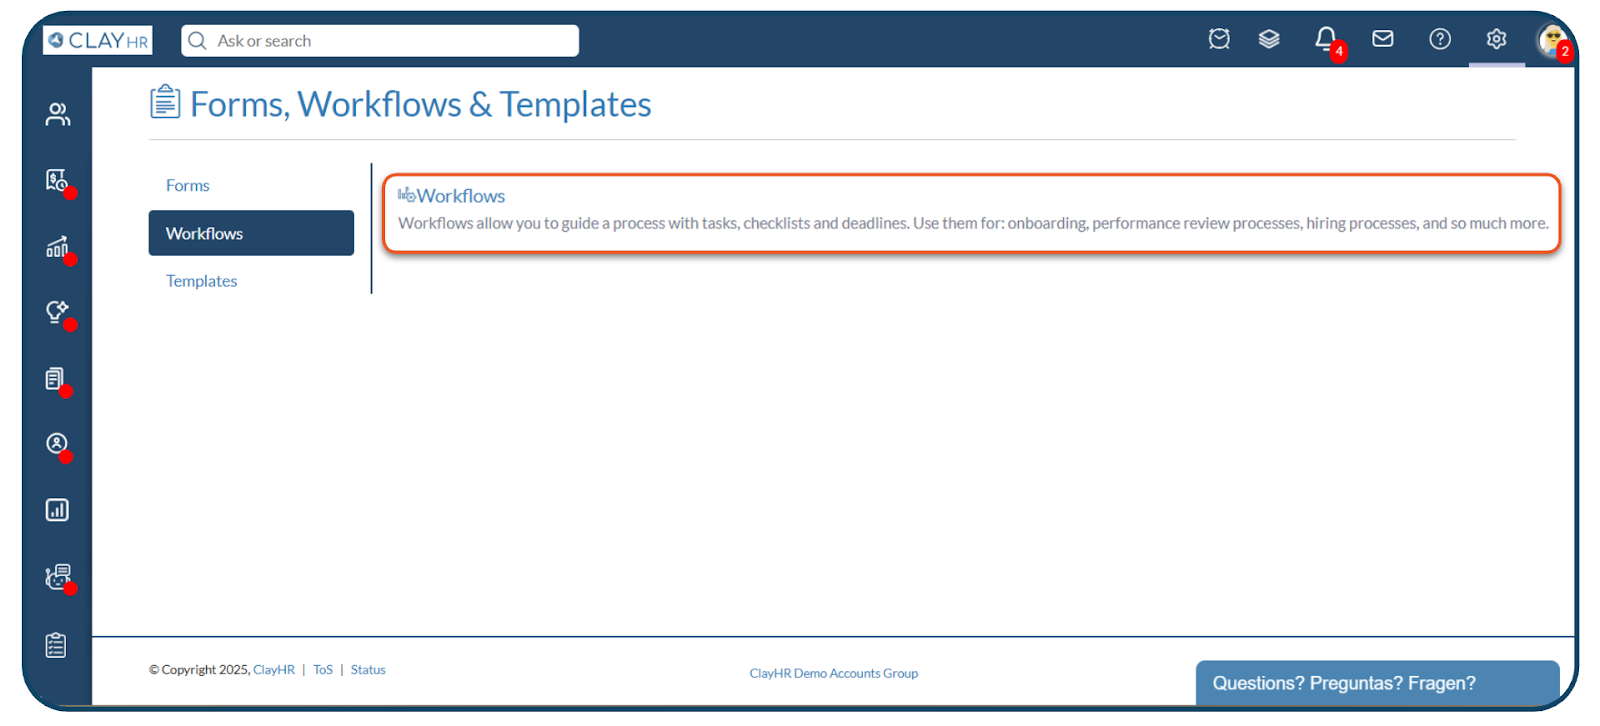
2. In the Workflows section, click on “Workflows”.
3. Click on the "New Workflow" button.
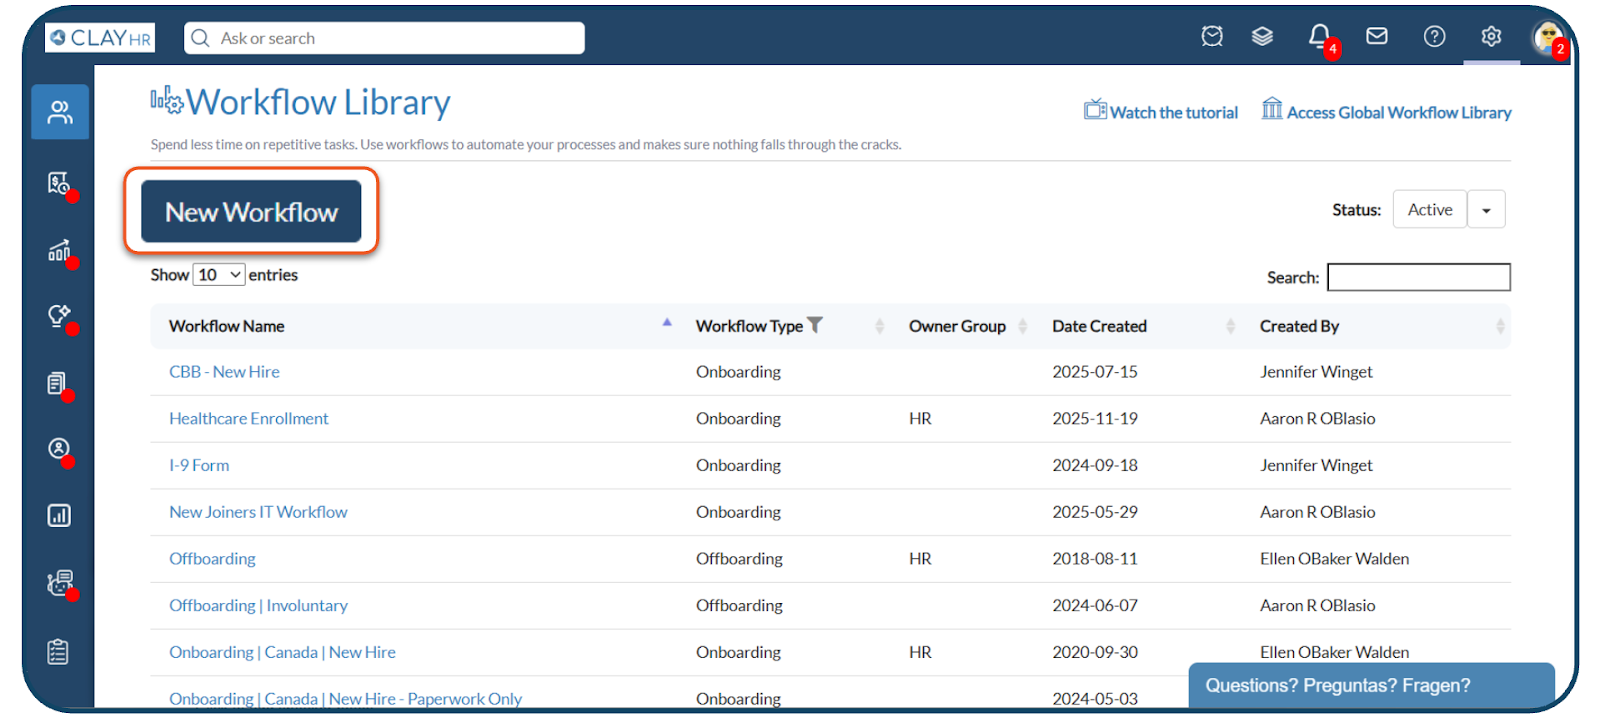
4. After clicking the "New Workflow" button, you will be redirected to the new workflow page.
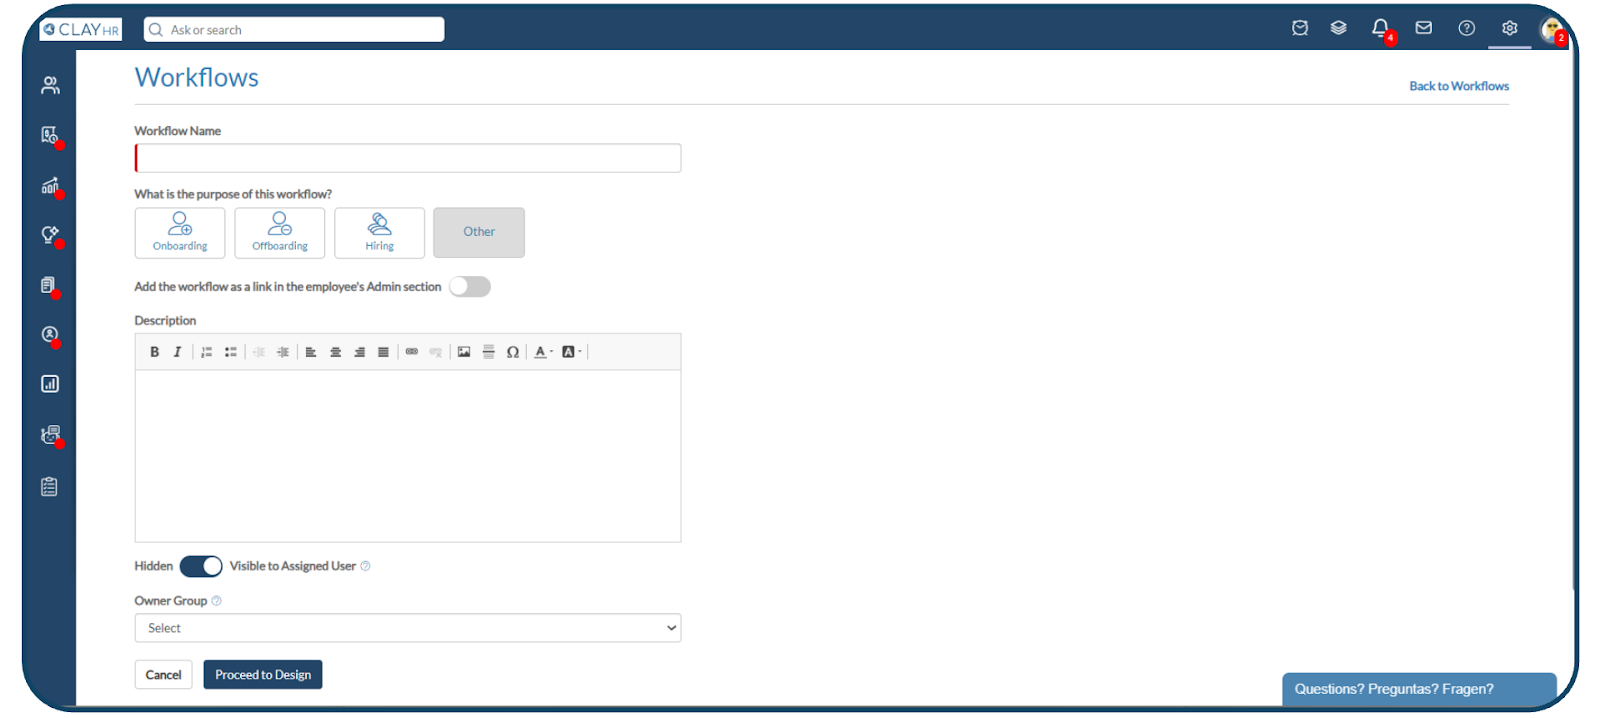
5. Fill in the details of the workflow:
- Enter the “Workflow Name” and select the “Purpose” of the workflow.
Purpose defines if a workflow is either a User Type workflow (Onboarding/Offboarding/Other) or a Candidate Type workflow (Hiring). - Turn on the toggle "Add the workflow as a link in the employee’s Admin section" if you want the workflow link to appear in the employee Admin area.
- Control the visibility of the workflow using the "Visibility to User" toggle. If set to "Hidden", the assigned user will not see workflow tasks or receive notifications.
- Select an “Owner Group” (or a User Group) to limit the access for managing the respective workflow. The users in the selected owner group should have the “Setup Menu Access” and “Manage Owned Workflows” permissions
For example, if HR is selected as the owner group for an onboarding workflow, only the HR user group and the Site Admin can manage that workflow.
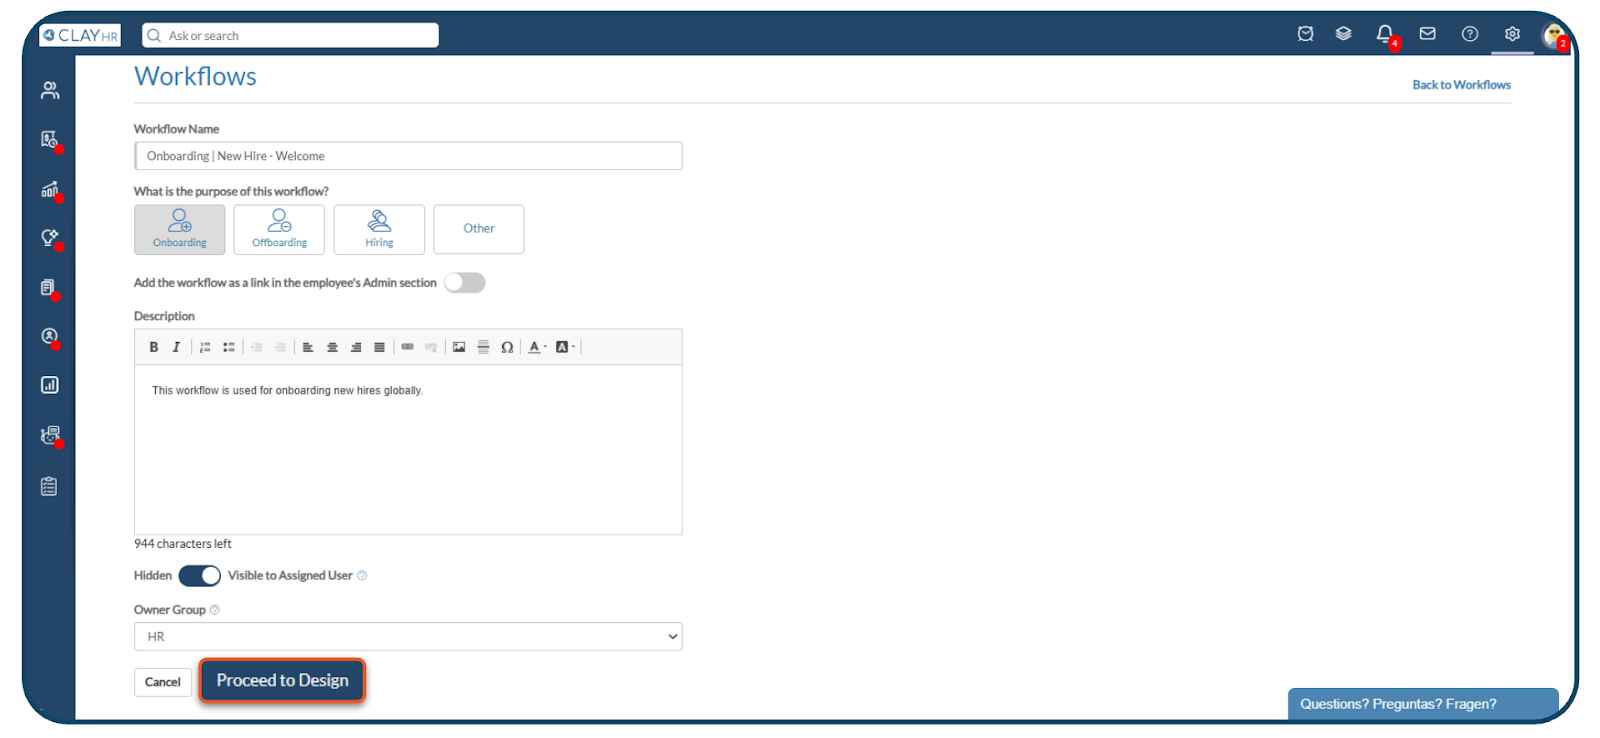
6. Click on the “Proceed to Design” button, a basic workflow is created, along with a sample phase and sample step in it.
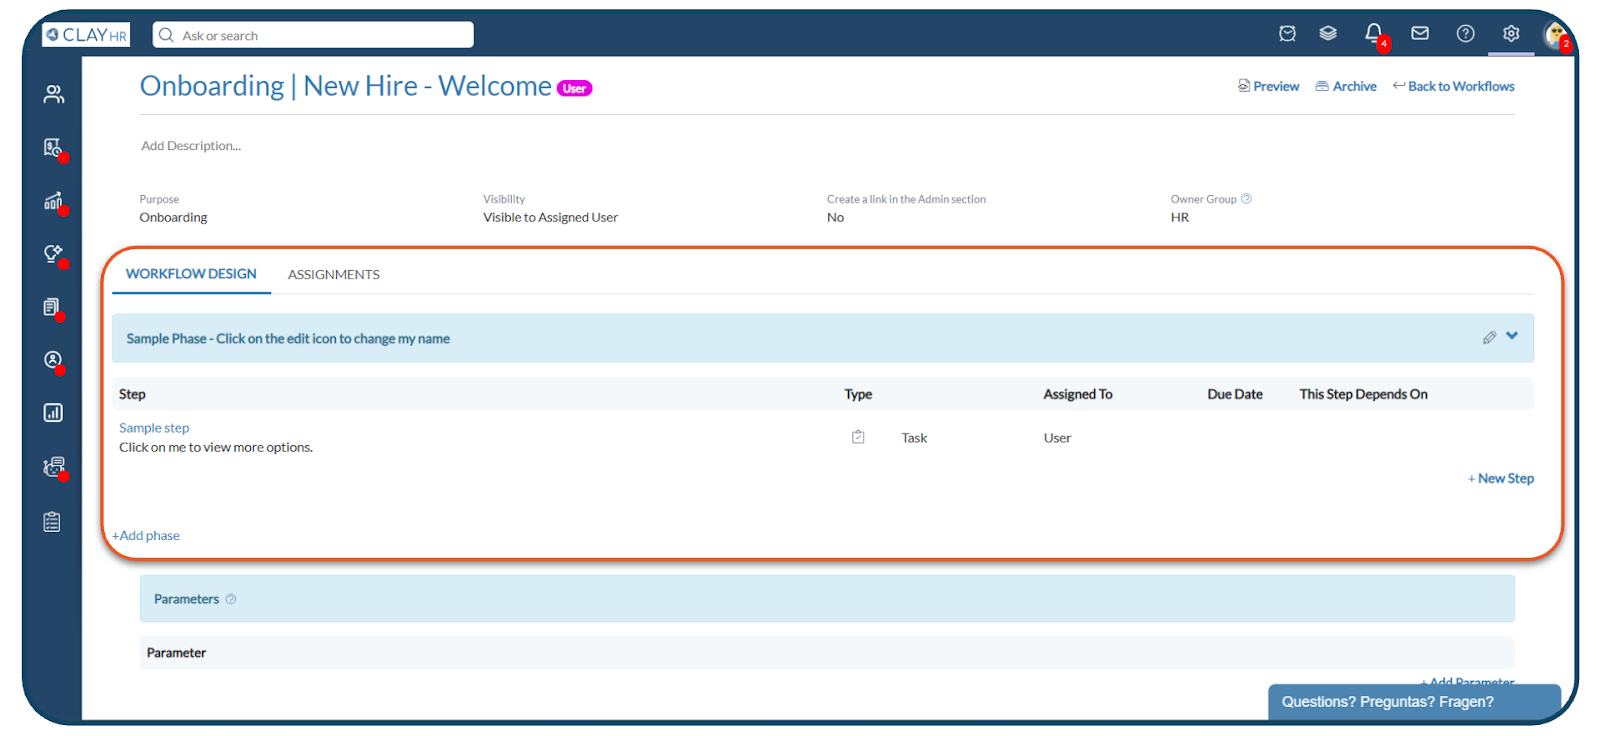
7. Click the edit icon on the right side of the “Sample Phase” to modify it. Update the phase name and click “Save Phase”. The “Advanced Settings” section is optional and is used only when you want the phase to apply to specific user groups.

8. Similarly, edit the “Sample Step” according to the requirement and save the step.
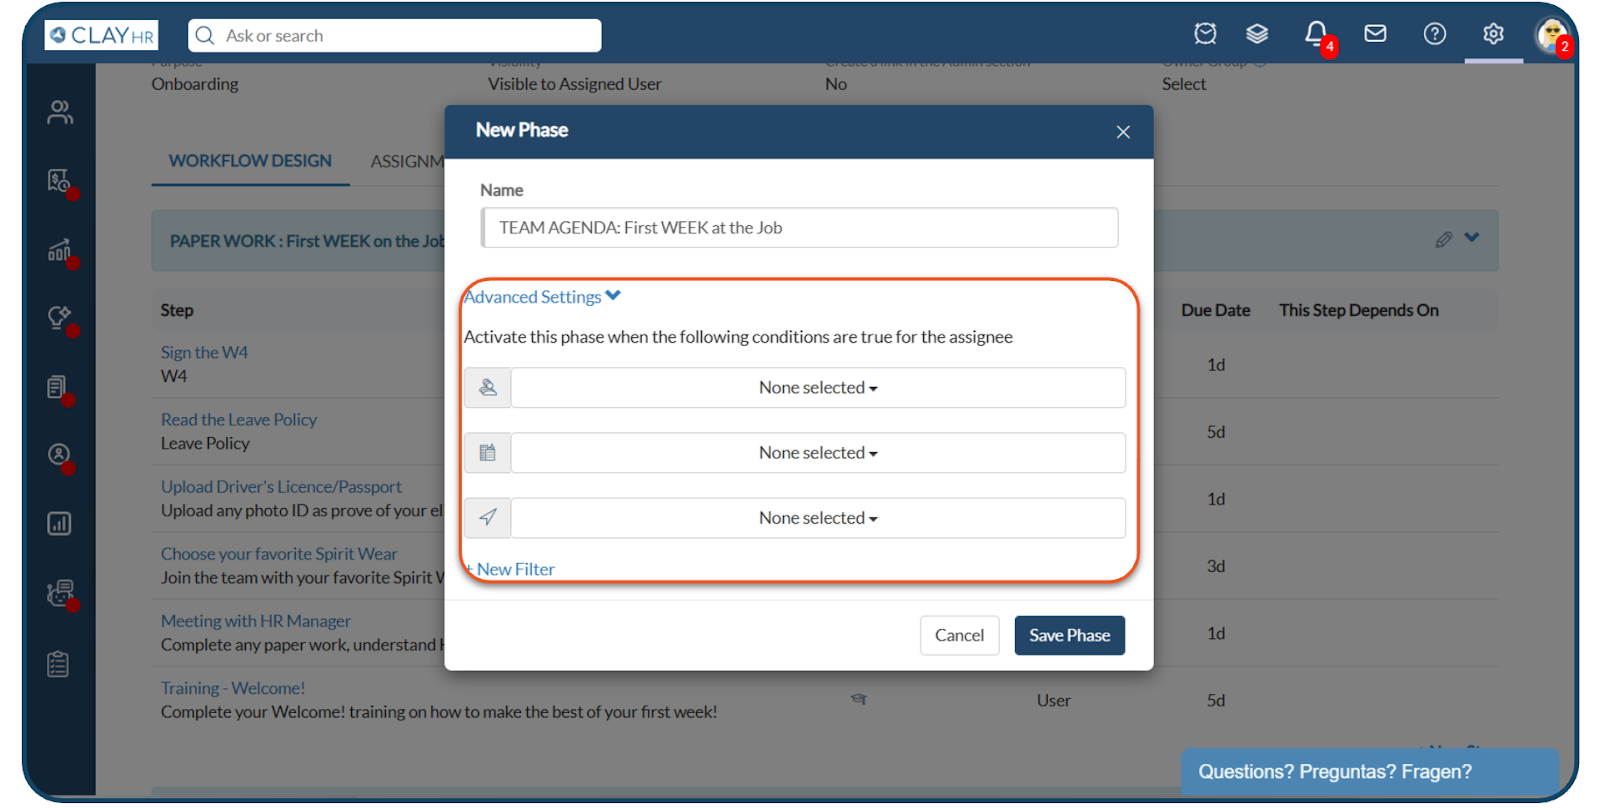
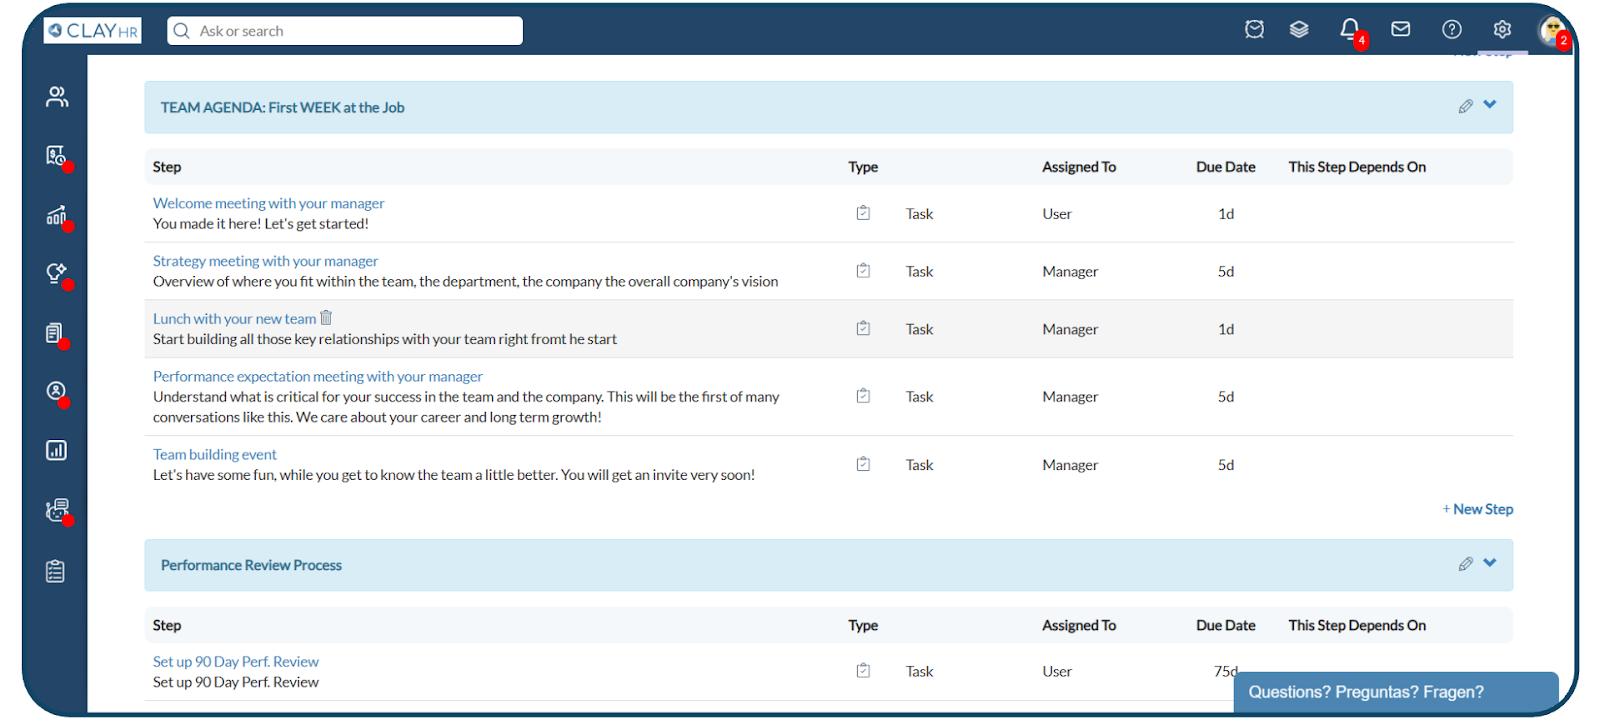
9. Use “+Add Phase” and “+New Step” to create further phases and steps respectively.
a) When creating a new phase, add the Phase Name and in the Additional Setting set the conditions based on which the phase should be assigned to the user.
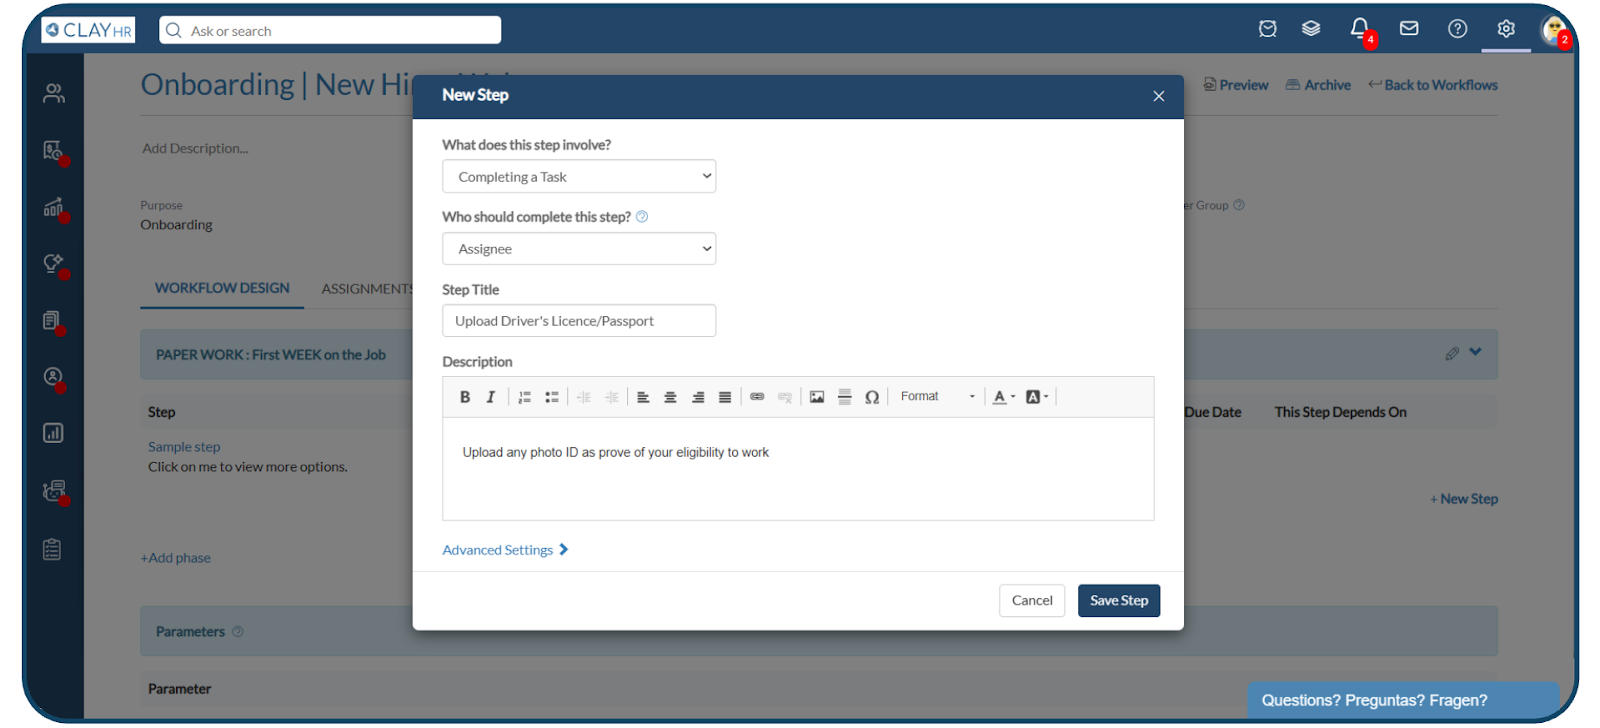
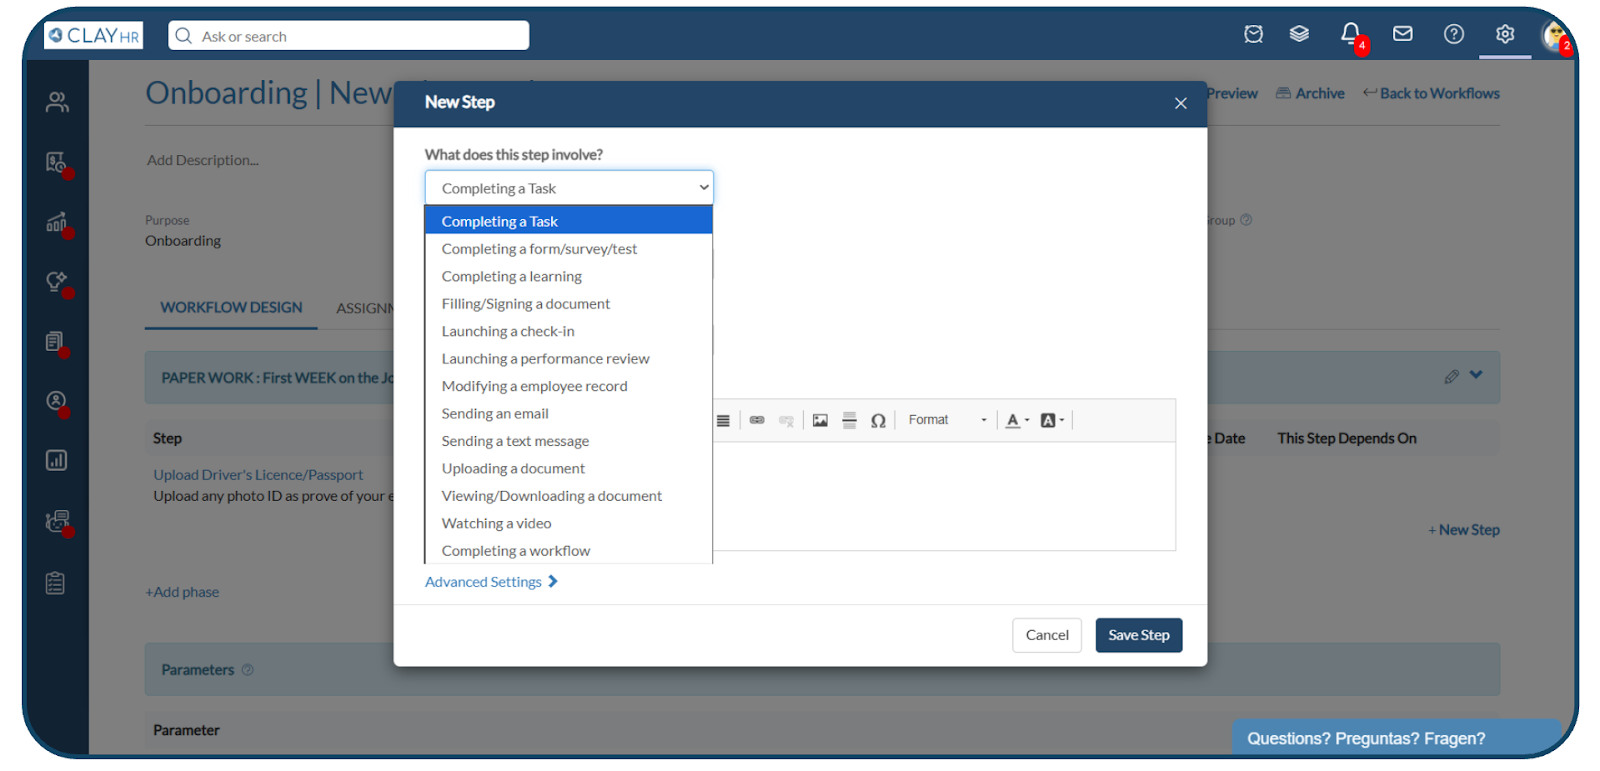
b) When creating a step, Select the step type from the "What does this step involve?" dropdown list.
For example:
- Choose "Completing a form/survey/test" when you want to assign a form, survey, or test to a user or candidate.
- Choose "Complete a learning" when you want to assign a learning module that the user must complete.
- Choose "Sending an email" when you want the step to send an email. The user must then select an existing email template to be used.
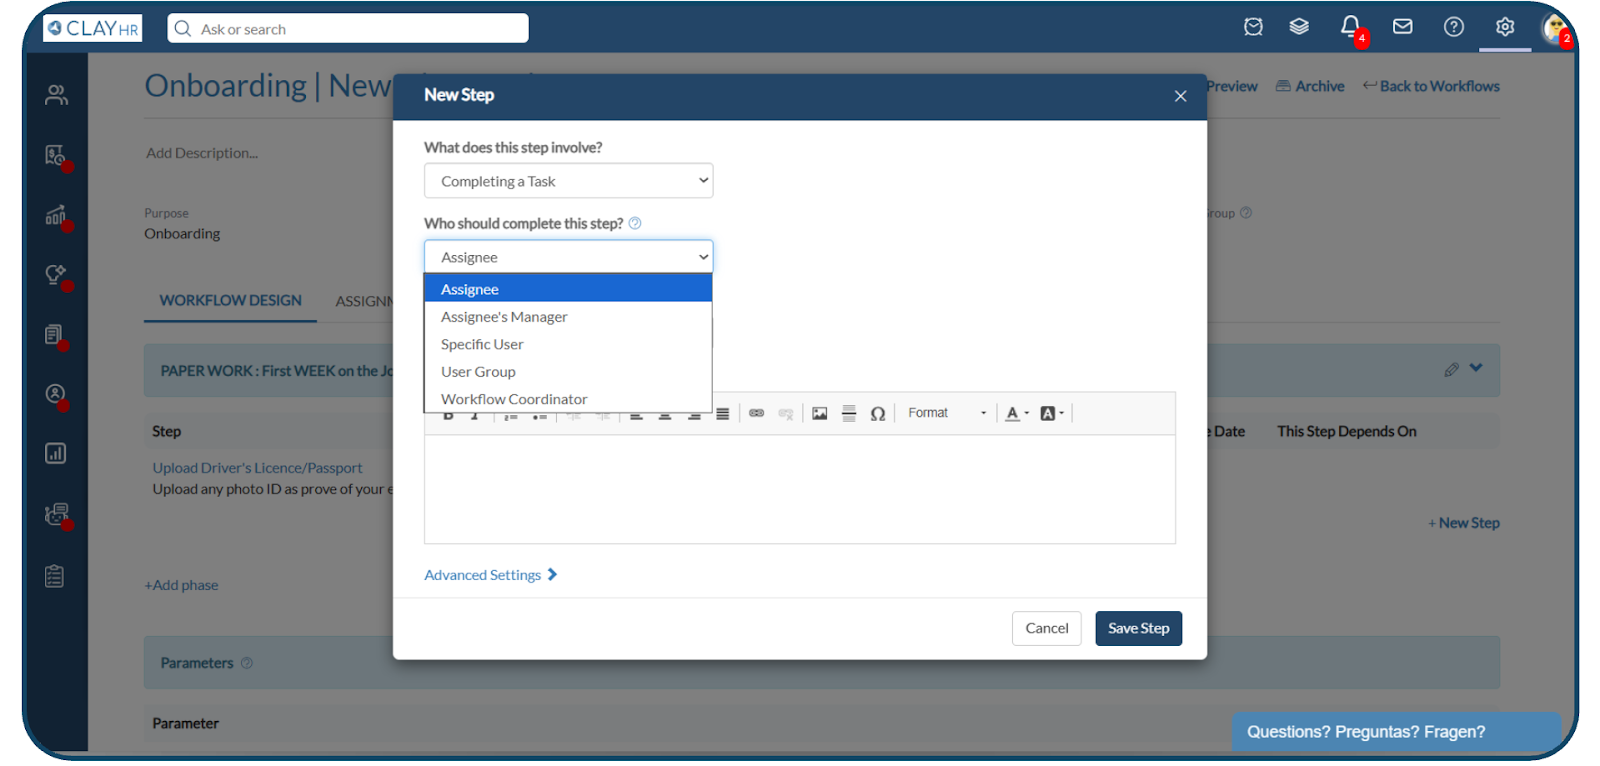
c) Select the step assignee from “Who should complete this step?” dropdown. In the “Advanced Settings” section, users can select additional settings for the step..
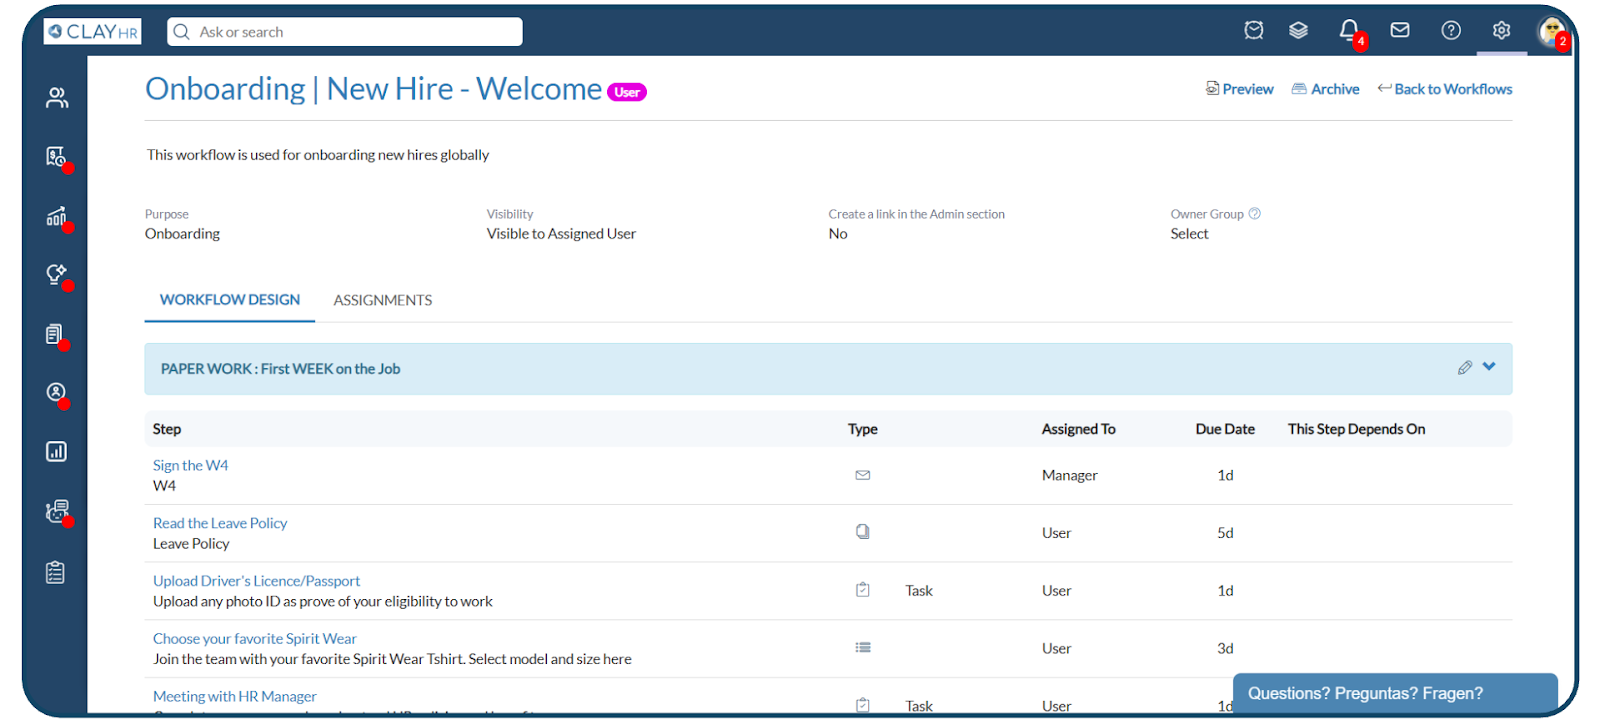
d) Once all the steps have been included, the workflow is now ready to be assigned to the Users/Candidates.
Learn how to Assign a Workflow


