How to Create and Configure App Menu
The App Menu makes it easy to find what you need within the application. It includes a default set of menus and sub-menus to get started easily. Users can also create their own custom menus and sub-menus to organize the app in a way that suits them best.
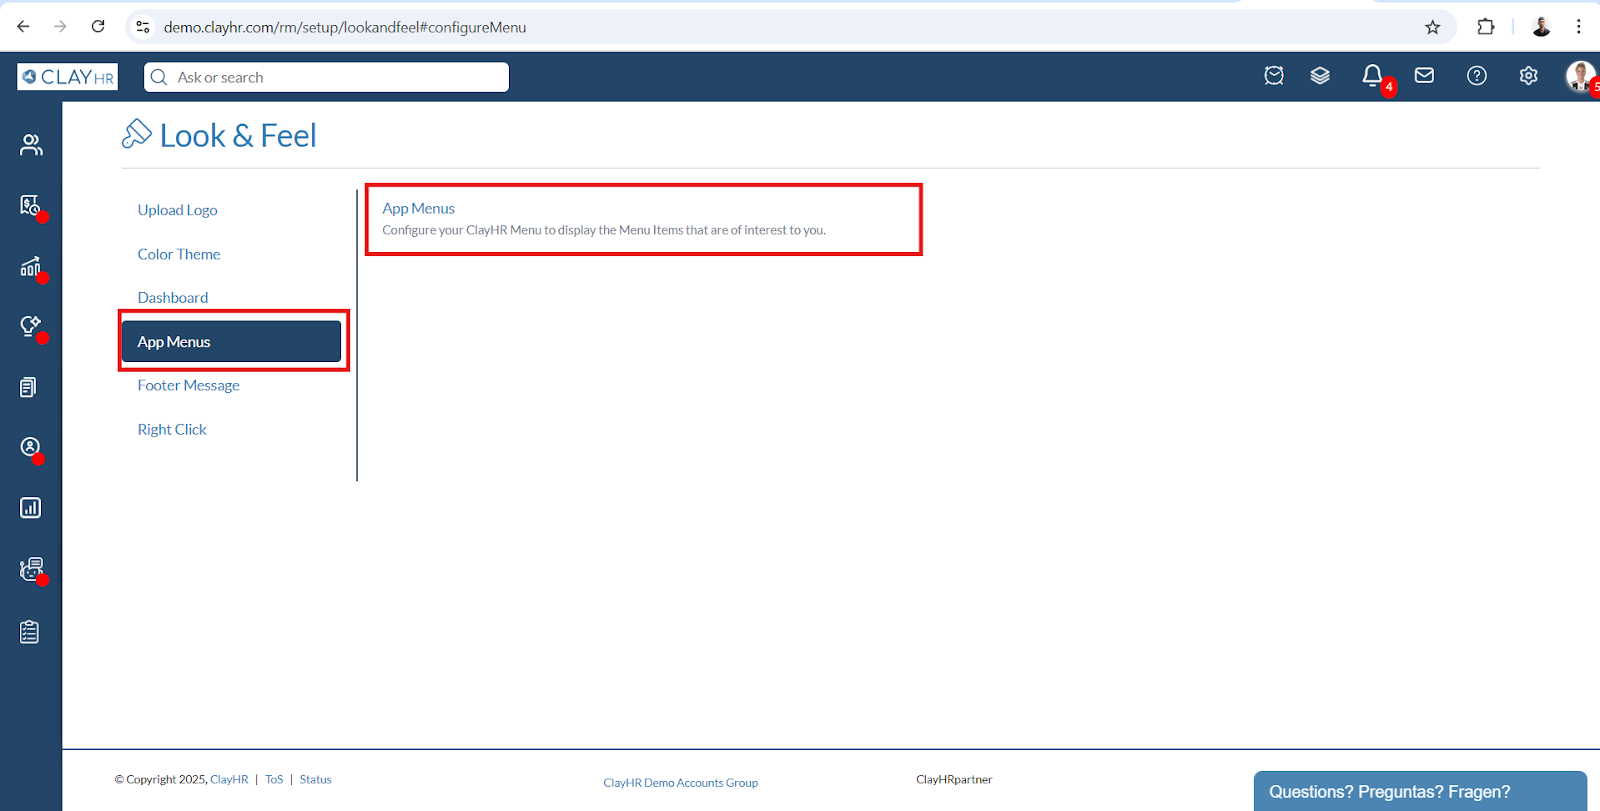
- Navigate to the “Gear” icon and select “Look & Feel”.

- Choose “App Menus” and click “App Menus” again.
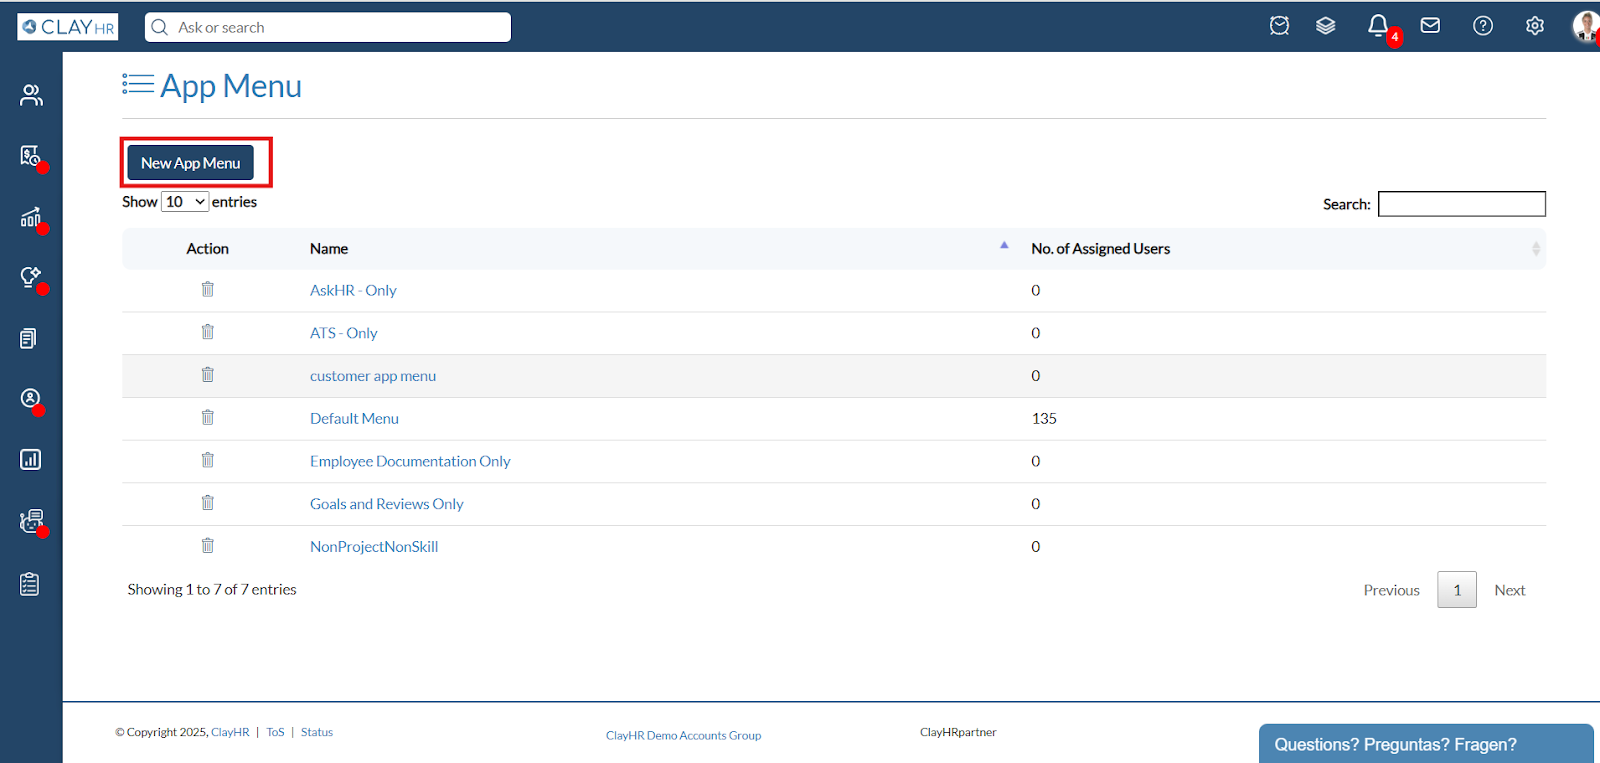
- On the App Menu page, click on “New App Menu”.
- Note: For activating modules, navigate to Setup > Your Account and Billing Information > Modules & Add-Ons.
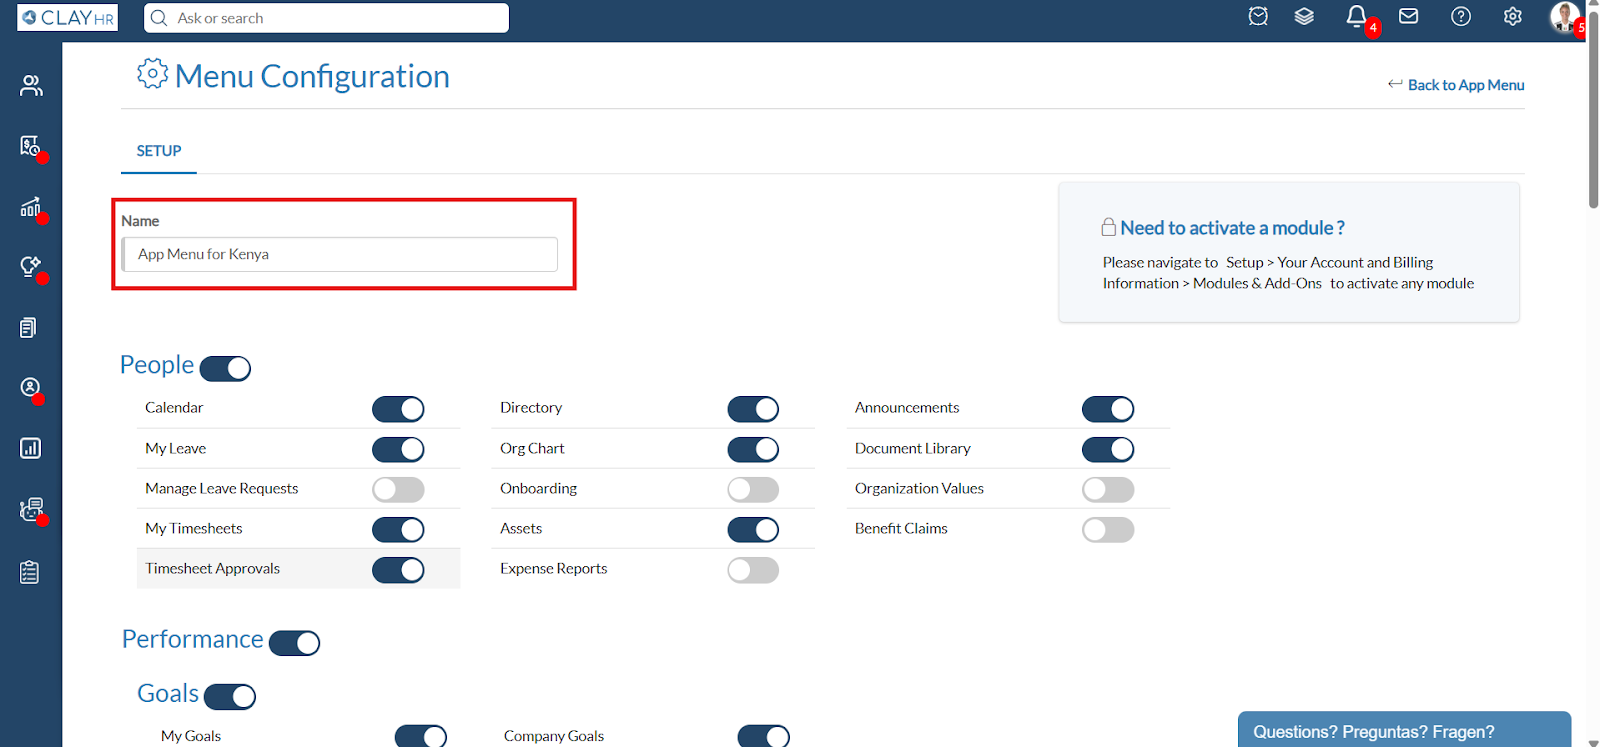
- On the Menu Configuration page, specify the name of the app menu (e.g., “App Menu for Kenya”) and toggle modules on or off as required.
- Note: Multiple app menus can be created based on e.g. roles, locations, etc, and assigned to different users.
- After configuring, click on the “Save Configuration” button.
- Note: To deactivate specific modules (e.g., “Ask HR”), toggle them off and save the configuration to ensure users do not see those modules.
How to Assign the App Menus
- Once the configuration is saved, a new app menu will appear on the app menu homepage. Click on the newly created app menu.
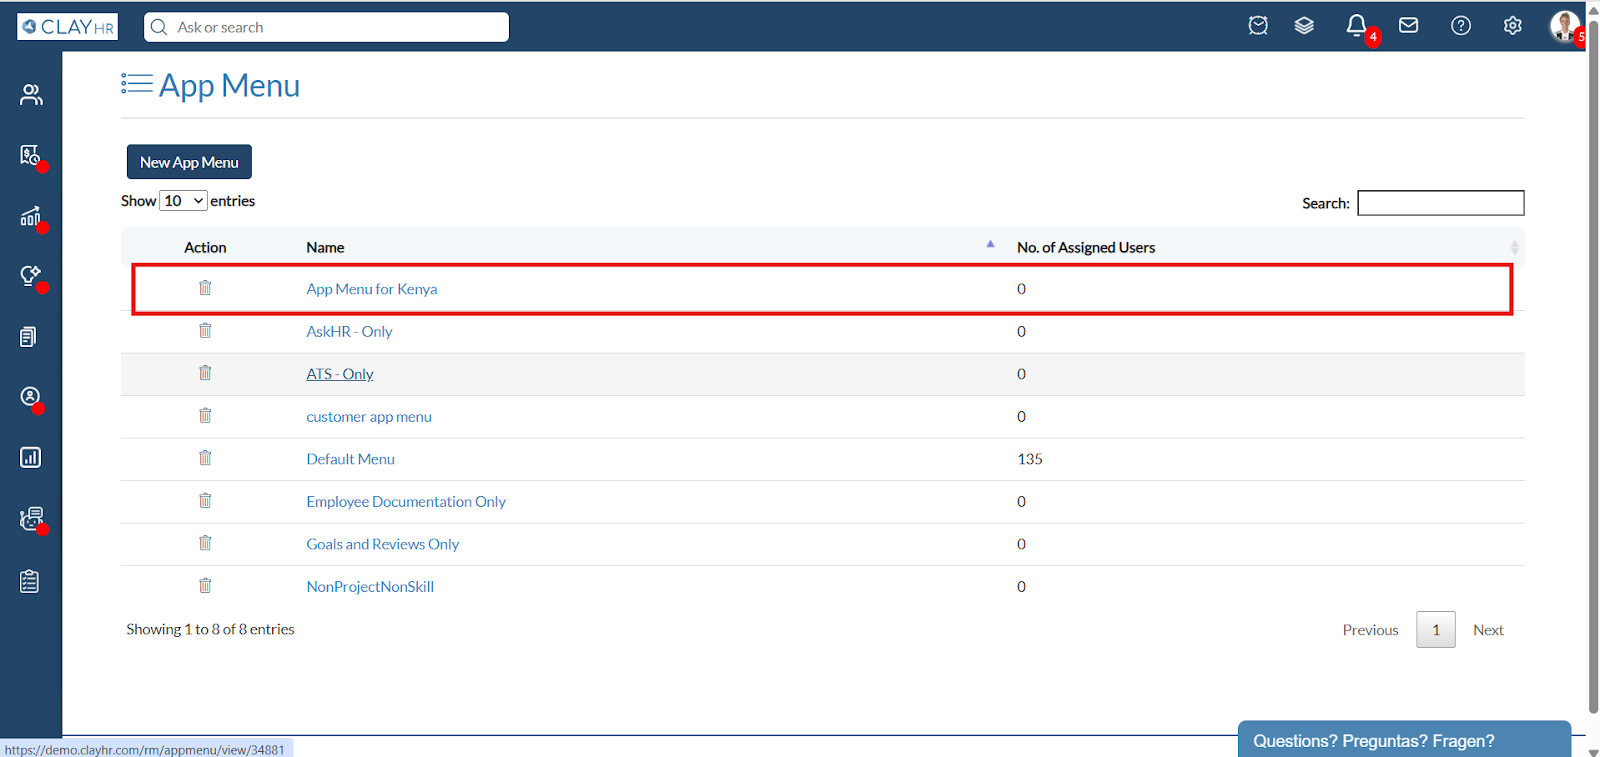
- On the menu configuration page, navigate to the “Assignment” tab.
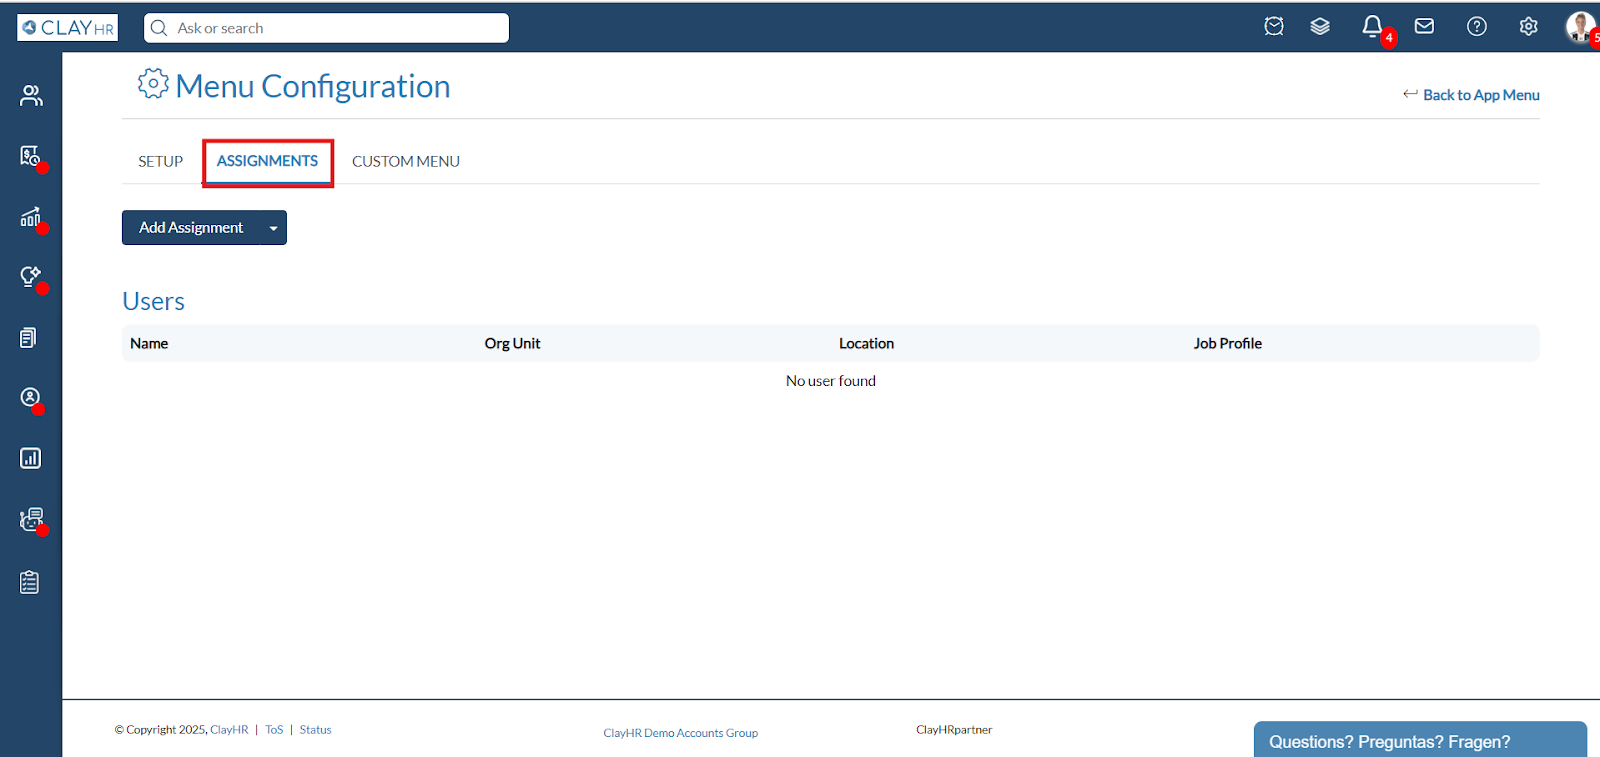
- To assign the menu to individual users:
- Click on “Add Assignment,” which will open a new pop-up.
- Enter the name of the user you wish to assign the app menu to and click on “Save Member.”
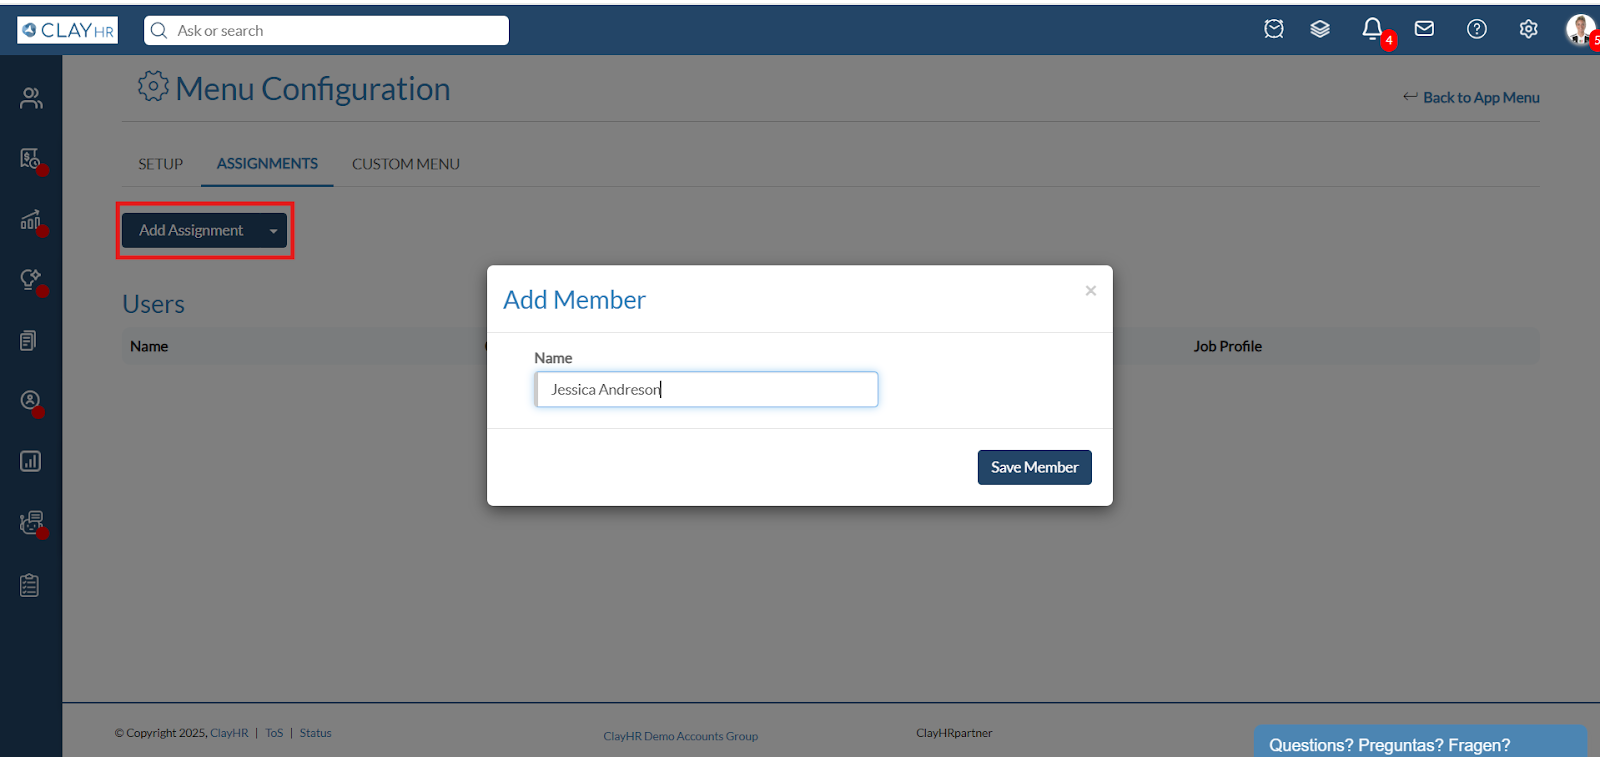
- To assign the menu to users in bulk:
- Follow the steps outlined in the following link for bulk user updates Bulk User Update.
How to Create and Delete Custom Menus
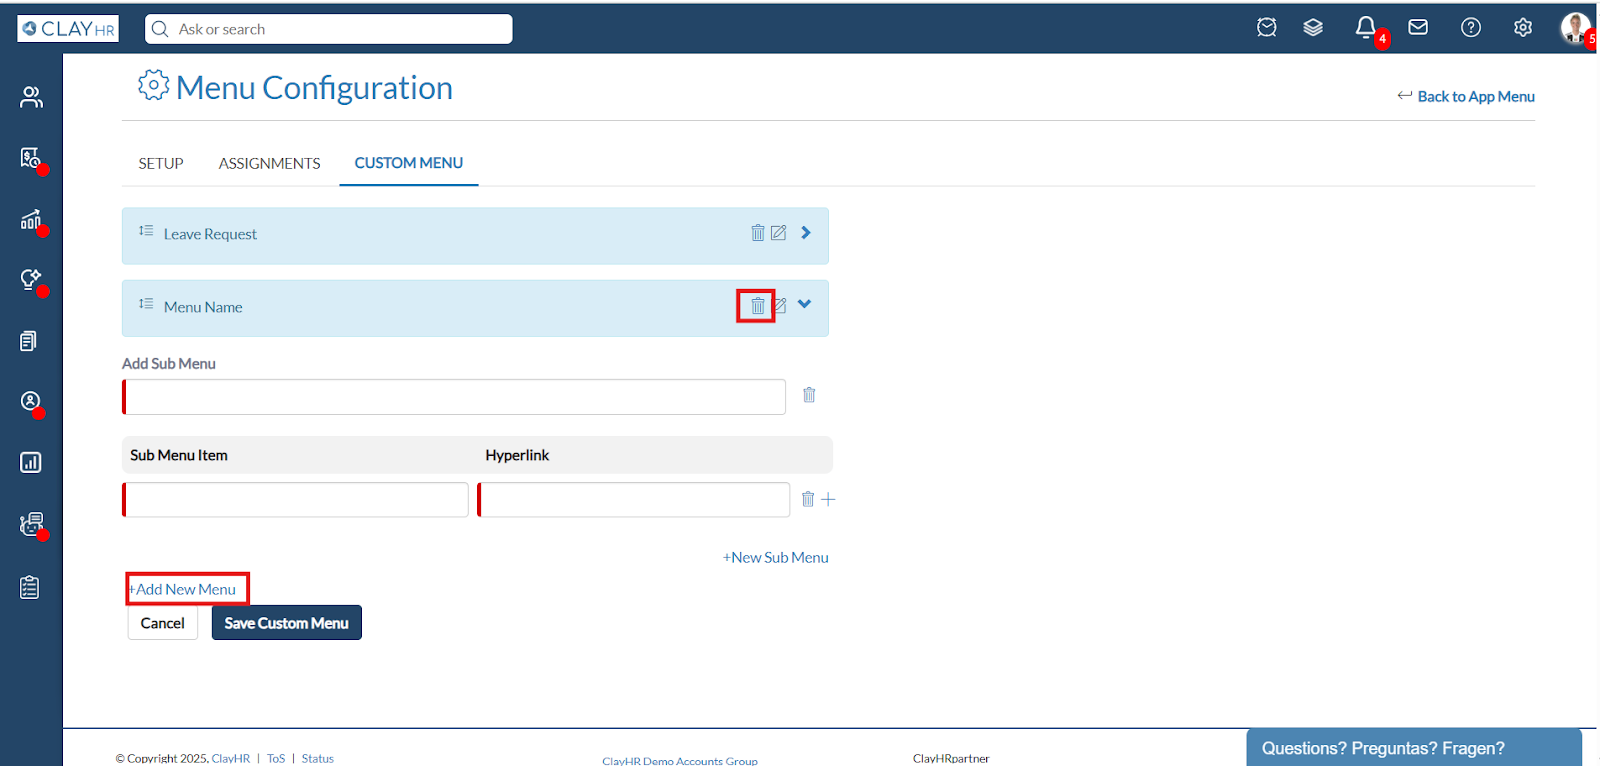
1. On the menu configuration page, navigate to the “Custom Menu” tab.
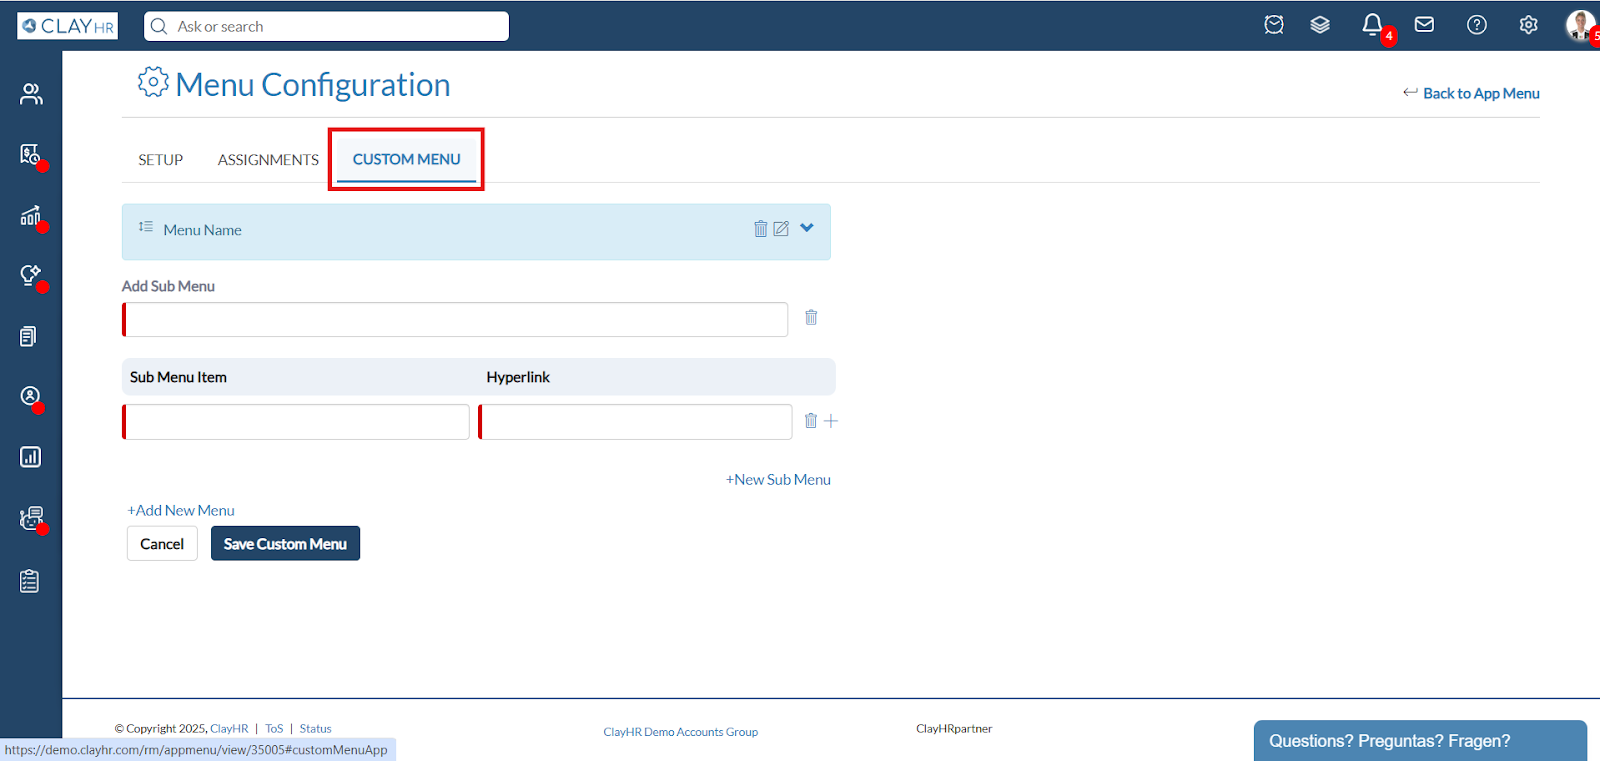
2. To change the menu name, click on the edit icon.
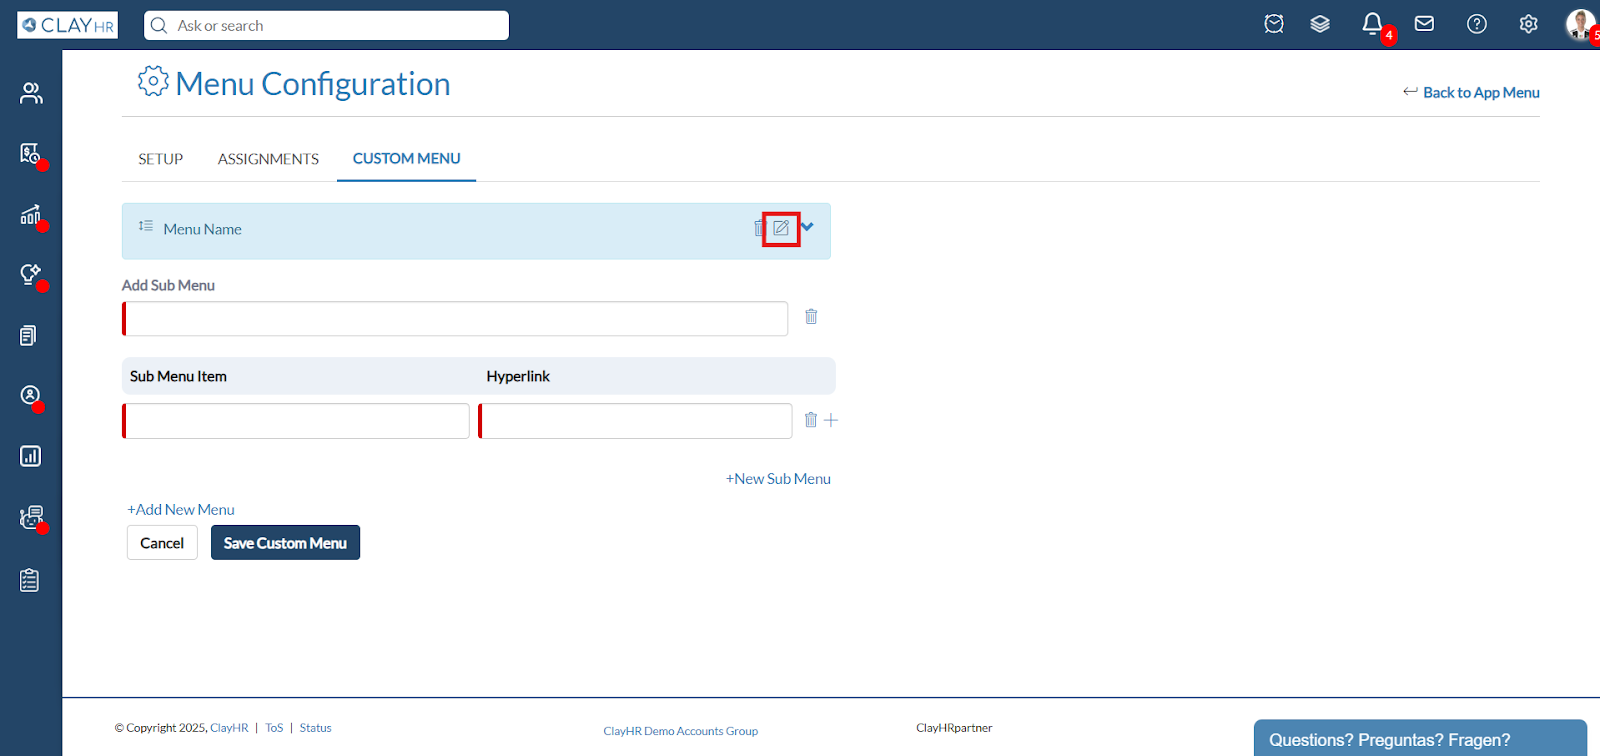
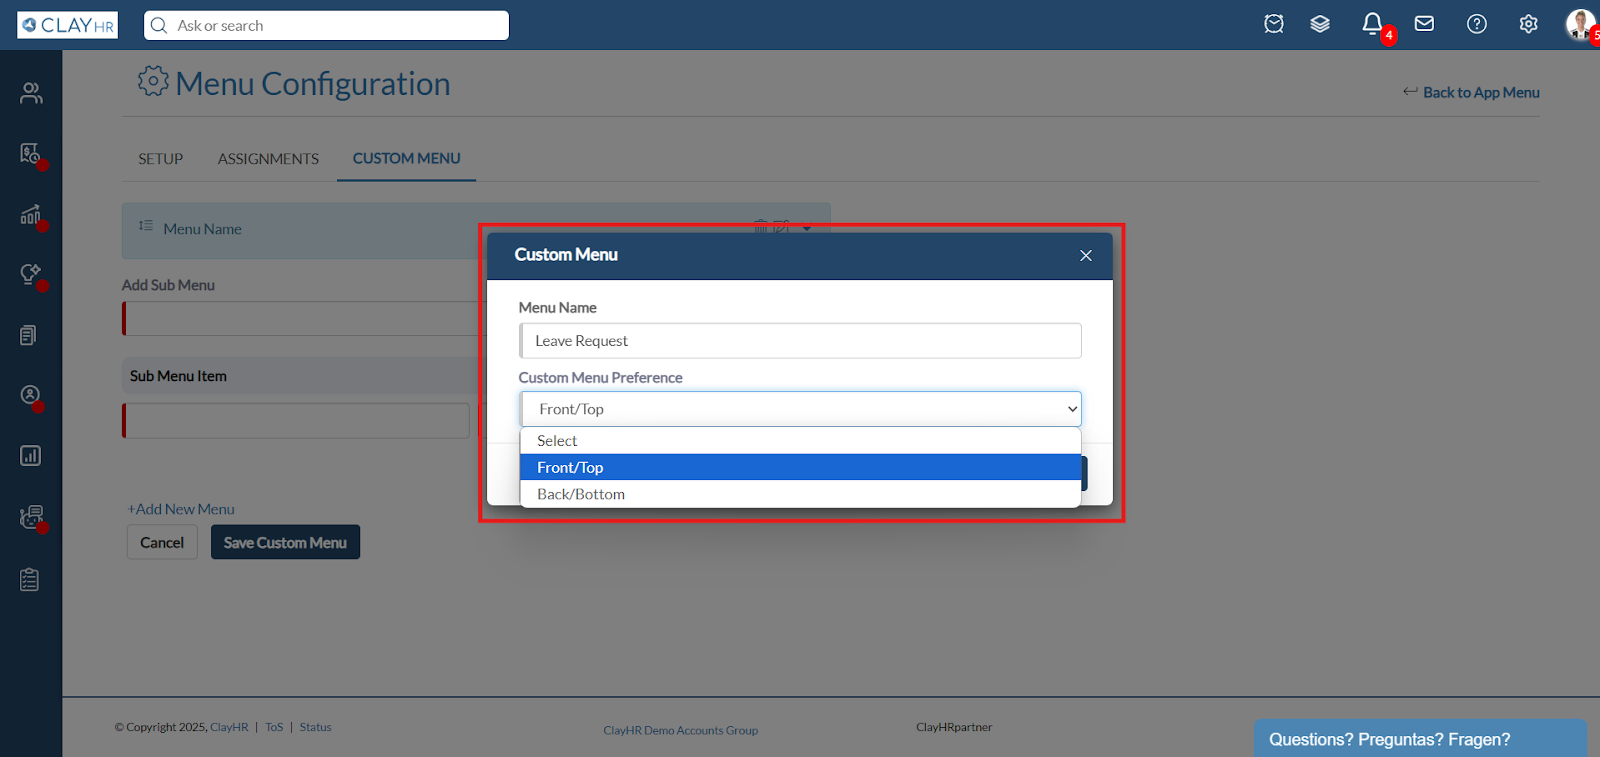
3. Here you can edit the name and update the preferences of the 'Custom Menu'.
4. Add the name and the hyperlinks to the sub-menus e.g. if you want to create a sub-menu time as PTO, you can simply add the name as PTO and in the Hyperlink just add the URL.
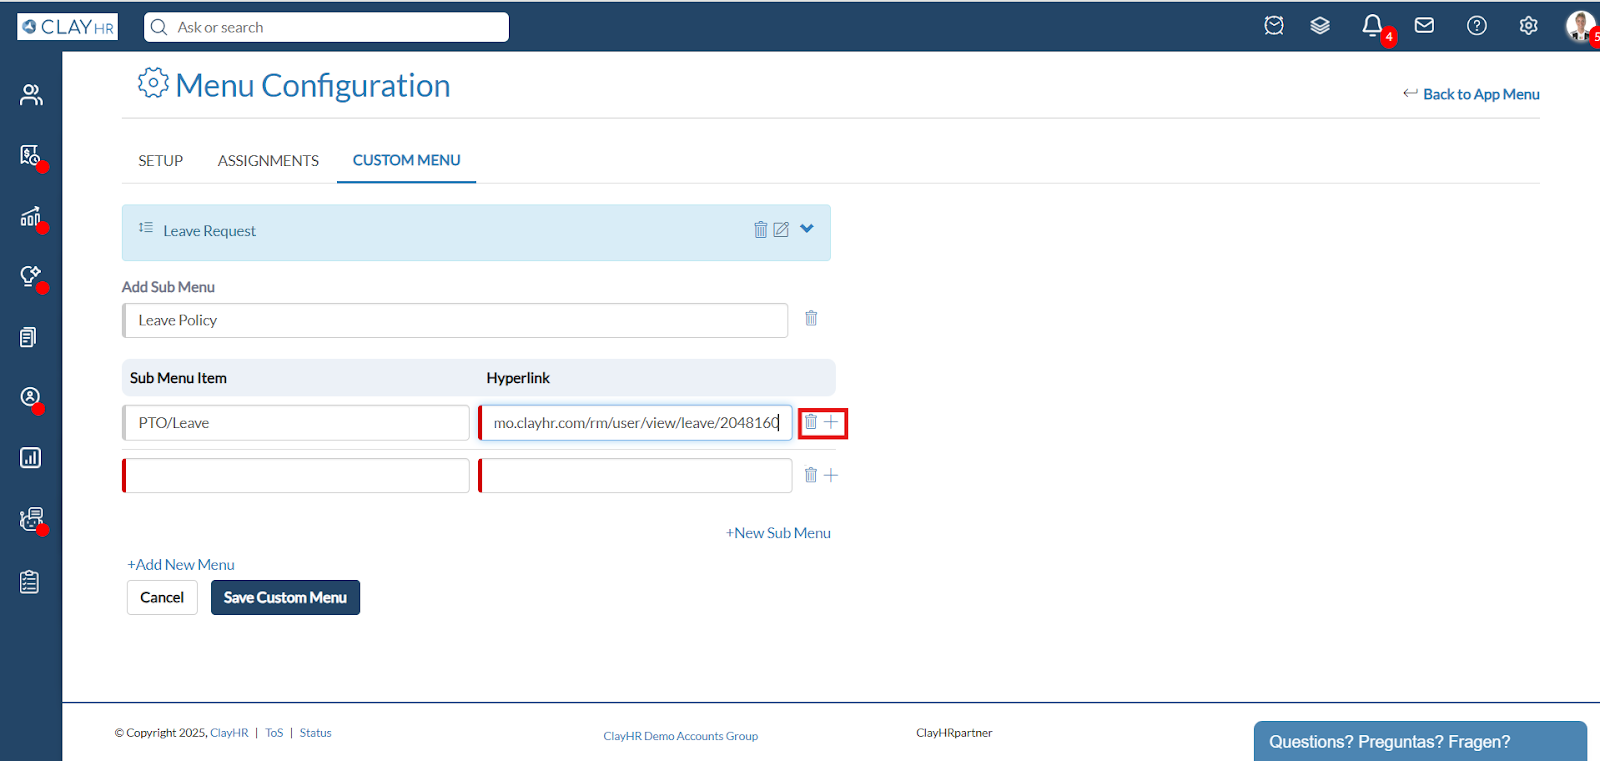
5. This section allows you to add and delete sub-menu items along with their respective hyperlinks.
- To add a new sub-menu, click on the '+ New Sub Menu' option
- To delete a sub-menu, click on the trash icon next to it.
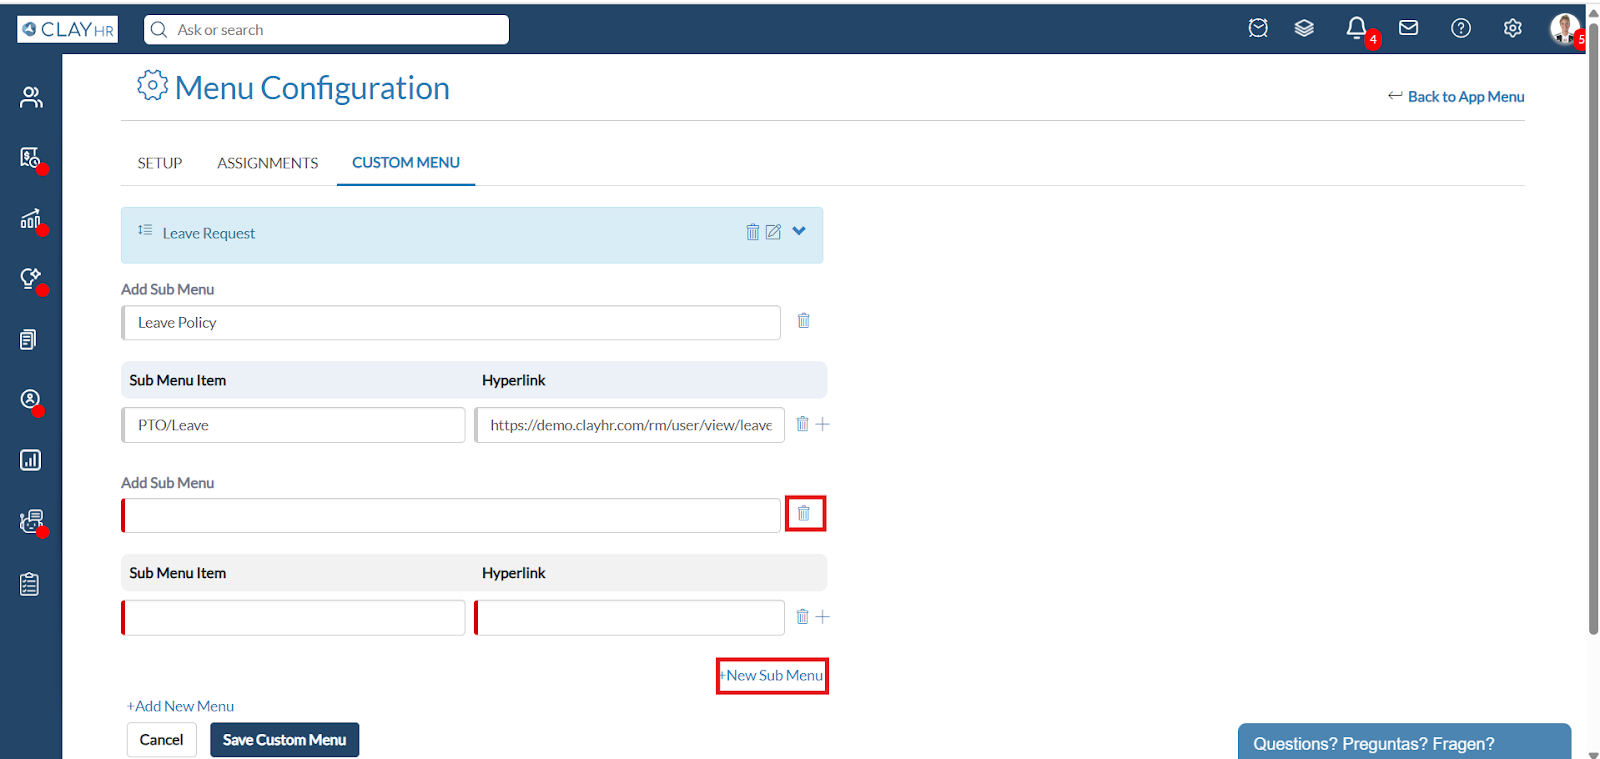
6. This section allows you to add and delete The Menu along with their respective sub-menus.
- To add a new sub-menu, click on the '+ Add New Menu' option
- To delete the Menu, click on the trash icon next to it.
