
Linking JIRA with ClayHR
Setup JIRA in Third-Party Integrations
1. Go to the top right “Setup” menu and scroll down to “Third Party Integrations”: Setup -> Third Party Integrations.

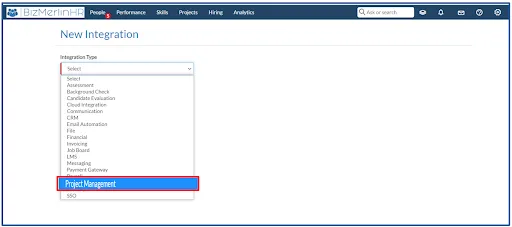
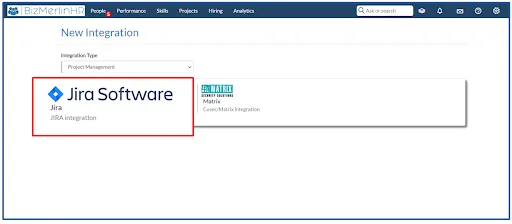
2. On the Third Party Integrations page, click on the button “New Integration” and select “Project Management” as Integration Type and choose “Jira”.
3. In the field, Host specifies your JIRA account URL (the address of your Atlassian cloud site).
For example, if your Jira dashboard is at https://ACME.atlassian.net/secure/Dashboard.jspa
then the Hostname should be https://ACME.atlassian.net
4. Enter your Username in the “Username” field.
5. Specify the API Token in the “Authtoken” field (how to generate auth token).
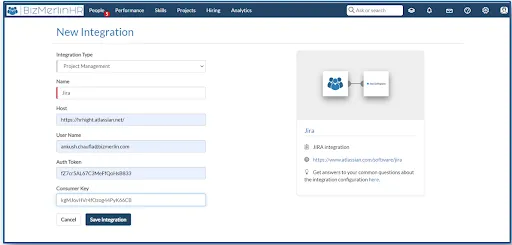
6. Now, you are ready to Integrate with JIRA.
7. Create Webhooks in Jira.
8. Add Jira Push or Pull Post Functions.
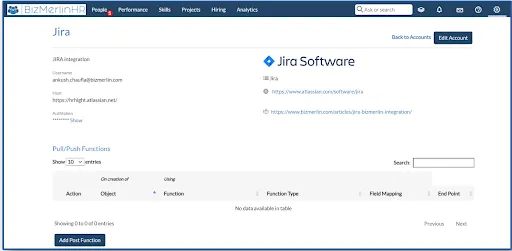
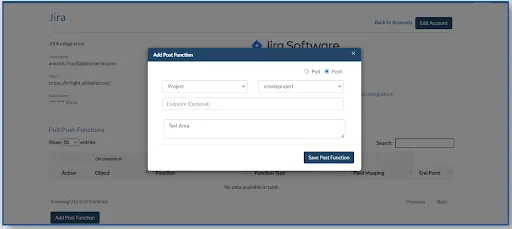
9. Add JIRA Push function in Post Functions.
A. On the Post Functions page, select Object as “Project” from the drop-down and “create project” from the Function drop-down with field mapping as Text Area.
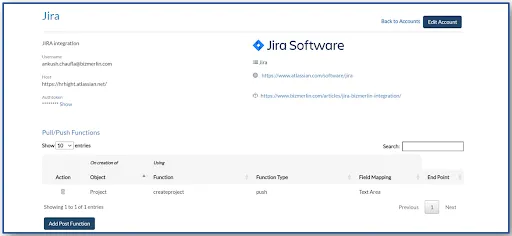
B. Click the “Save” button to save the Post Function.
C. Now, you are ready to create a project in JIRA, wherever you will create a Project in ClayHR.
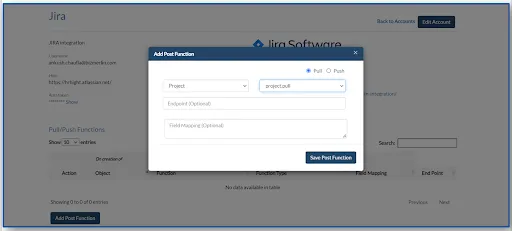
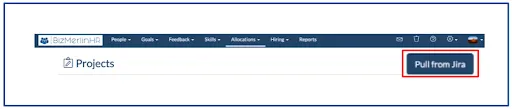
10. Pulling “Projects” in ClayHR from JIRA
A. In ClayHR, go to the top menu “Projects” and click “Projects”.
B. There you see a button “Pull from JIRA” on top right.
C. The project ID in Jira should be stored as a project’s custom field in ClayHR.
D. The custom field code should be ‘jira.project.ID’
E. Click on the button. All JIRA projects will be created in ClayHR.
F. Finally, you will see a notification message on the screen.
Configure Webhooks in JIRA
1. Go to Site administration.
2. In the left panel, go to JIRA settings.
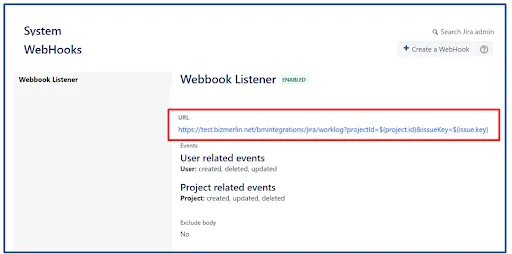
3. In the left panel, find Webhooks, click on the link.
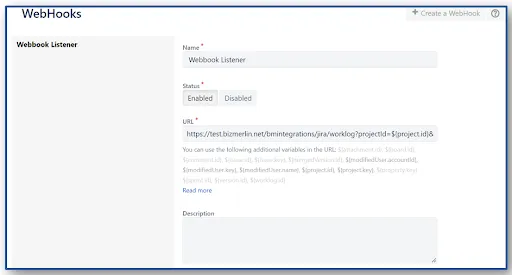
4. Click on Create a Webhook.
5. Enter the Name of the Webhook, say Project Listener.
6. Set status Enabled.
7. Set URL as https://yourdomain.clayhr.net/bmintegrations/jira/project.
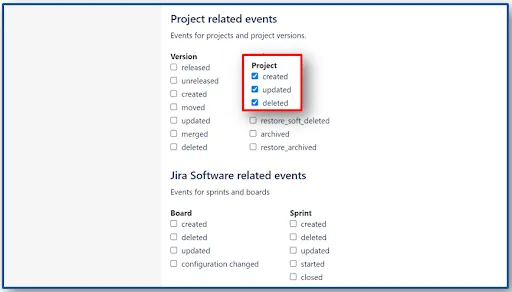
8. Set Project related Events, check all the checkboxes (created, updated, deleted).
9. Hit the Save button.

Create an API token
You can create API token from your Atlassian account by following steps:
A. Log in to https://id.atlassian.com/manage/api-tokens
B. Click Create API token.
C. From the dialog that appears, enter a memorable and concise Label for your token and click Create.

D. Click Copy to get the auth token, then paste the token to your script or elsewhere to save.


