Managing User Groups
[To learn more about the difference between “User Profile” | “User Role” | “User Group”]
User Groups are one of the core building blocks of ClayHR’s Permission Matrix within the overall Permission Framework. They define who users are from an access-management perspective and allow administrators to apply permissions efficiently at scale. By organizing users into meaningful groups—such as HR Admins, Recruiters, Managers, or regional teams—organizations can control system access with precision and consistency.
In this article:
- Creating User Groups
- Assigning Users to a User Group
- Configuring Permissions for a User Group
- Best Practices for Managing User Groups
1. Creating User Groups
To create a User Group:
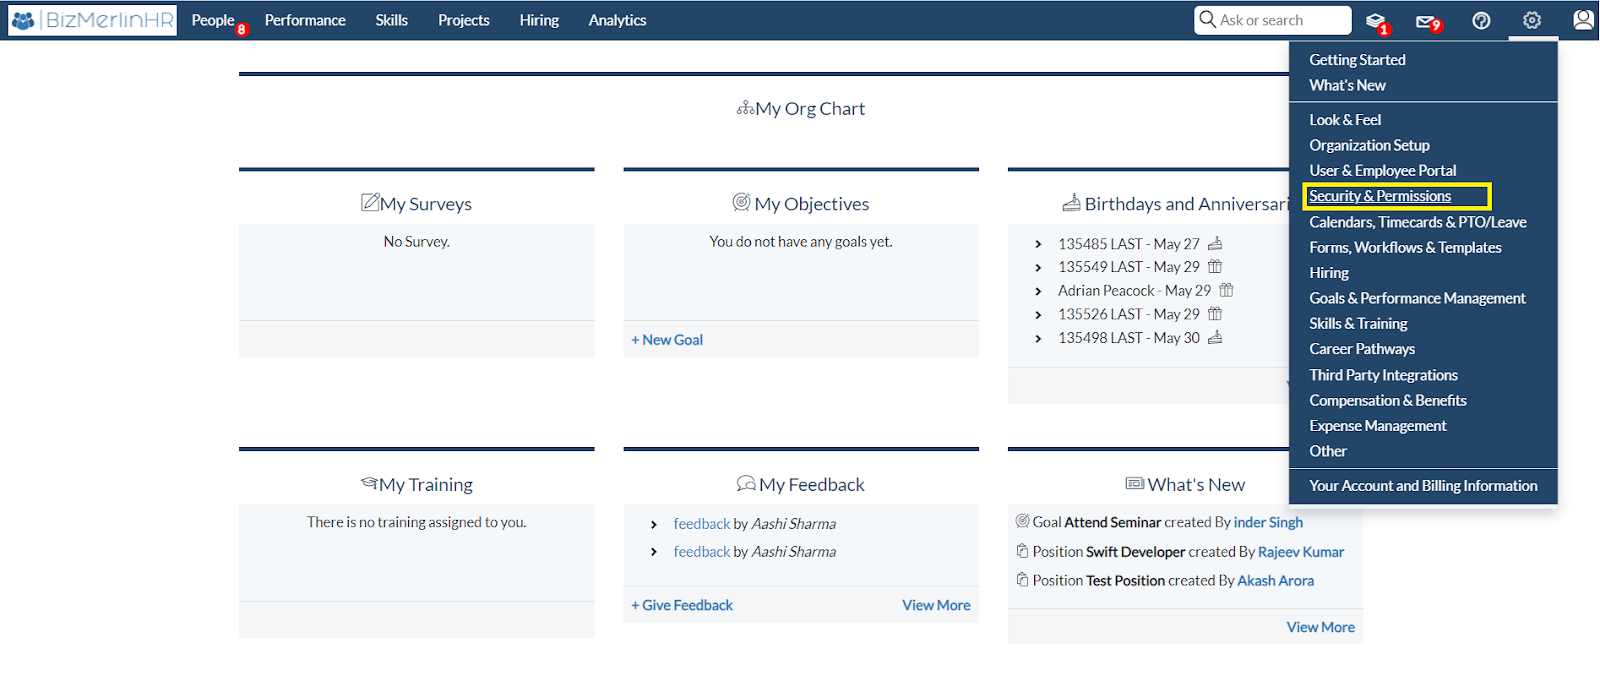
- Navigate to Setup Gear Icon to the top right
- Select Security and Permissions Submenu
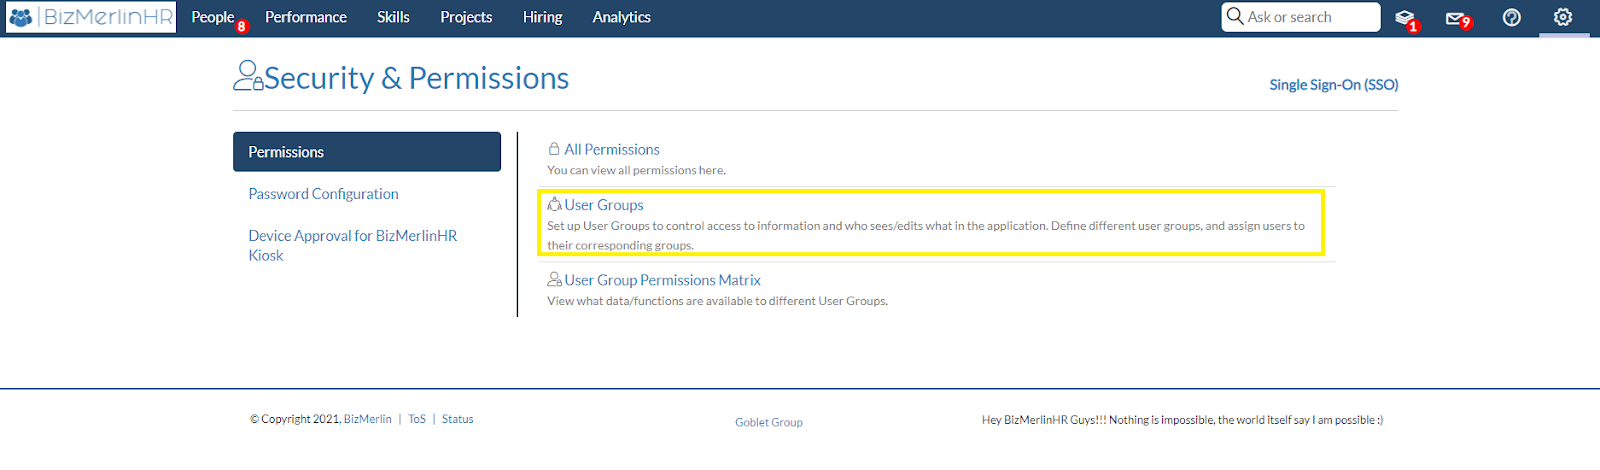
- Select User Groups
- Click Create User Group.
Once created, you can immediately begin assigning Users and adding Permissions.
2. Assigning Users to a User Group
To add users:
- Open the User Group you want to edit.
- Select Add Users.
- Users can be added:
- One by one: Search for and select the appropriate Users
- In Bulk: based on the different filters offered
- Save your changes.
Users may be added to or removed from groups at any time.
Changes take effect immediately and automatically update the User’s access based on the group’s permissions. If a User is logged in, they need to log out and back in for the changes to take effect.
3. Configuring Permissions for a User Group
Method 1. Adding Permissions within the User Group
Method 2. Adding Permissions through the Permission Matrix
Method 1. Adding Permissions within the User Group
In the User Group:
- Go to the "Permissions" tab
- Add the permissions needed
- Set Advanced Permission settings if available and needed (Not all permissions admit advanced settings)
Method 2. Adding Permissions through the Permissions Matrix
(This method does not allow to set up Advanced Permissions)
After creating the User Group, go to the Permission Matrix to configure what the group can do.
In the Permission Matrix:
- Click on the "Edit" button
- Check permissions on/off for the group.
- Don´t forget to click on the Save button.
4. Best Practices for Managing User Groups
To design a permission structure that is scalable, secure, and easy to maintain, consider the following best practices when creating and managing User Groups in ClayHR:
4.1. Align User Groups With Clear Categories
User Groups can be created using different logical categories depending on how your organization operates. Common grouping strategies include:
- Functional Role–Based Groups
- Examples: HR Admins, Recruiters, People Managers, Finance Analysts, IT Support
- Ideal for assigning permissions tied to job responsibilities.
- Seniority or Responsibility Level
- Examples: Executive Leadership, Senior Managers, Supervisors, Team Leads
- Useful when higher levels require broader visibility (e.g., directory access, approvals).
- Geography or Location
- Examples: US Employees, India HR Admins, Europe Managers, APAC Recruiters
- Helpful when access must be restricted or tailored by country-specific regulations or regional operations.
- Business Unit or Department
- Examples: Marketing Leaders, Sales Operations, HR Business Partners, Engineering Managers
- Enables targeted visibility into department-specific workflows and reporting lines.
User Groups can be mixed and matched across categories—for example, “US Managers” or “APAC Senior Recruiters.”
4.2. Keep User Groups Broad and Purposeful
- Avoid creating overly granular or individual-specific groups.
- Use the Permission Matrix and Advanced Settings to refine access, rather than duplicating groups.
- Keep group names descriptive and consistent across the organization.
4.3. Assign Users to Multiple Groups When Appropriate
- Leverage ClayHR’s cumulative permission model: users inherit the sum of all permissions from their groups.
- This allows you to layer access—e.g., a user could belong to Managers, US Region, and Compensation Approvers simultaneously.
- Combine general-purpose groups with more specialized ones for optimal flexibility.
4.4. Use Advanced Settings Instead of Extra User Groups
- Instead of creating multiple “limited-access versions” of a group, apply Org Unit, Location, or Reporting Line restrictions through Advanced Settings in the Permission Matrix.
- This keeps your User Groups list clean and reduces long-term maintenance.
4.5. Review Membership After Organizational Changes
- During reorganizations, department changes, or leadership transitions, revisit User Group memberships.
- Use periodic audits (quarterly or biannually) to ensure accuracy and security.
4.6. Document Your Permission Strategy
- Maintain internal notes or documentation describing:
- The purpose of each User Group
- Who should belong to it
- Which permissions it controls
- This supports continuity across changing HR or IT teams.
--
How to create “User Groups”?
Only users with “Admin” permission have access to the “Defining User Groups” features.
- To begin, hover over the gear icon in the upper right corner and select “Security and Permissions”.
- Go to the Permissions section and click on “User Groups”.
- To create a new user group, click the “New User Group” button.
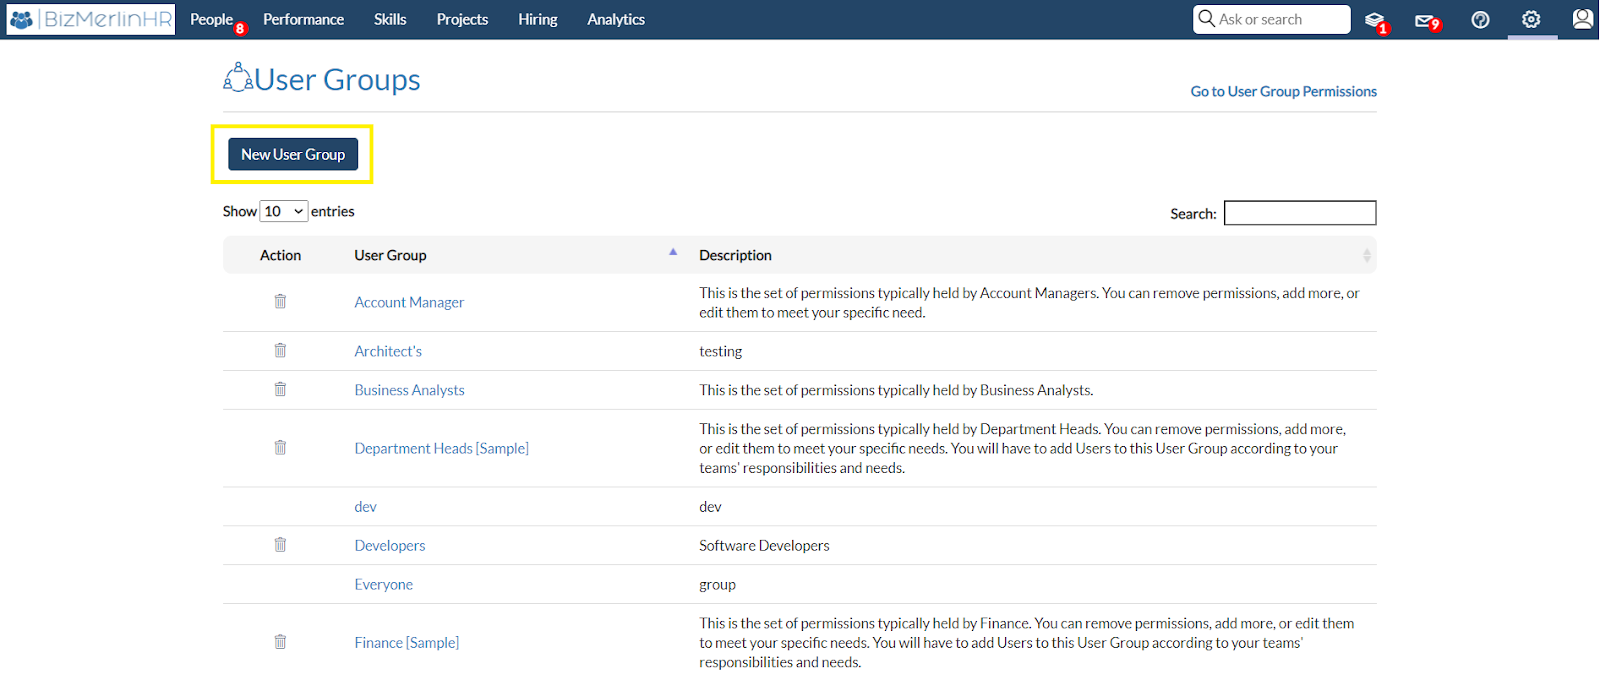
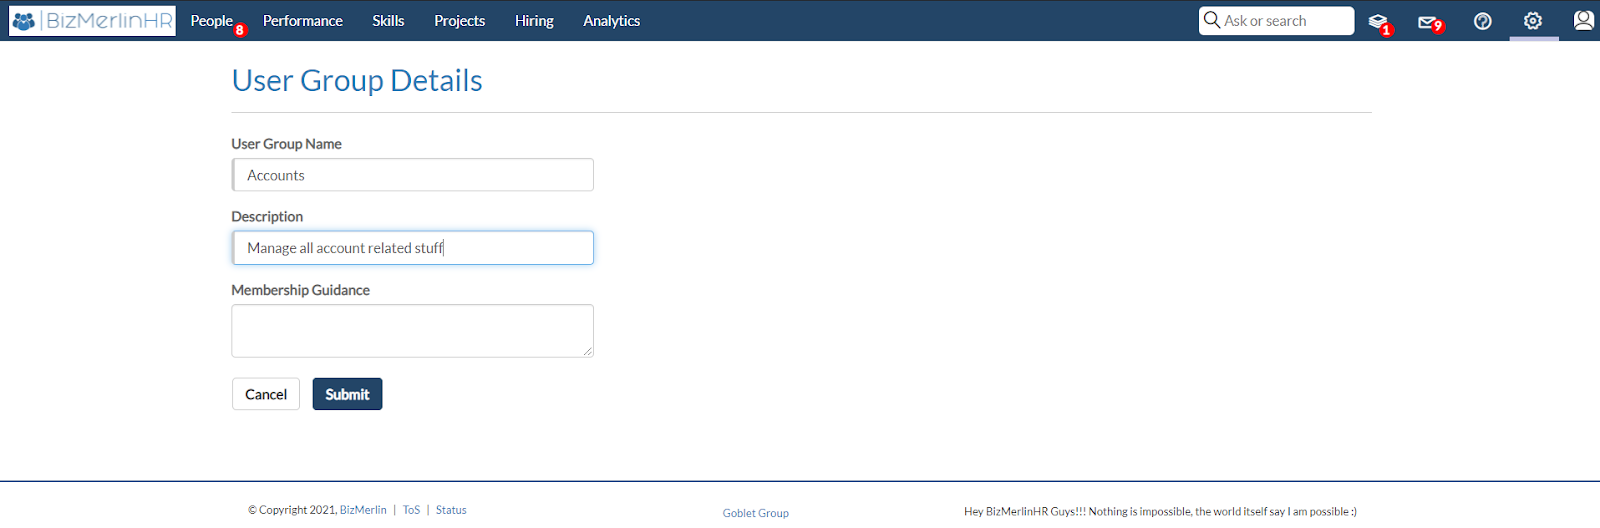
- Set the user group's name and description.
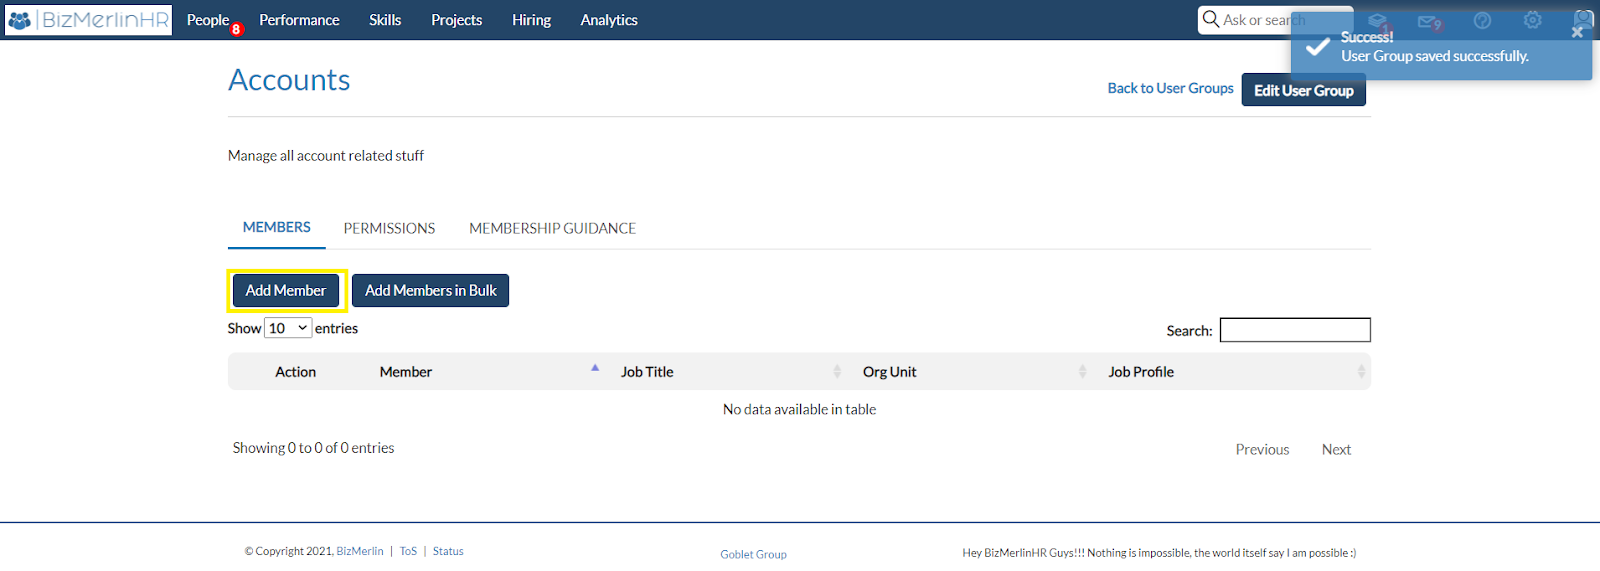
Add User’s
- Add single user
- Click the “Add Member” button.
- Then choose the user that you want to add to the specified user group.
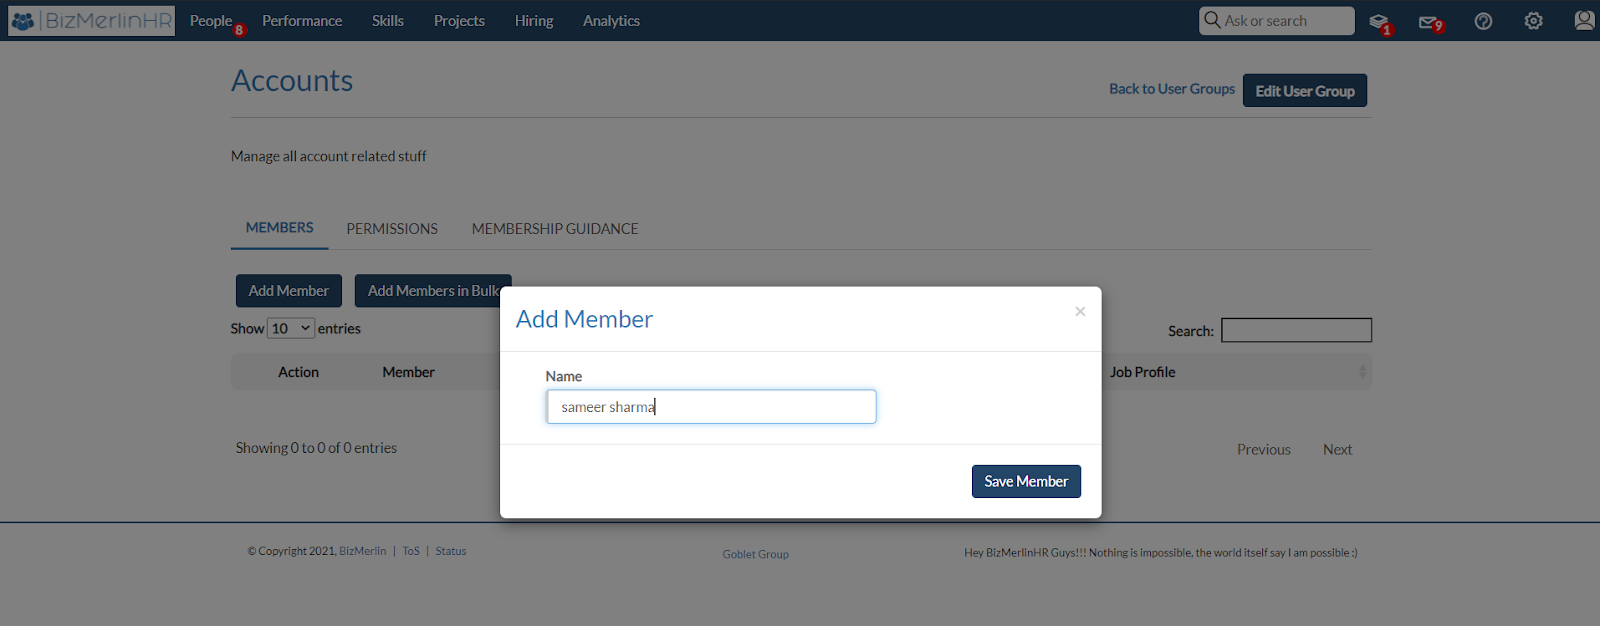
- Congratulations!, you have successfully added the user to the respective user group. Click the “Add Members in Bulk” button.

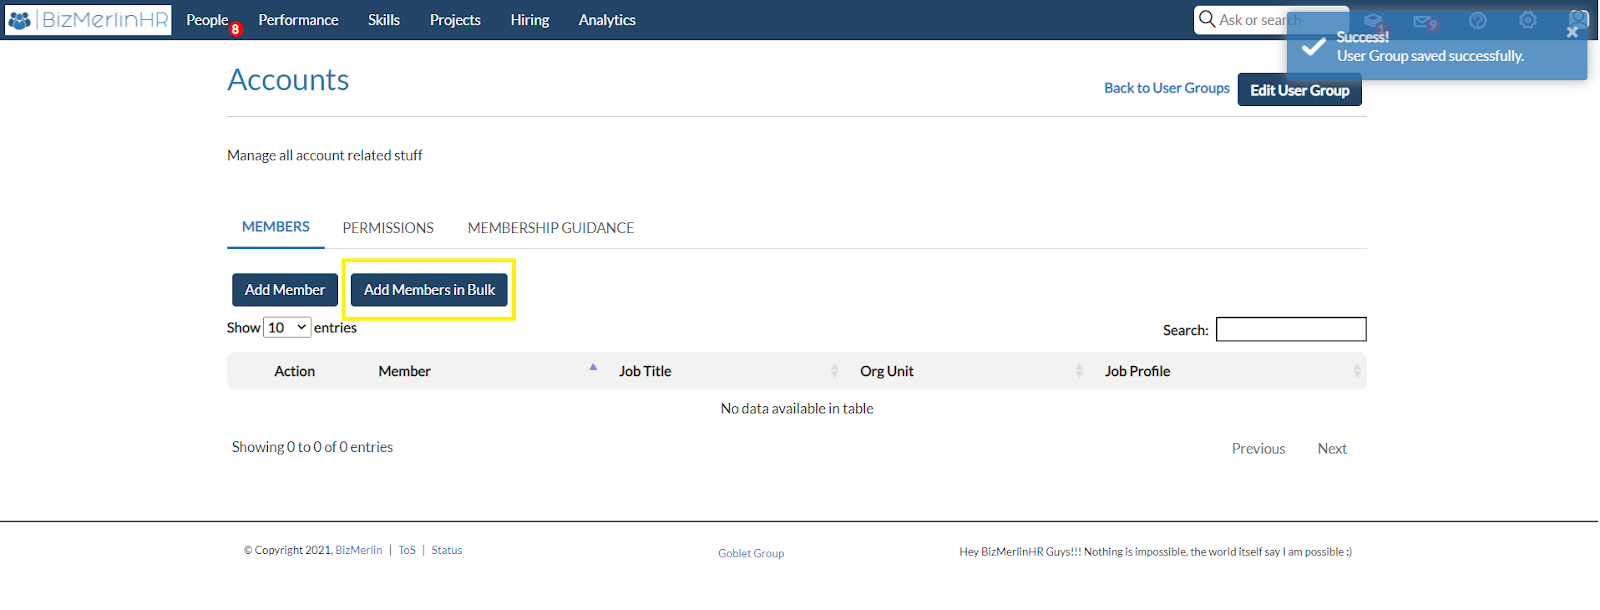
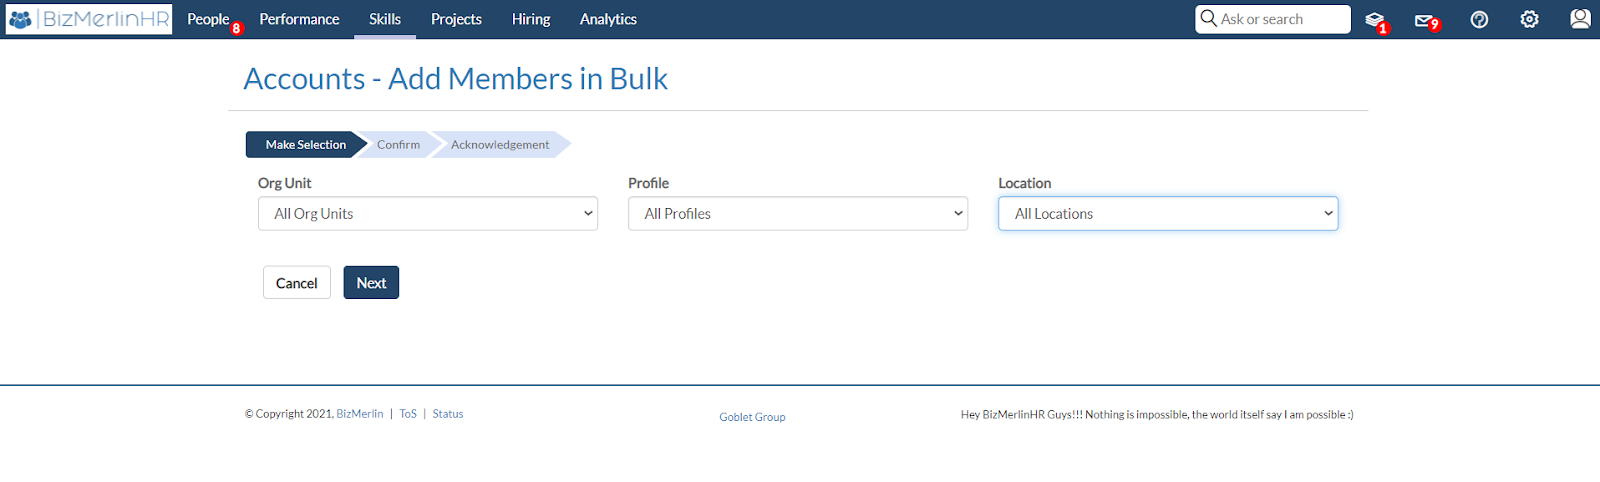
- Add users in Bulk
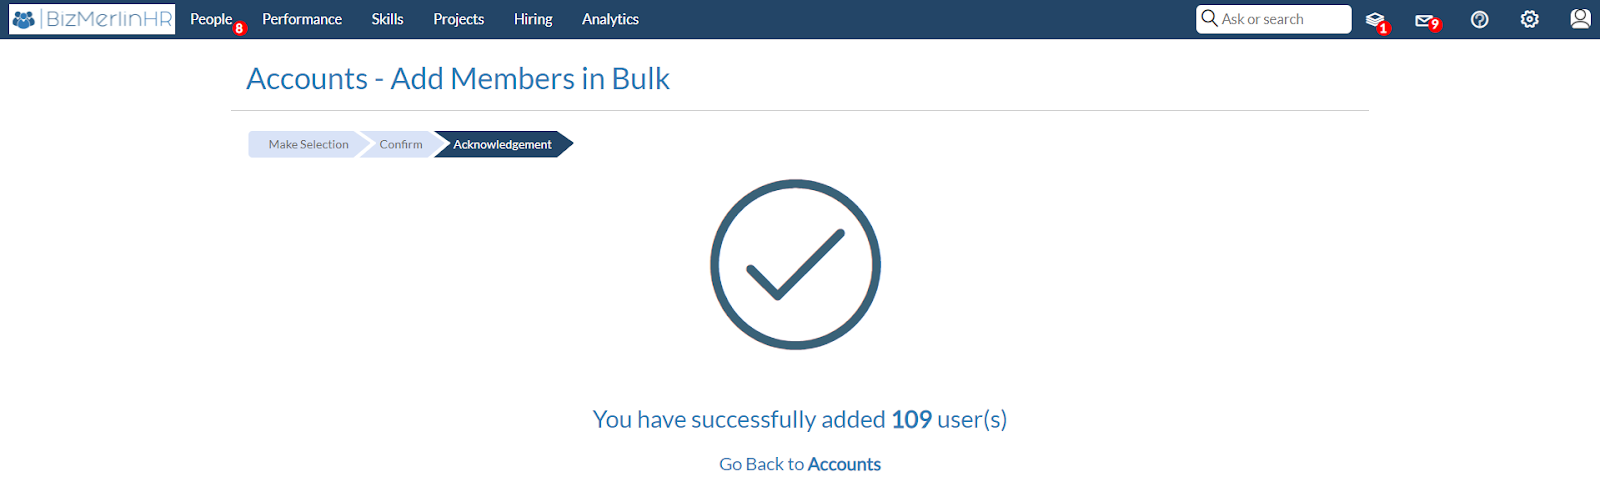
- Click the “Add Members in Bulk” button.
- Now, pick the group of users that you wish to add to the specified user group. Then click on the “Next” button.
- After selecting Next, you can see a preview of the group of members you've picked.
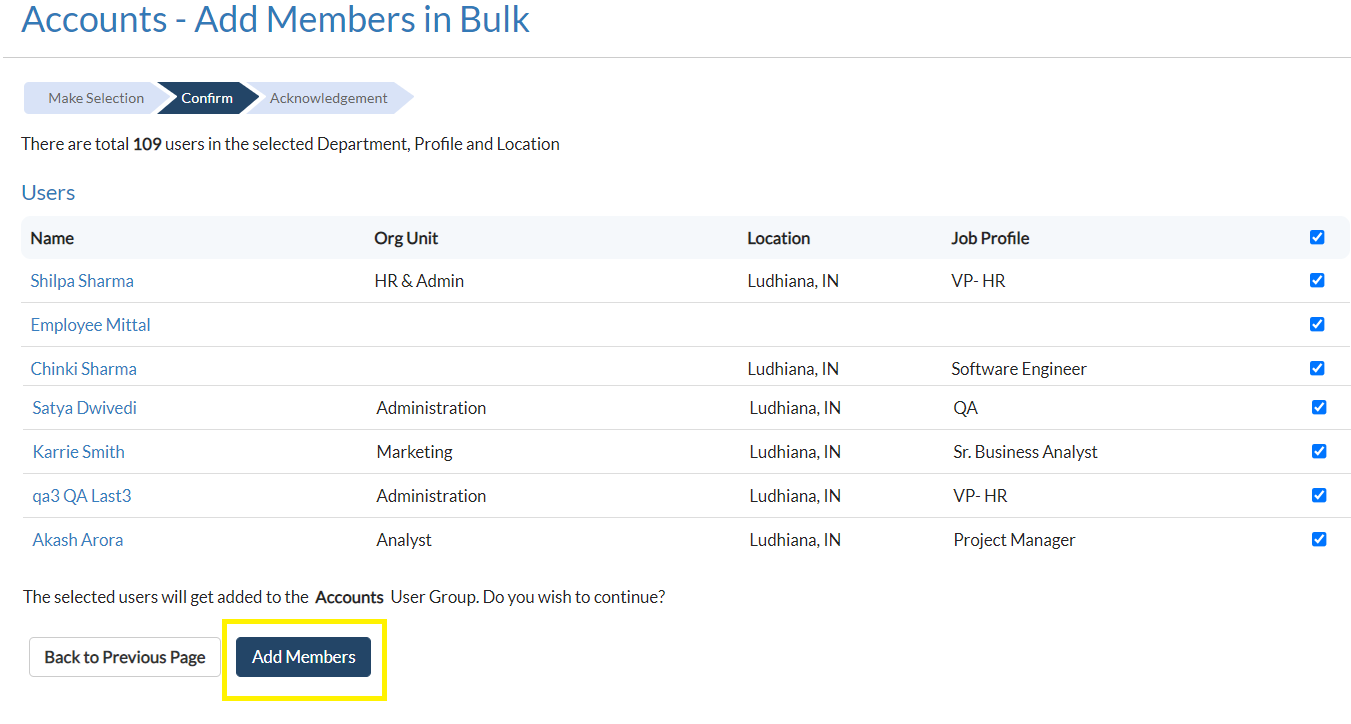
- Congratulations!, you have successfully added the group of users to the user group that you have selected.