
How to Configure a Custom Widget for ClayHR Home Dashboard
ClayHR allows you to easily create and configure custom widgets to surface personalized insights, track key tasks, and stay connected to what matters most, all from one intuitive dashboard.
Here are the steps to configure a custom widget:
- Hover over the gear icon in the top menu (right side of the page) and select “Look & Feel.”

- Select “Dashboard” from the left panel and click on “Configure Dashboard”. You will be redirected to the dashboard home page.

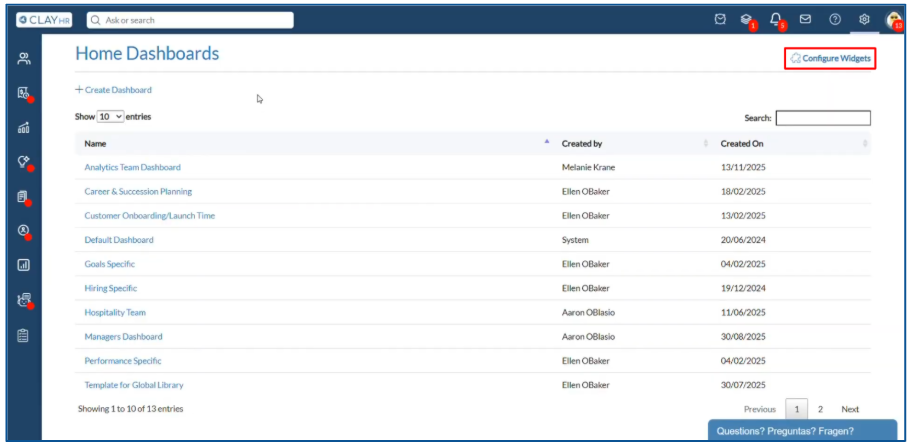
- Click “Configure Widgets”. The custom widgets home page will open up.
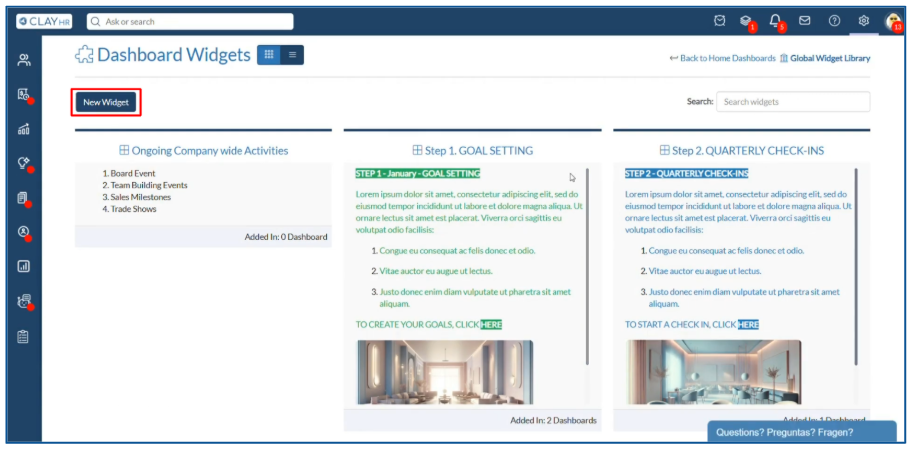
- Click the “New Widget” button to open the custom widget configuration page. Note: To edit an existing custom widget, simply click its name. It will also open the custom widget configuration page.
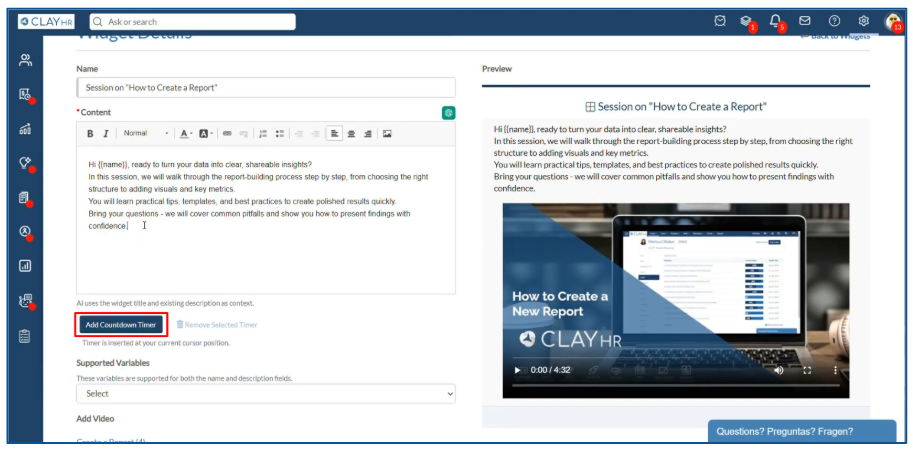
- Enter the widget name in the “Name” field.
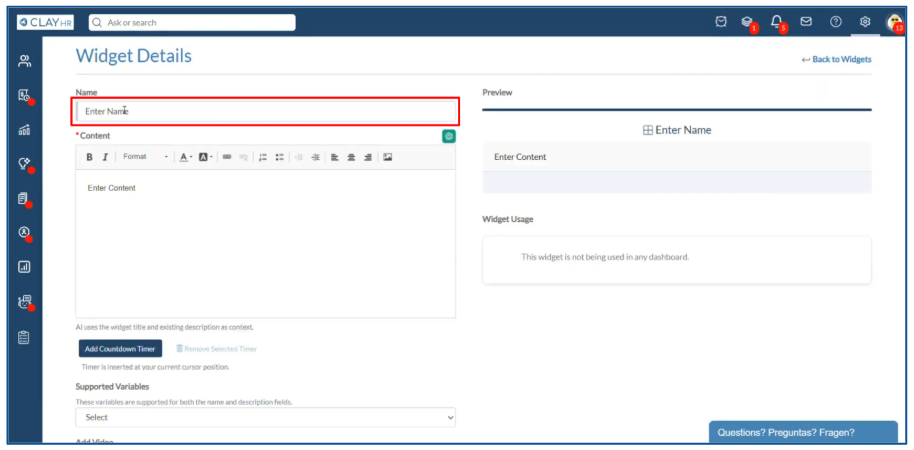
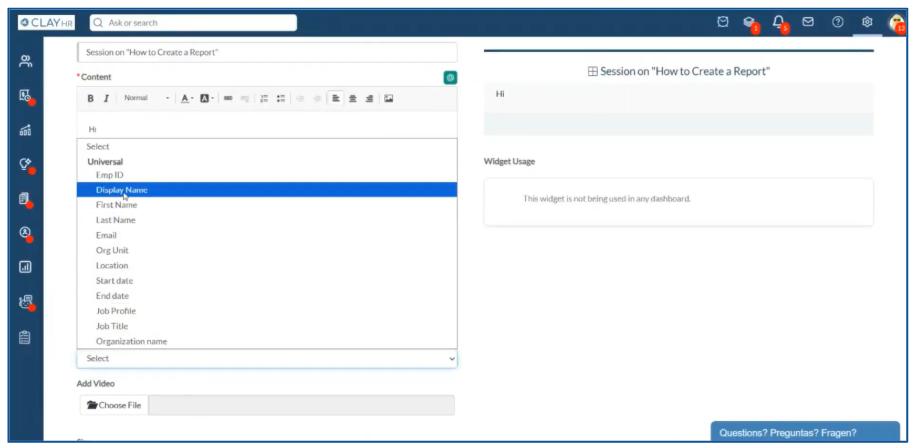
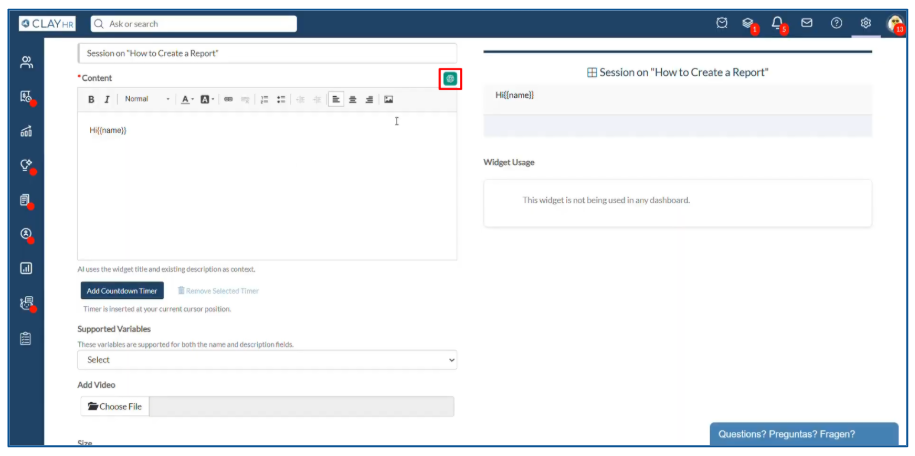
6. Enter the widget content in the “Content” field.
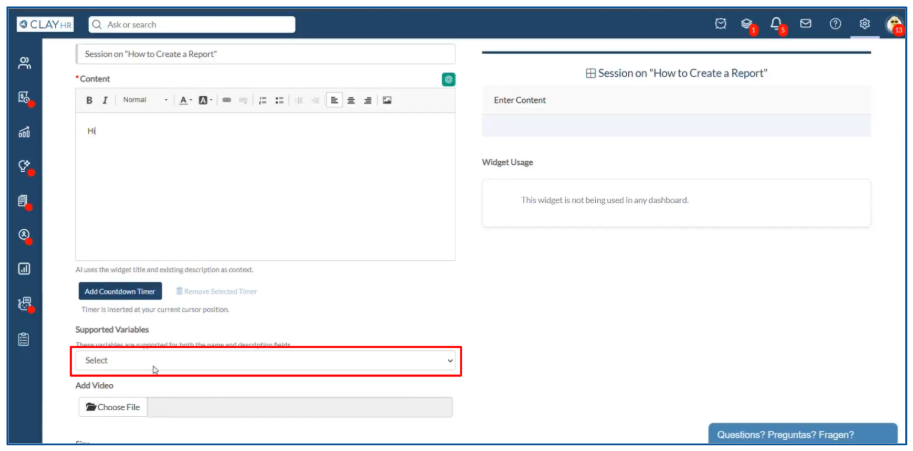
- To add dynamic content, supported variables can be used. Select the variables you need from the dropdown in the “Supported Variables” section and place them anywhere in the content.
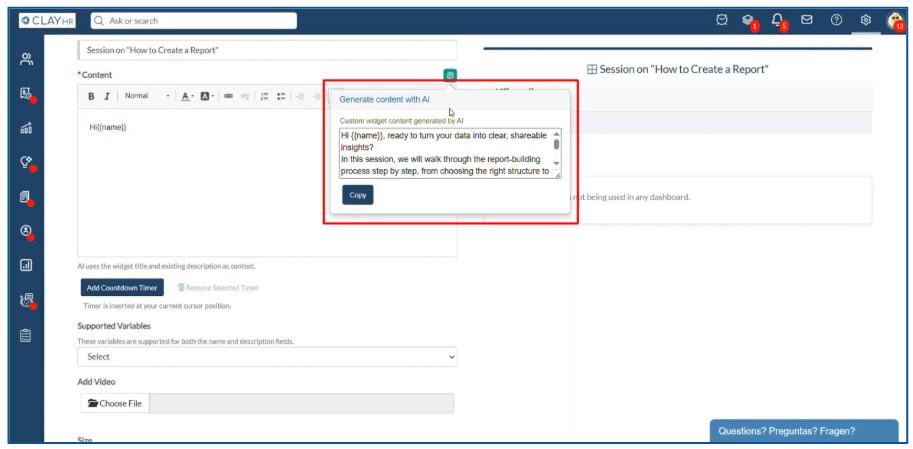
- You can also generate widget content using AI. Click the AI generate icon at the top-right corner of the Content section. Once generated, copy and paste the content into the text box
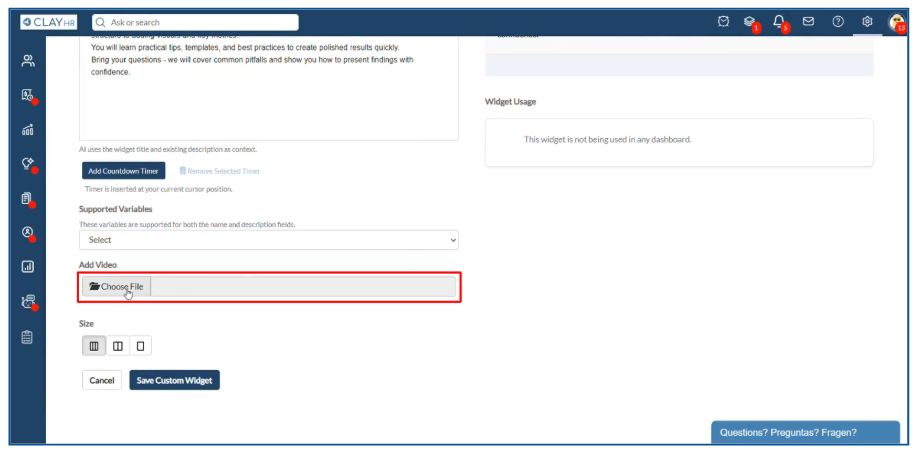
- You can also attach a video to the widget. To do this, click on “Choose File” in the “Add Video” section and upload the video you want to show in the widget.
- A countdown timer can also be shown in the widget. To do that:
a. Click on the “Add Countdown Timer” button. A pop up window will appear.
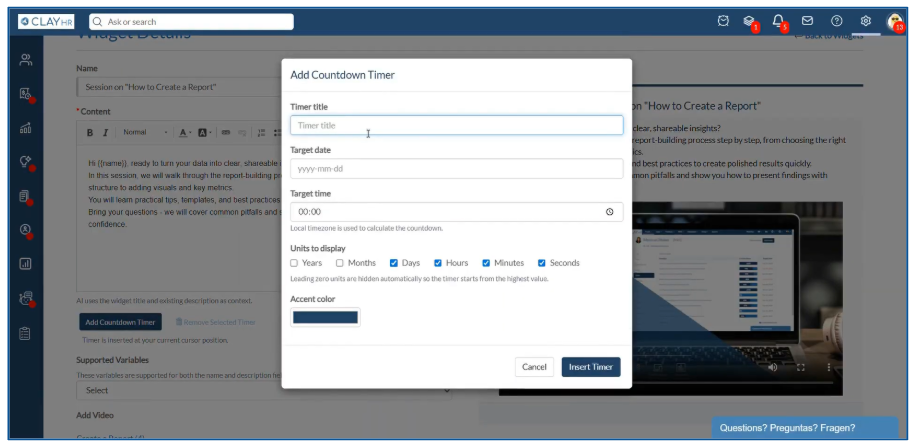
b. Type in the title of the timer.
c. Select the target date and time when the timer should end.
d. You can also choose what units of time should be displayed by selecting the desired checkboxes.
e. The color of the timer can also be set from the “Accent Color” section.
f. Once you are done, click on “Insert Timer” to apply your changes. The timer will be added successfully.
9. Once you are done, click on the “Save Custom Widget” button.

Your widget will be configured successfully. You can add this newly configured widget in any home dashboard.


