
How to create an Offboarding Workflow
Employee offboarding is more than a simple termination checklist—it is a coordinated business process that ensures responsibilities are completed consistently across HR, managers, IT, Payroll, Facilities, and other stakeholders. In ClayHR, offboarding is powered by workflows that automatically assign tasks, route approvals, send notifications, collect required documentation, recover company assets, and track every step until the process is complete. This article focuses specifically on configuring and managing Offboarding in ClayHR. If you would first like to understand the broader workflow concepts that power offboarding and many other business processes throughout the platform, we recommend reading Getting Started with Workflows before continuing.
Steps to Create an Offboarding Workflow
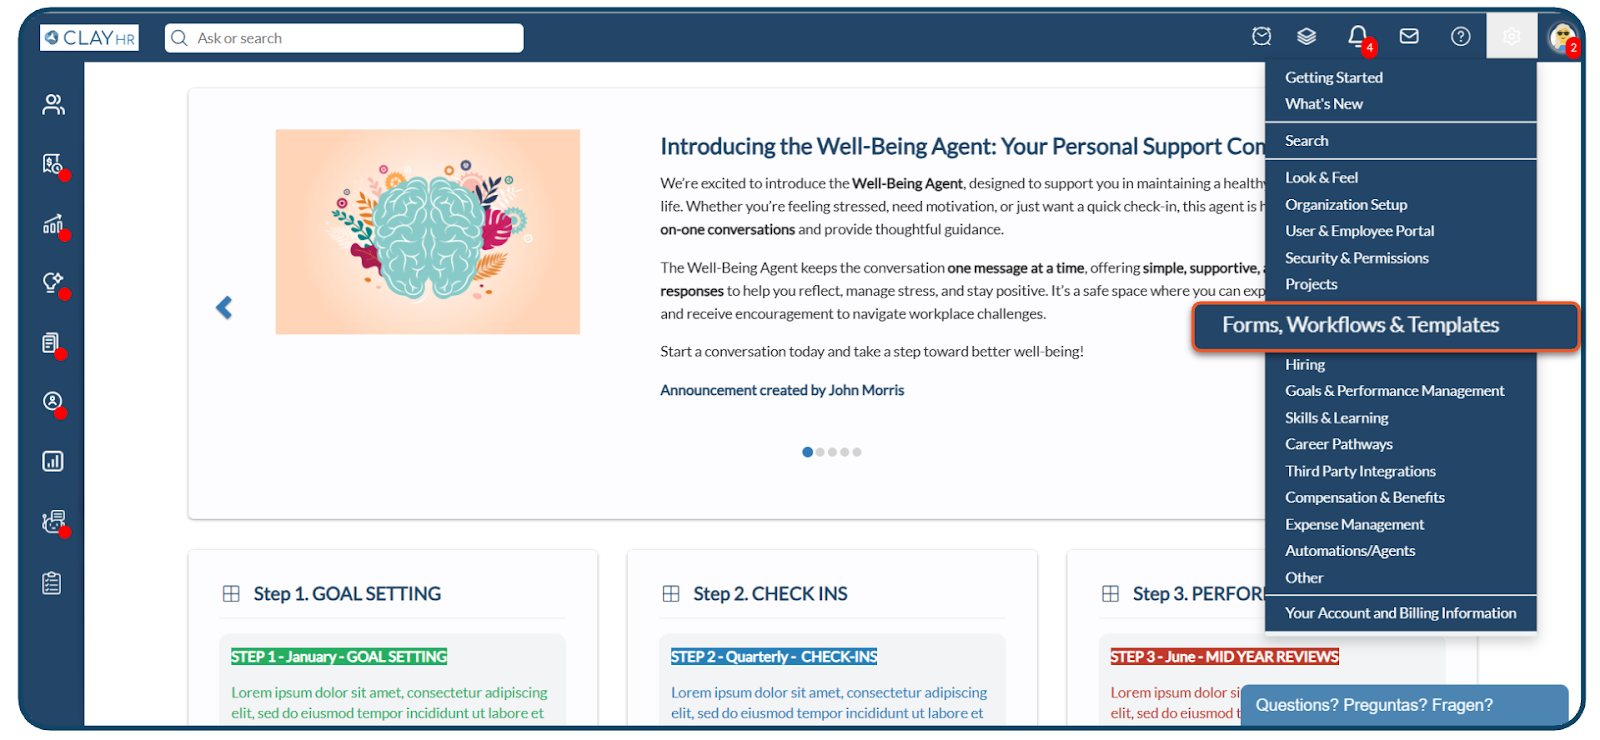
- Click on the Gear Icon in the upper right corner, select Forms, Workflows & Template.
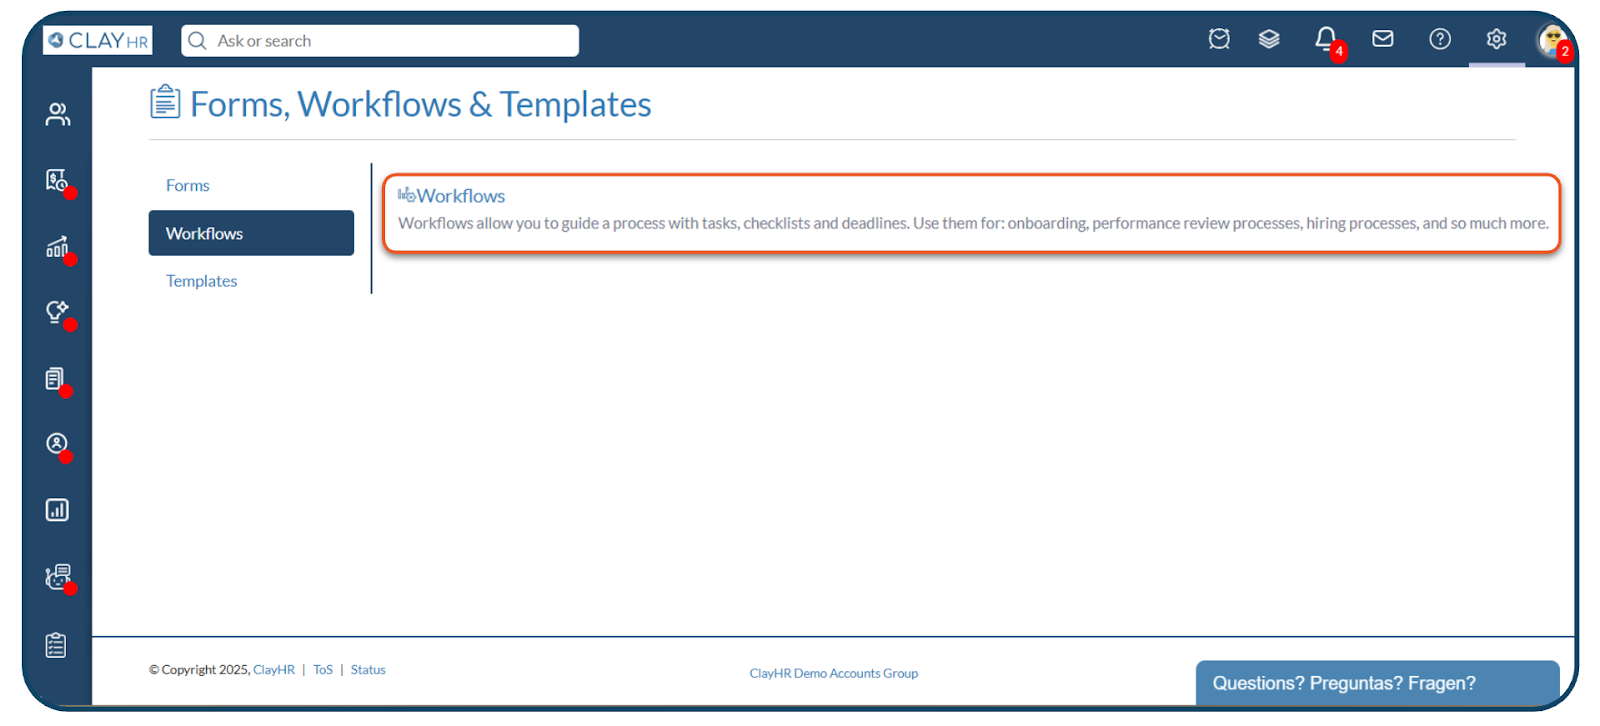
- In the Workflows section, click on Workflows.
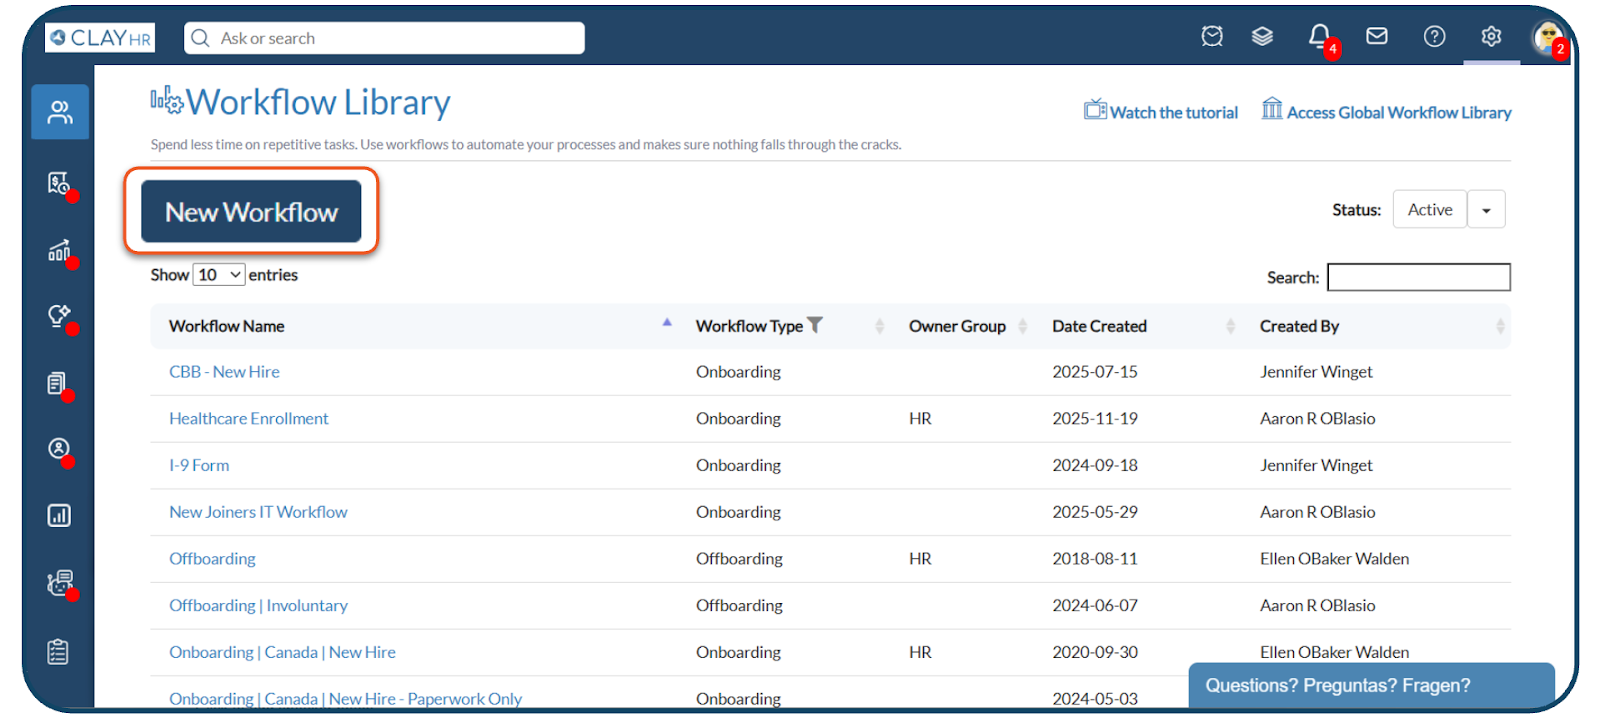
- Click on the New Workflow button.
- After clicking the New Workflow button, you will be redirected to the new workflow page. Fill in the required details.
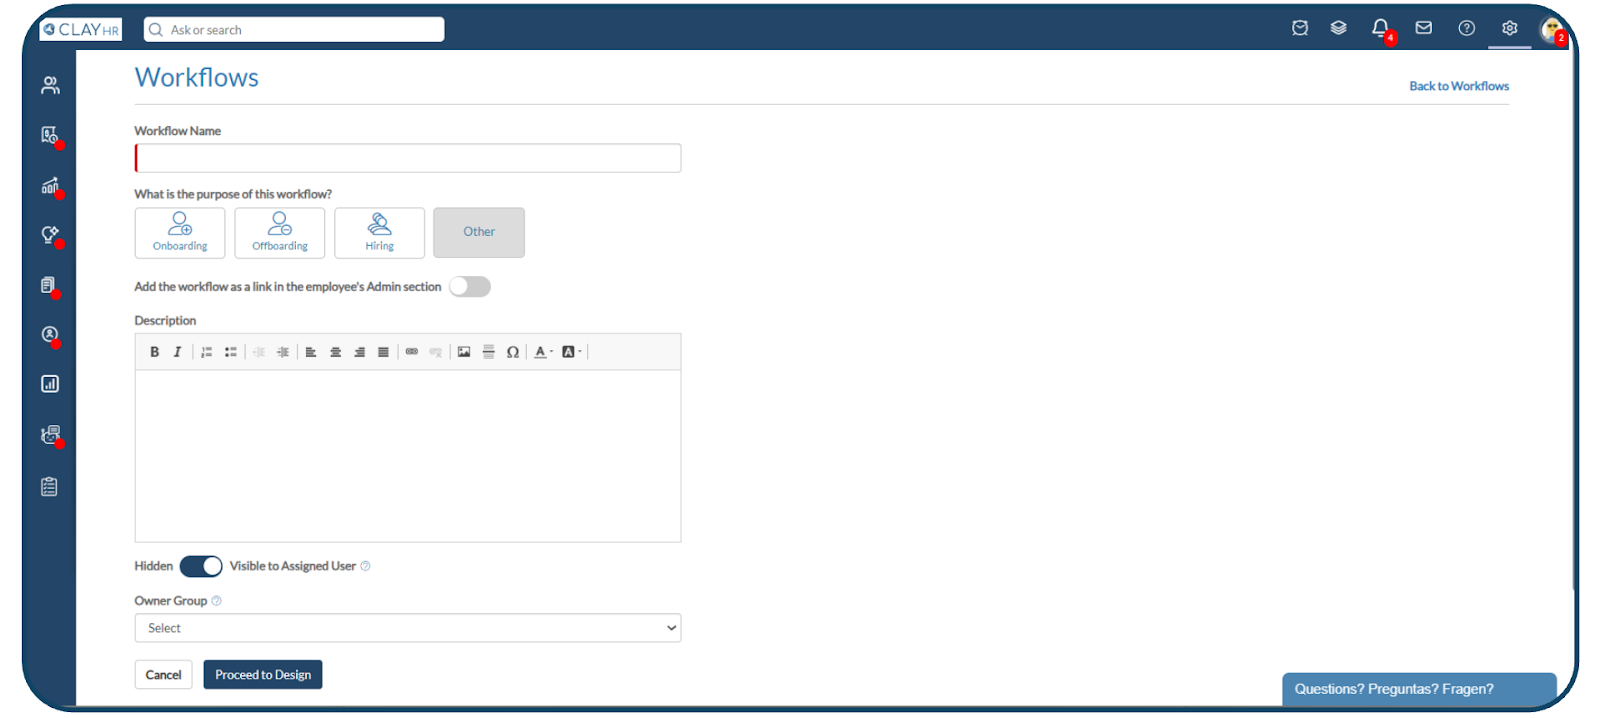
- Fill in the details of the workflow:
- Enter the Workflow Name and select the Purpose of the workflow as Offboarding. Turn on the toggle Add the workflow as a link in the employee’s Admin section if you want the workflow link to appear in the employee Admin area.
- Control the visibility of the workflow using the Visibility to User toggle. If set to Hidden, the assigned user will not see workflow tasks or receive notifications.
- Select an Owner Group (or a User Group) to limit the access for managing the respective workflow. The users in the selected owner group should have the Setup Menu Access and Manage Owned Workflows permissions.
For example, if HR is selected as the owner group for an onboarding workflow, only the HR user group and the Site Admin can manage that workflow.
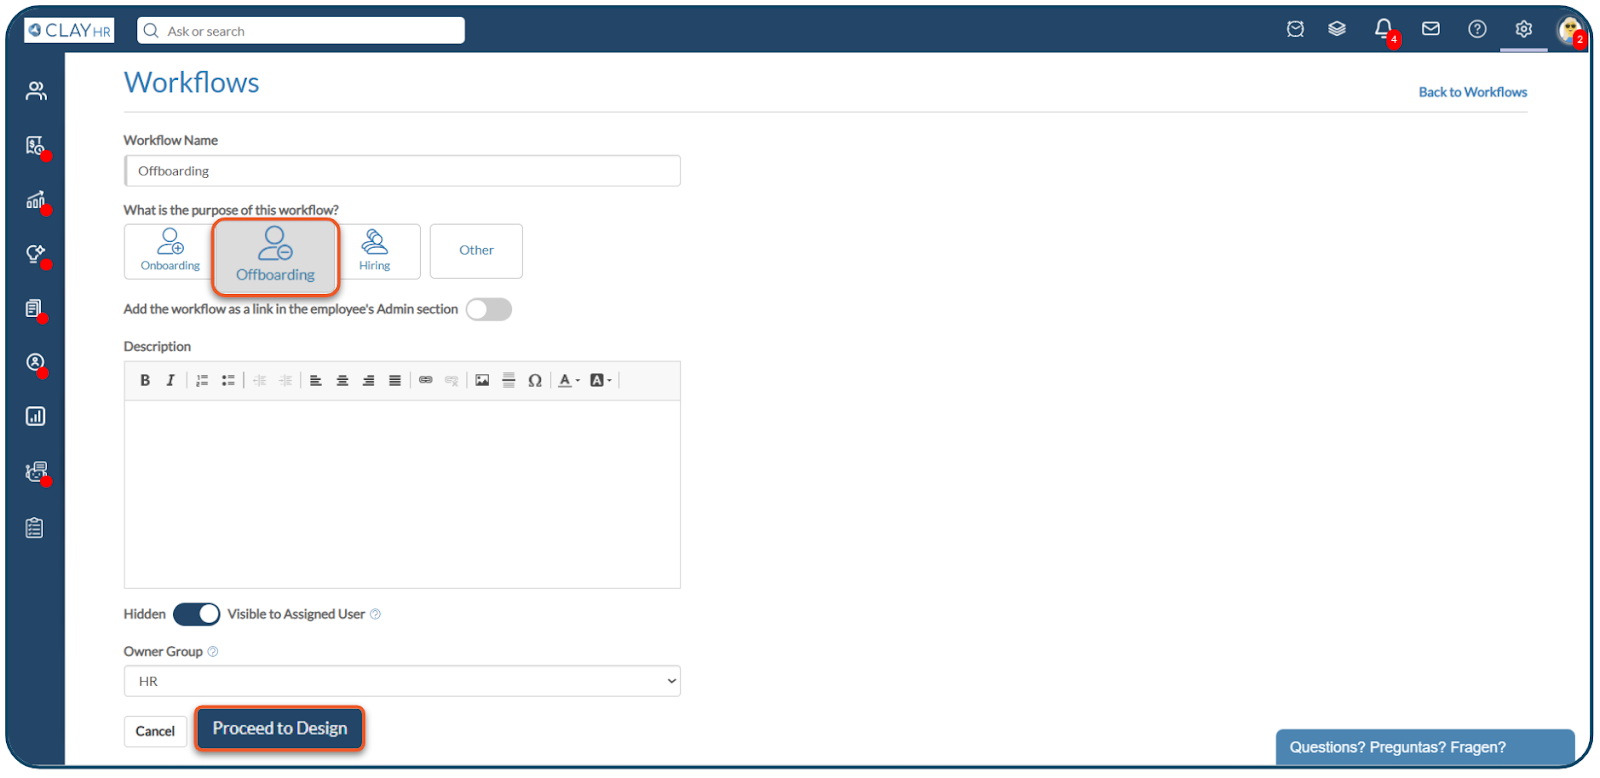
6. Click on the Proceed to Design button.
Learn more about How to create a Workflow.


