
How to Import User Records in ClayHR?
ClayHR provides a powerful and flexible framework to create and manage user profiles at scale. While individual user profiles can be created manually, the Import Users tool allows administrators to upload large volumes of user data in a structured, controlled, and repeatable way. This ensures accuracy, reduces onboarding time, and maintains consistency across your organization.
This article outlines the step-by-step process to import user records, including preparing the data file, uploading it, validating entries, and finalizing the import.
A sample file is available for download here.
IN THIS ARTICLE:
- Step by Step: Import User Records
- How to Modify Existing User Records via Import
1. Step-by-Step: Import User Records
1.1. Go to the Import Users Page
- Navigate to People → Directory.
- In the upper-right corner, click the Import Users icon.
This opens the Import page where you’ll configure what type of data you’re bringing in.
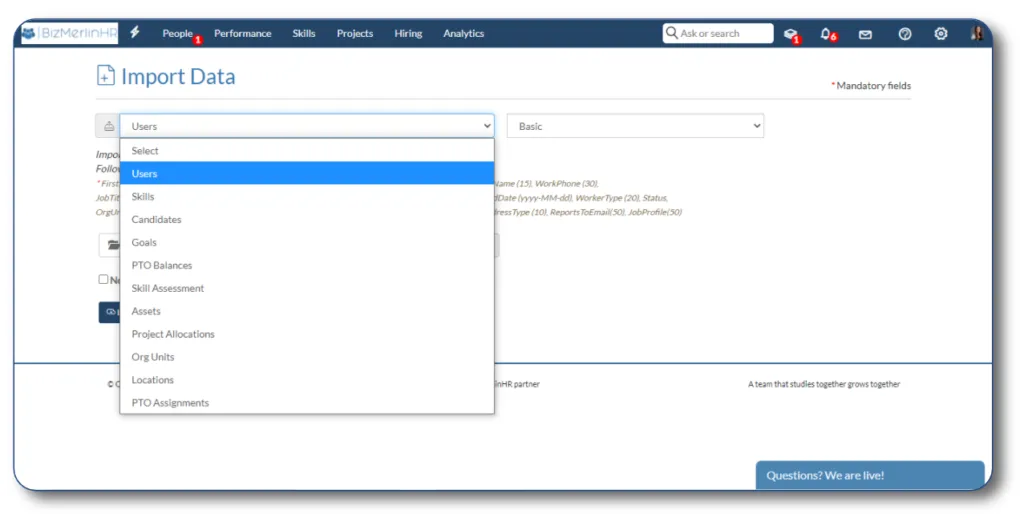
1.2. Select What You Want to Import
On the Import page:
- In the first dropdown, select the type of details you want to import.
- In the module dropdown, choose the module where you want the data to go.
- In this scenario, select Users.
This ensures the system knows you’re importing user records (as opposed to another type of data).
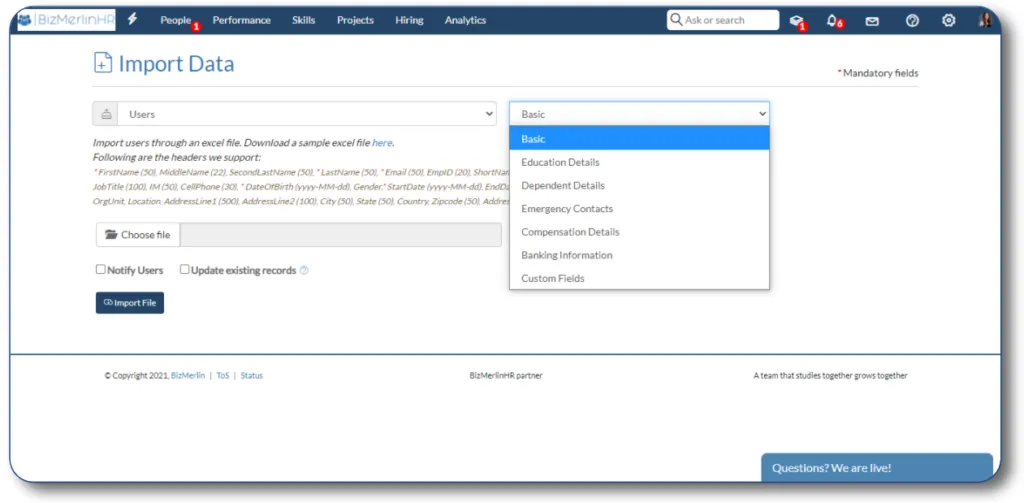
1.3. Choose the Type of User Details
Next:
- In the next dropdown, select the basic details you want to add for users and/or candidates.
This helps define which specific fields ClayHR expects in your spreadsheet (for example, basic user profile fields vs. more detailed attributes).
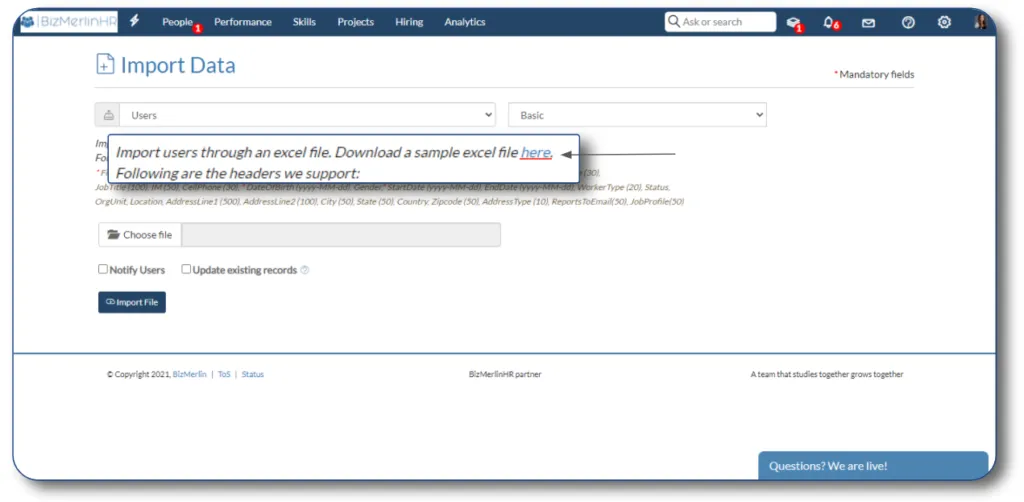
Note: Please click and read the instructions link on this screen before uploading your spreadsheet. It contains important information about:
- Required columns
- Supported formats
- Data validation rules
1.4. Upload the Spreadsheet
Once your file is ready:
- Click to select and upload the Excel spreadsheet from your device.
- Confirm that the file structure matches the instructions (headers, formats, etc.).
ClayHR will then process the file according to the selected module and detail type.
1.5. Decide Whether to Notify Users
On the same screen, you’ll see a Notify Users checkbox.
- If the “Notify Users” checkbox is selected, each user will receive an email notification when their account is created.
- If you prefer to set up accounts silently and notify later, leave this checkbox unchecked.
1.6. Understand the One-Entry-Per-Field Rule
During import:
- You can upload only one entry per field per user record within a single import file.
- For example, you can only include one address per user in that import.
If you need to load additional addresses or complex multi-value data, you may need to handle those via a separate process or subsequent updates.
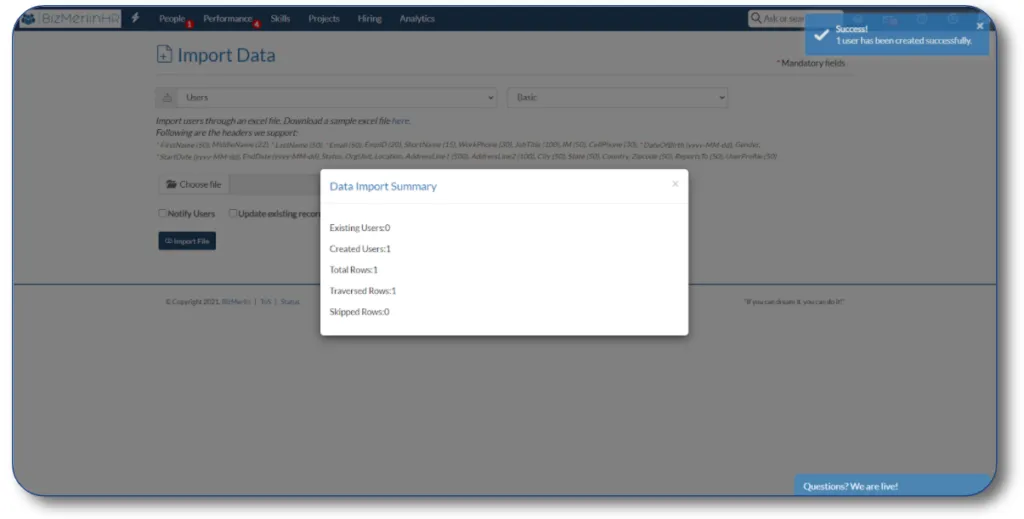
1.7. Confirm the Import and Review the Summary
After the spreadsheet is successfully processed:
- A toaster message will appear confirming that the import has completed.
- A popup will display the data import summary, such as:
- Number of records processed
- Number of successful imports
- Any errors that occurred
Congratulations! At this point, your users have been successfully imported into ClayHR.
2. How to Modify Existing User Information via Import
You can also use the same import mechanism to update existing user records in bulk.
To do this:
- Prepare a spreadsheet with the users you want to update, including:
- A unique identifier (such as email)
- Any fields you want to change
- Go to People → Directory → Import Users and follow the same steps as above.
- On the Import screen, check the “Update existing records” checkbox.
- Upload your spreadsheet.
If ClayHR finds a user that already exists in the system:
- Their data will be updated according to the values provided in the uploaded sheet.
- Fields included in the file will be overwritten with the new values.
This is especially useful for bulk updates such as manager changes, department changes, or job title updates.
--
- Please navigate to People → Directory. Then, in the upper right corner, click on the “Import Users” icon.

- Now on the Import page, select the type of details that you want to import. Select the module in which you want to import the data. Let’s say we select the Users in this case.
- On the next dropdown, select the basic details that you want to add in the case of users and candidates.
NOTE:- Please read the instructions carefully before uploading the spreadsheet.
- Select and upload the excel spreadsheet from your device.
- If the “Notify Users” checkbox is selected, the user will be notified with an email when his or her account is established.
- You can upload only one entry for each field. For instance, only one address is allowed per import and user record.
- After successfully importing the data from a spreadsheet, a toaster message will appear, along with a popup displaying the data import summary.
Congratulations! Users have been successfully imported
How to modify current user information?
You can also change the current user’s information. Simply check the “Update existing records” checkbox and upload the spreadsheet. If any user is found to already exist in the system, their data will be updated according to the uploaded sheet.


