Import PTO Balances through an Excel file
ClayHR allows you to import PTO balances through an Excel file (download a sample file here).
Following are the steps to import PTO balances for different users for different PTO policies:
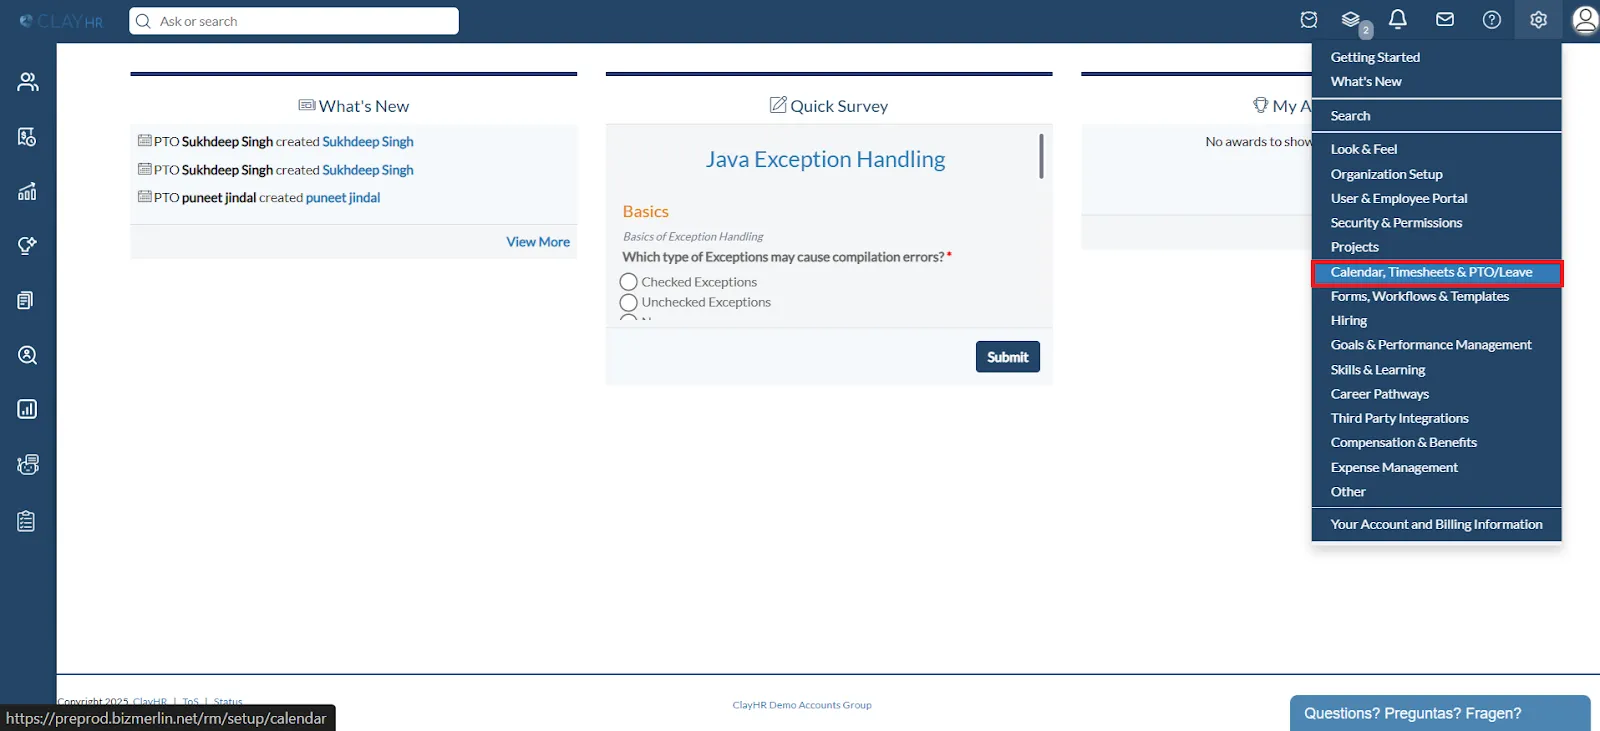
- Go to the “gear icon” and select the “Calendars, Timesheets & PTO/Leave” option.
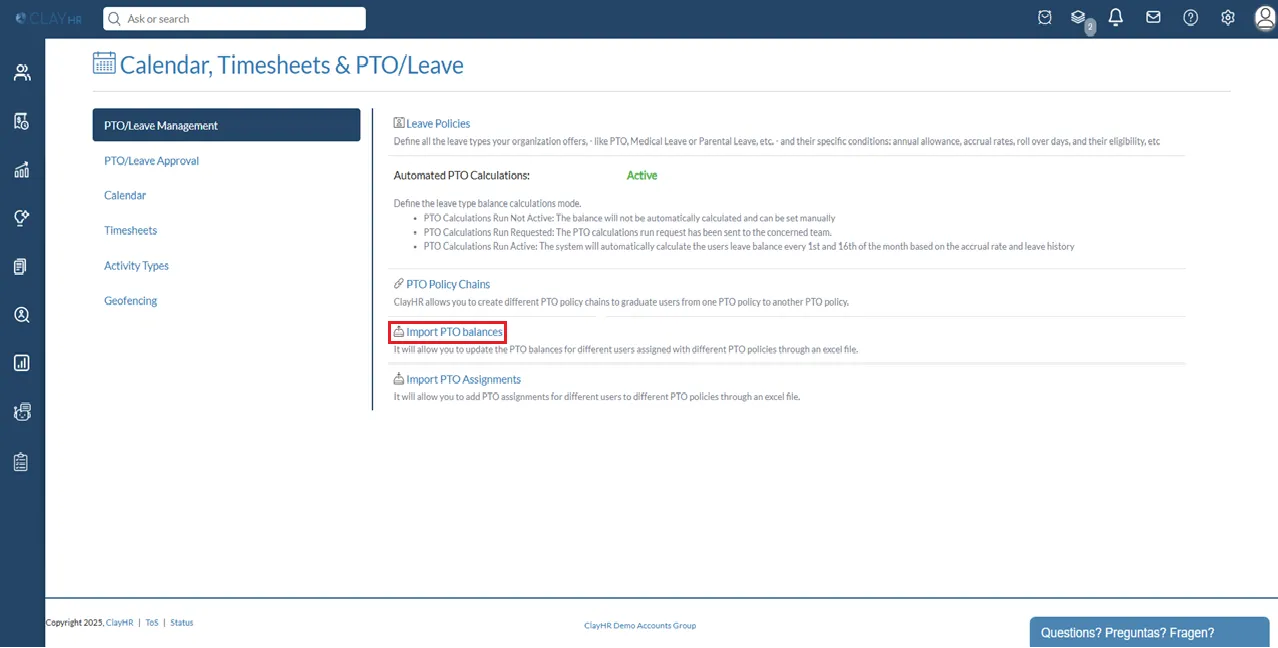
- Click on the Import PTO balances in the PTO/Leave Management section.
- Click on “Choose file” to upload the excel file from the system.
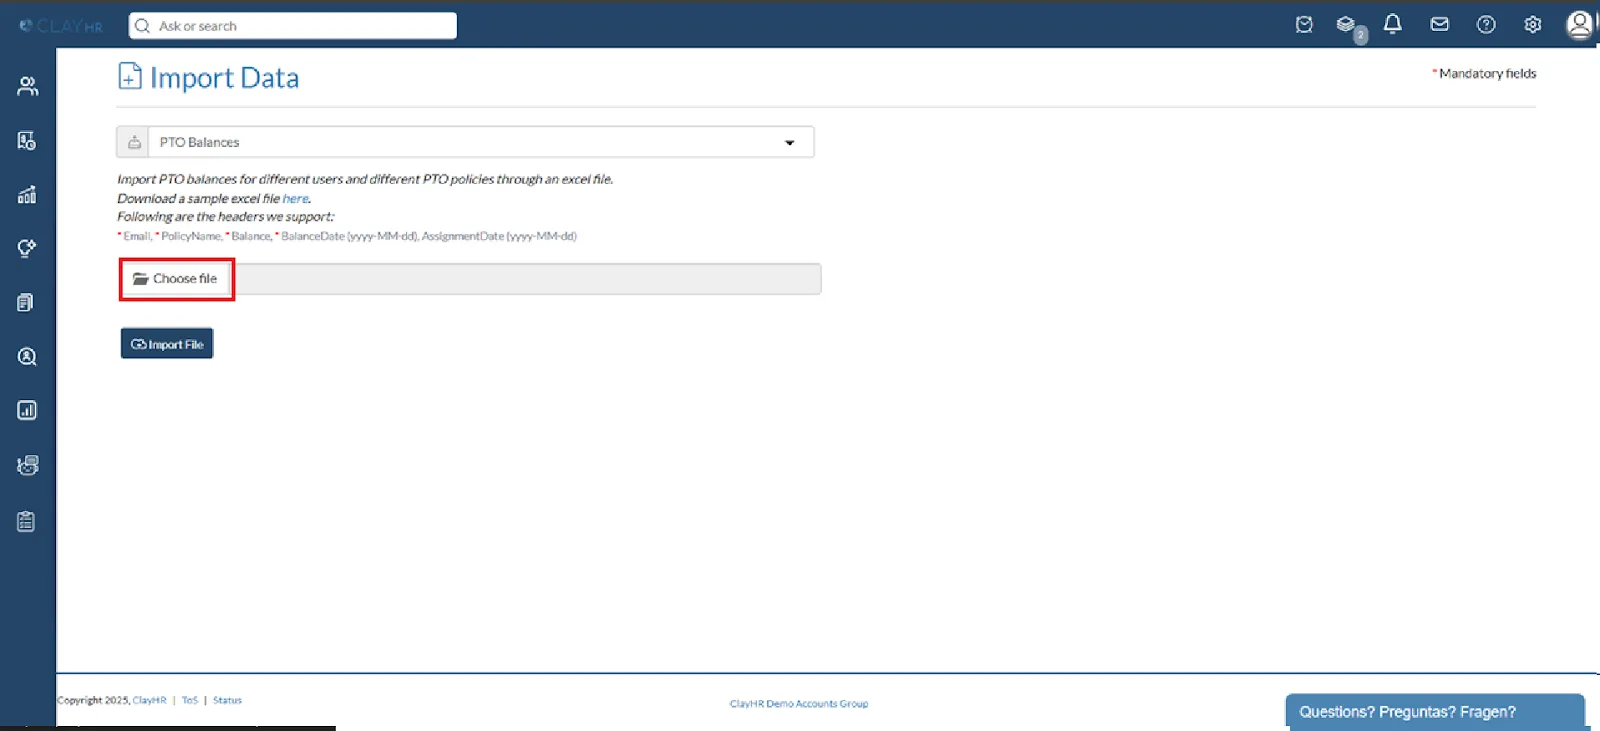
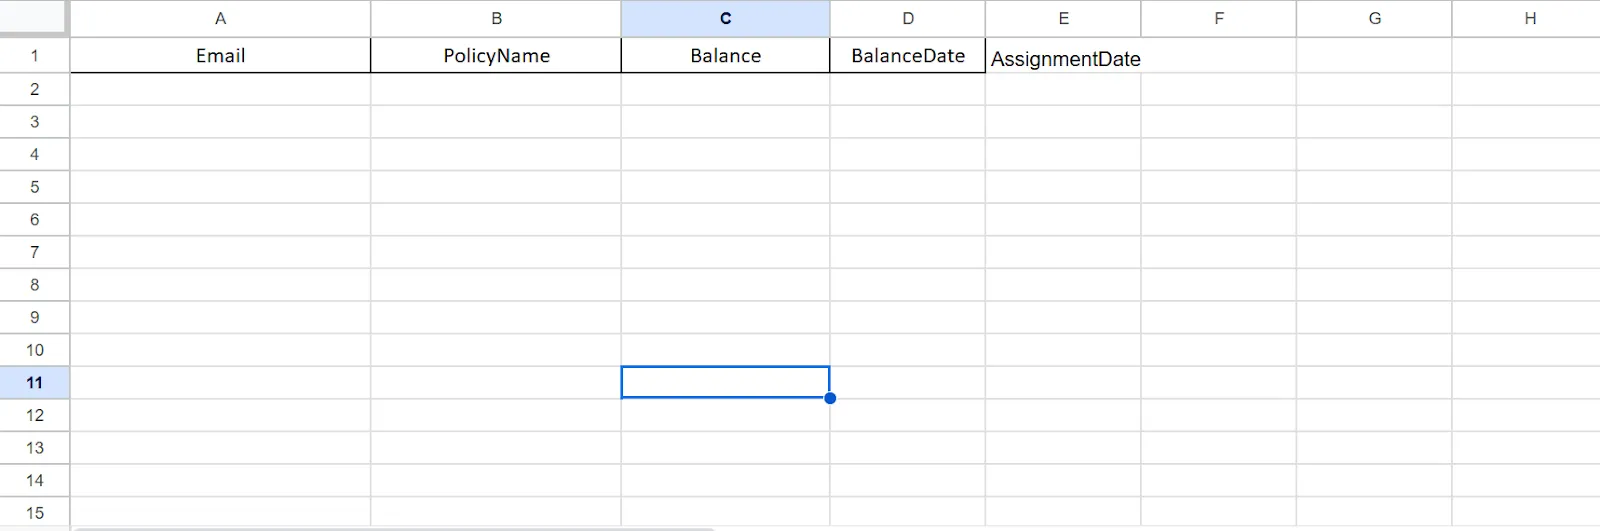
- Here is a brief explanation of the excel file:
a. The supported headers are Email, PolicyName, Balance, and BalanceDate.
b. All the titles should be placed in the top row of the excel file.
c. Email: It should be the email of the users for whom the balance needs to be updated/uploaded.
d. PolicyName: It should be the name of the PTO/leave policy. Make sure that the policy name is exactly the same as the name defined for Leave Policy in the system.
f. Balance: It defines the PTO balance that you want to provide to the user and the balance should be in numeric value only.
g. BalanceDate: It specifies the date to which the PTO balance is uploaded and will be the user’s current available leave balance. The balance date column should be of date type
h. Assignment Date: It specifies the date on which the PTO Policy is assigned to the user.