
Multi-Level Approval Flow in Goals
ClayHR's Multi-Level Approval Flow in Goals allows organizations to define a structured approval hierarchy for goals. Instead of a goal being approved by a single person, it can pass through multiple approval levels, where each approver reviews and approves the goal in a defined sequence. Once an approval level is completed, the request is automatically routed to the next approver in the hierarchy until the goal receives final approval.
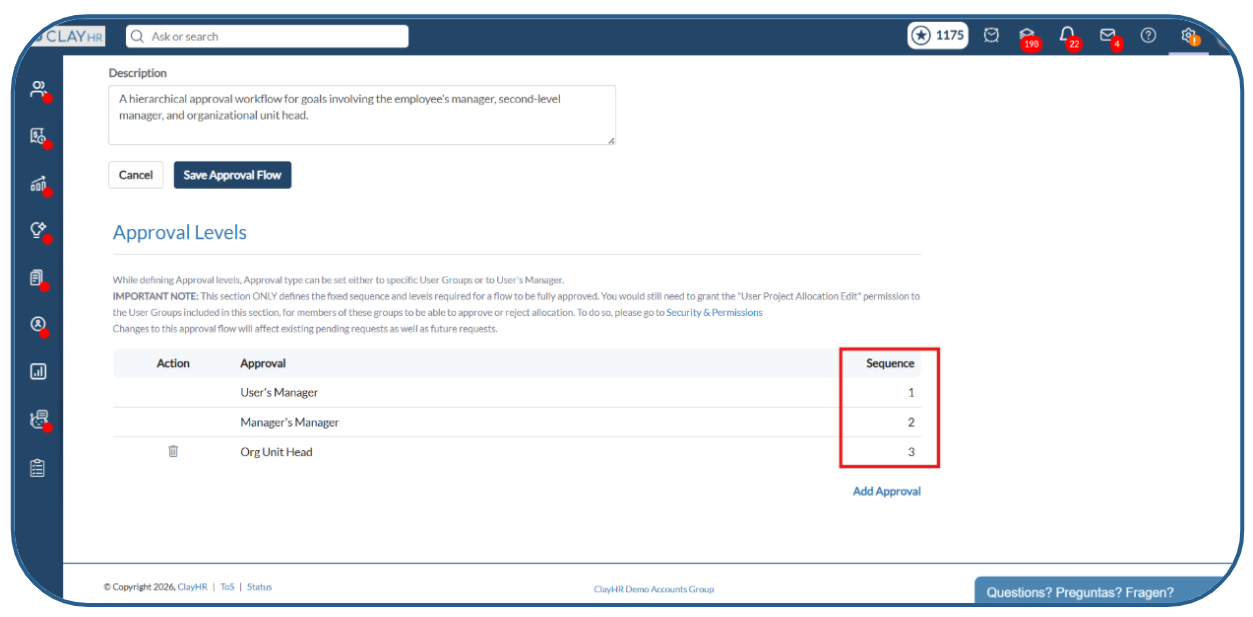
Organizations can configure approval levels such as a user's manager, manager's manager, department head, HR, or any specific user.
Here are the steps to configure and use a multi-level approval flow for goals:
Step 1: Create an Approval Flow
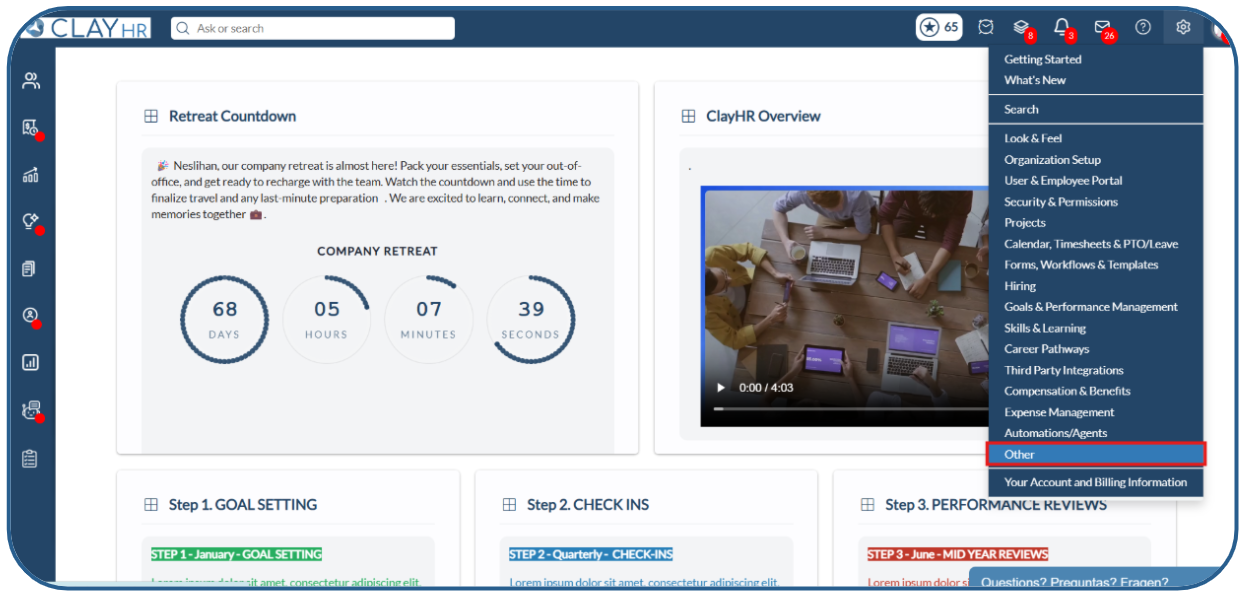
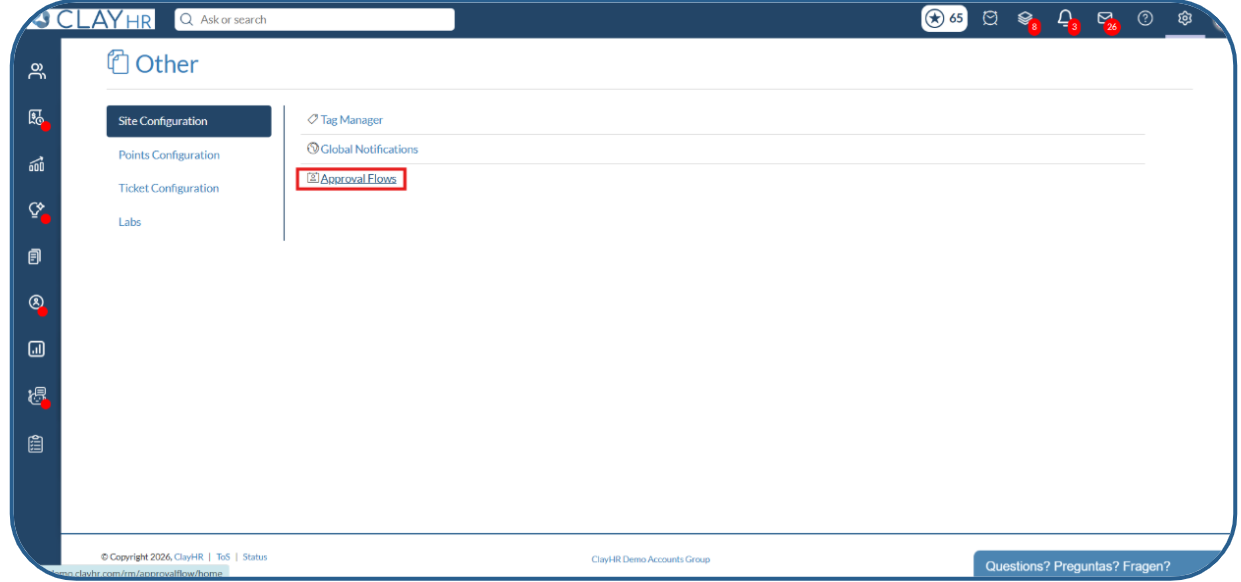
- Navigate to: Setup Menu > Other > Approval Flows
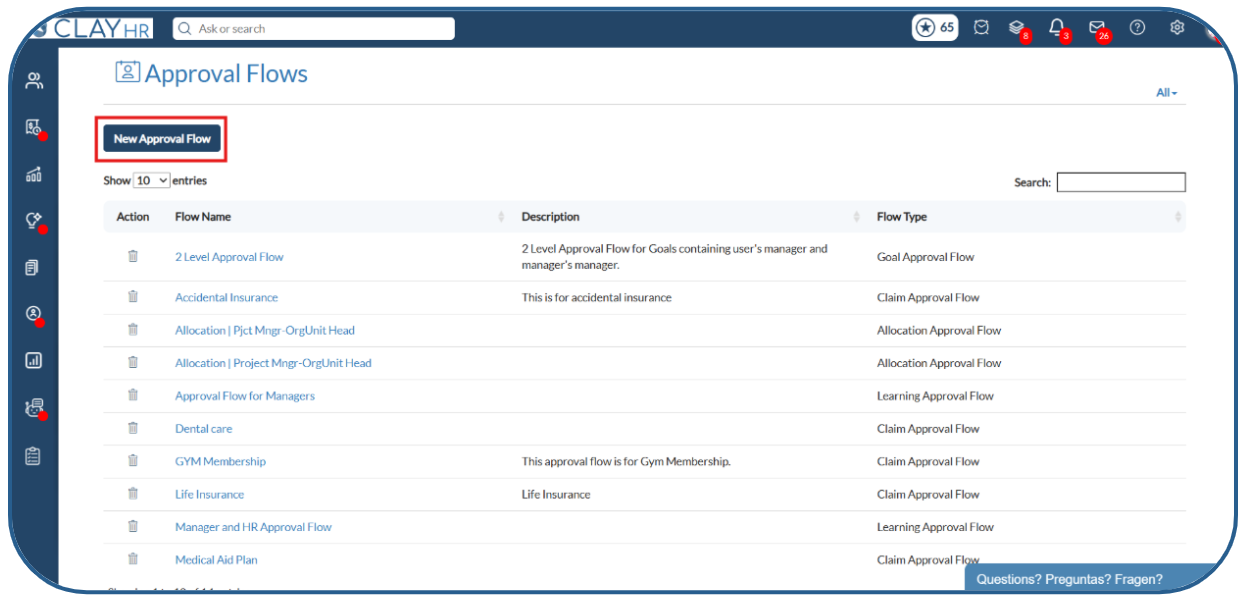
2. On the Approval Flows home page, click the New Approval Flow button.
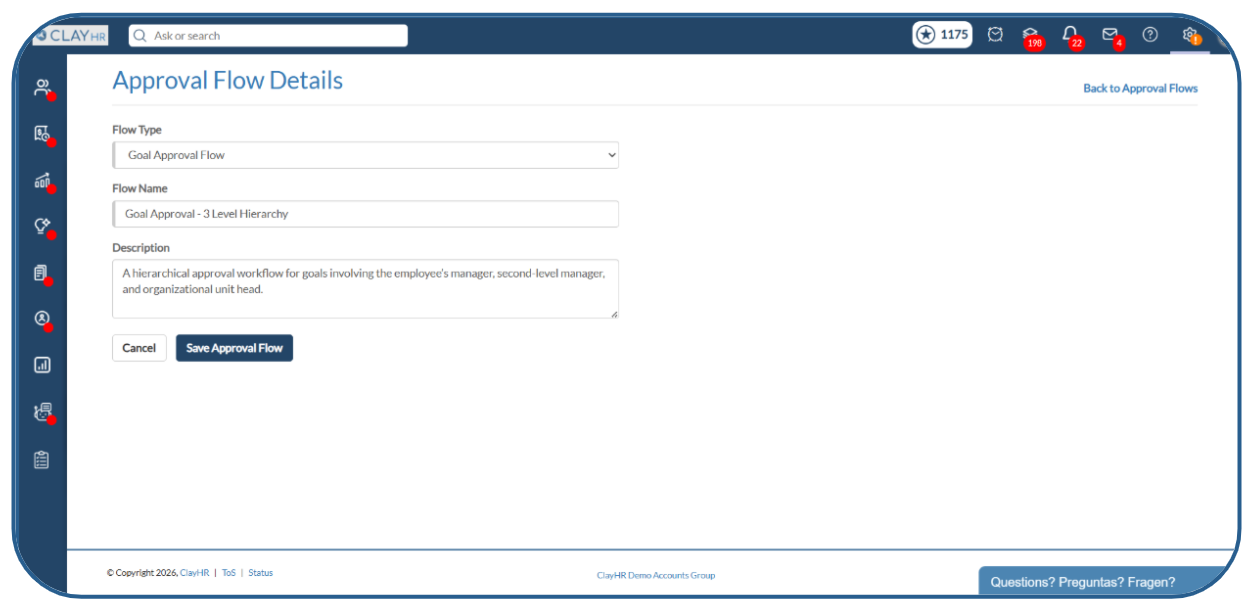
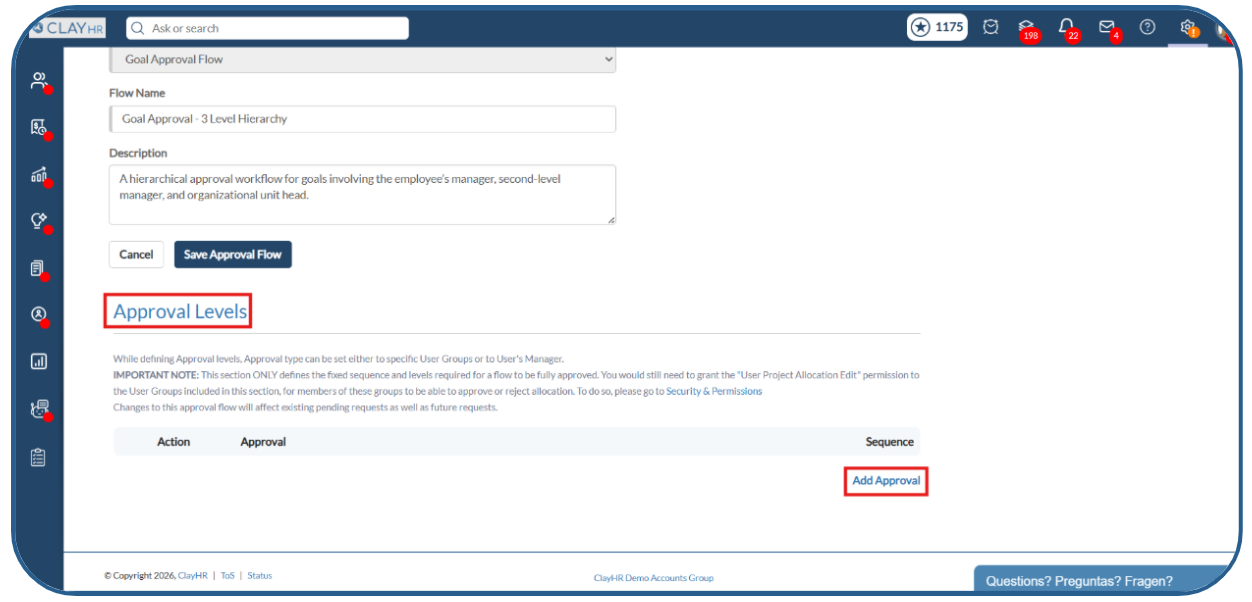
3. On the Approval Flow Details page, select "Goal Approval Flow" as the Flow Type, enter the Flow Name and Description, and click the "Save Approval Flow" button.
4. After saving the approval flow, click Add Approval in the Approval Levels section to configure approval levels.
5. In the Add Approval Level dialog box, select the approver type.
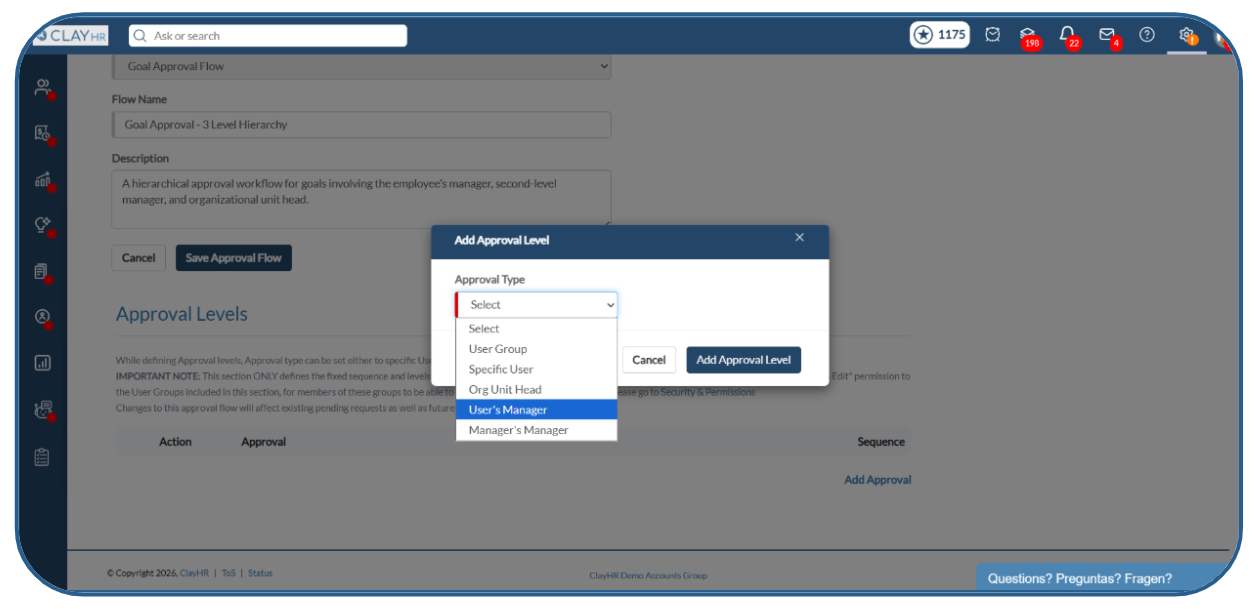
6. Add the required approval levels in sequence. The goal will follow this approval order and move to the next approver only after the current level is approved.
Step 2: Assign the Approval Flow to a Goal
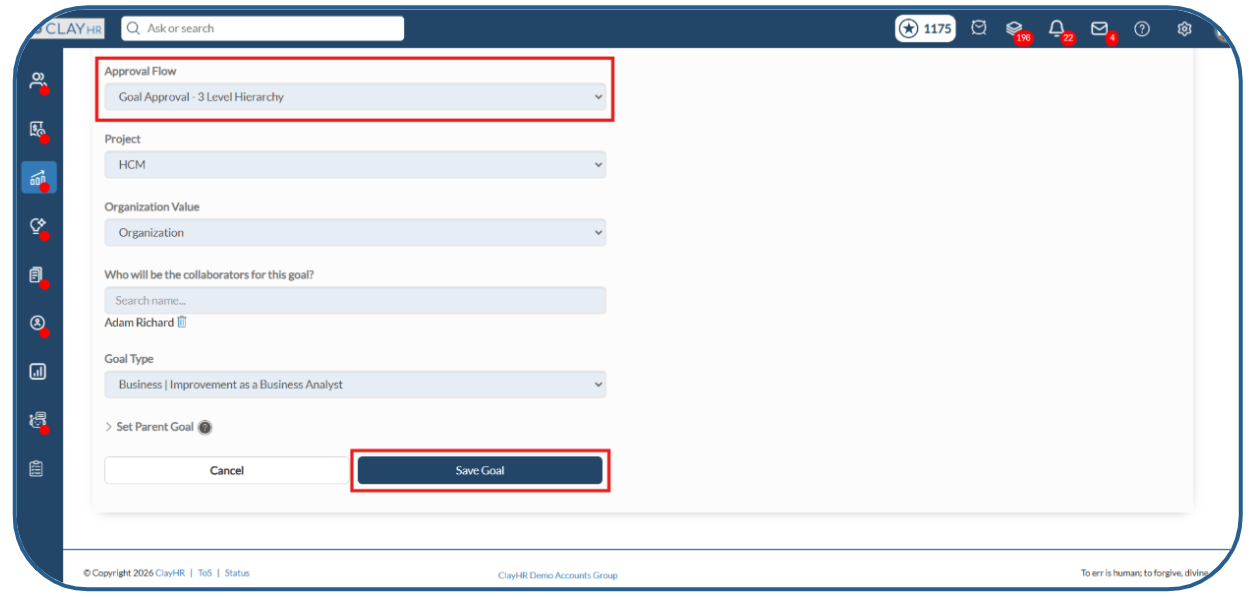
- Navigate to the Goals home page and click the New Goal button.

2. On the Goal Details page, complete the goal information, select the desired Approval Flow from the Approval Flow dropdown, and save the goal.
Step 3: Submit the Goal for Approval
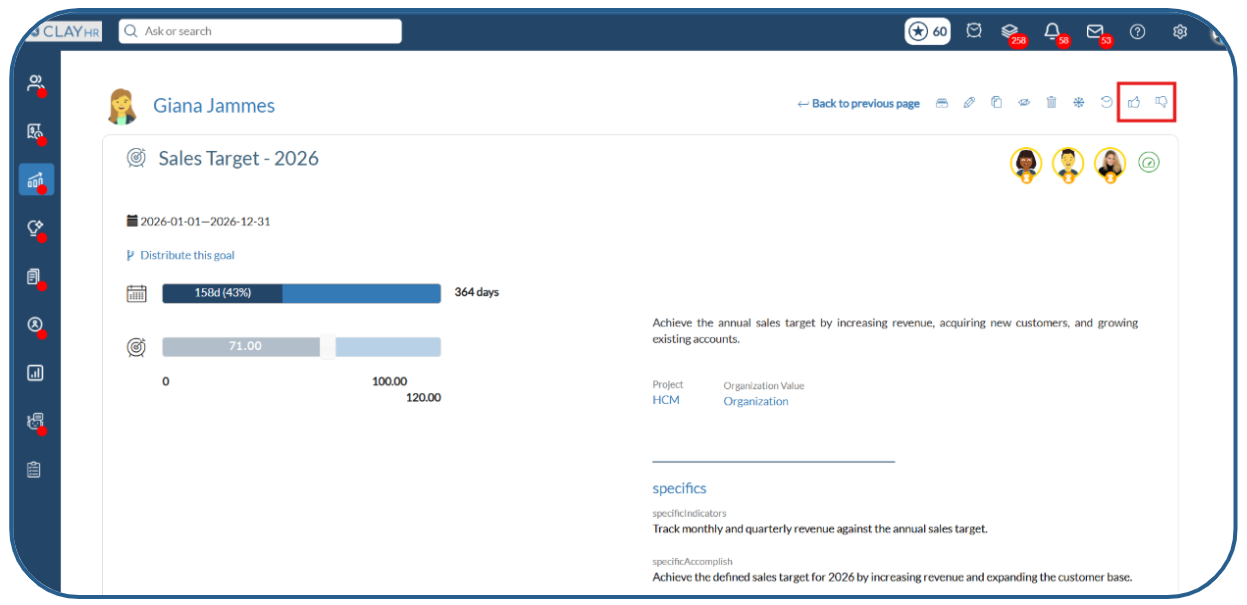
- After updating the goal progress, click the Send for Approval (paper plane) icon to submit the goal for approval.
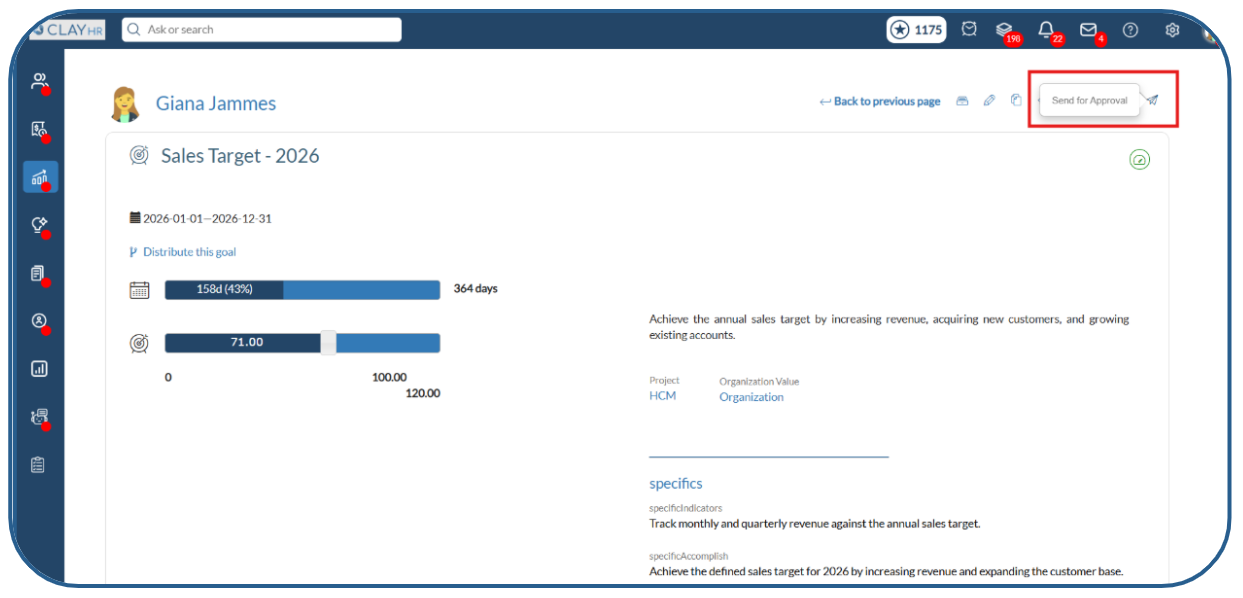
2. When the goal is sent for approval:
- The goal is frozen and can no longer be edited.
- The approval strip displays all configured approval levels and their current status.
Step 4: Approval Process
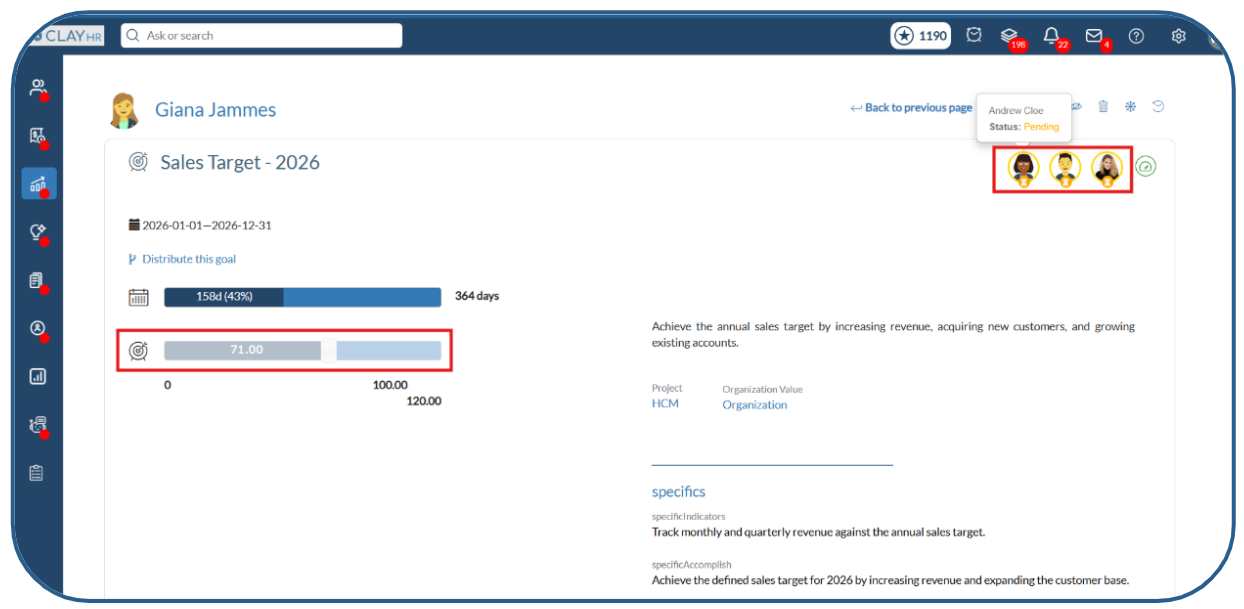
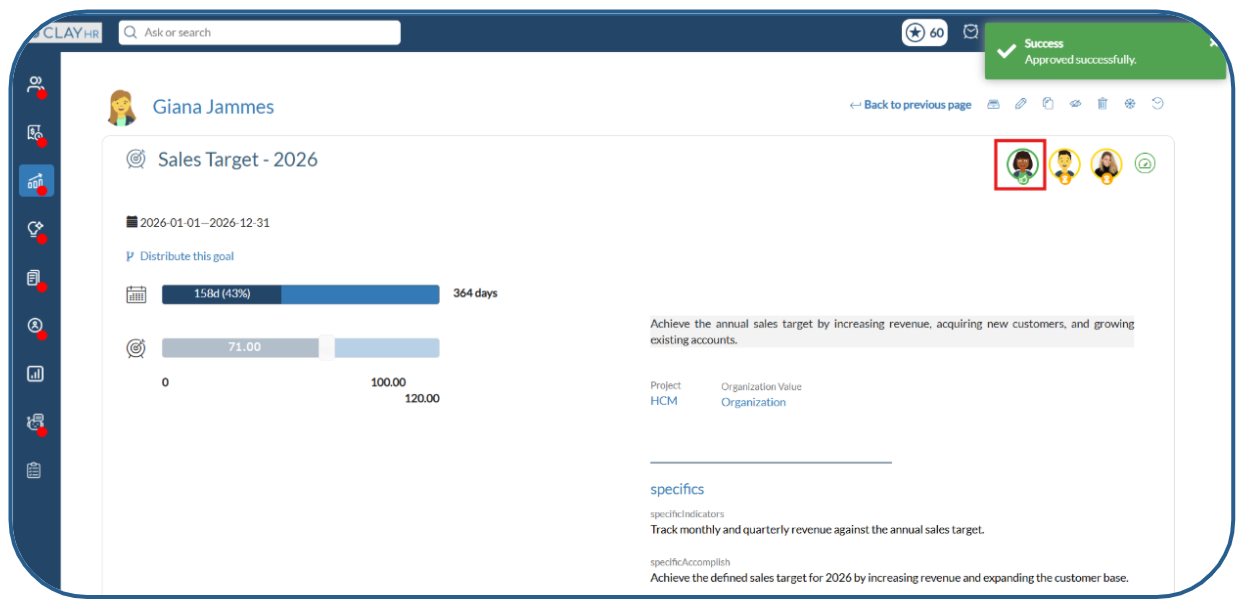
- Once the goal is submitted, an email notification is sent only to the first level approver.
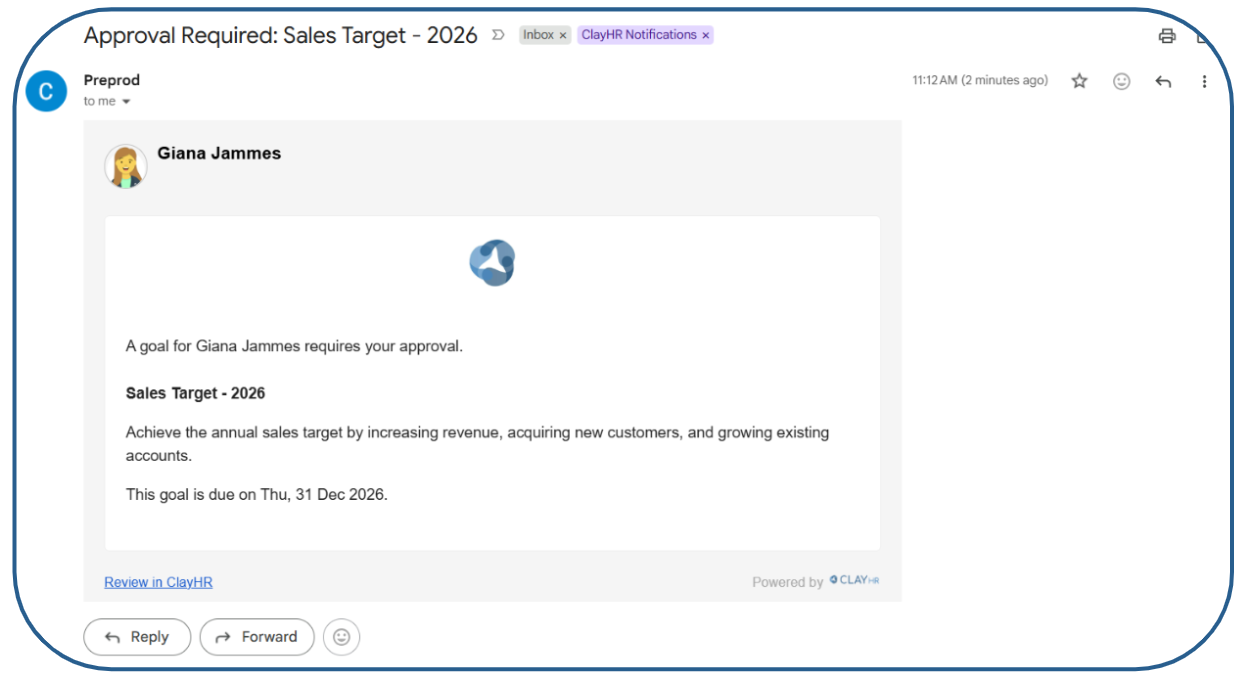
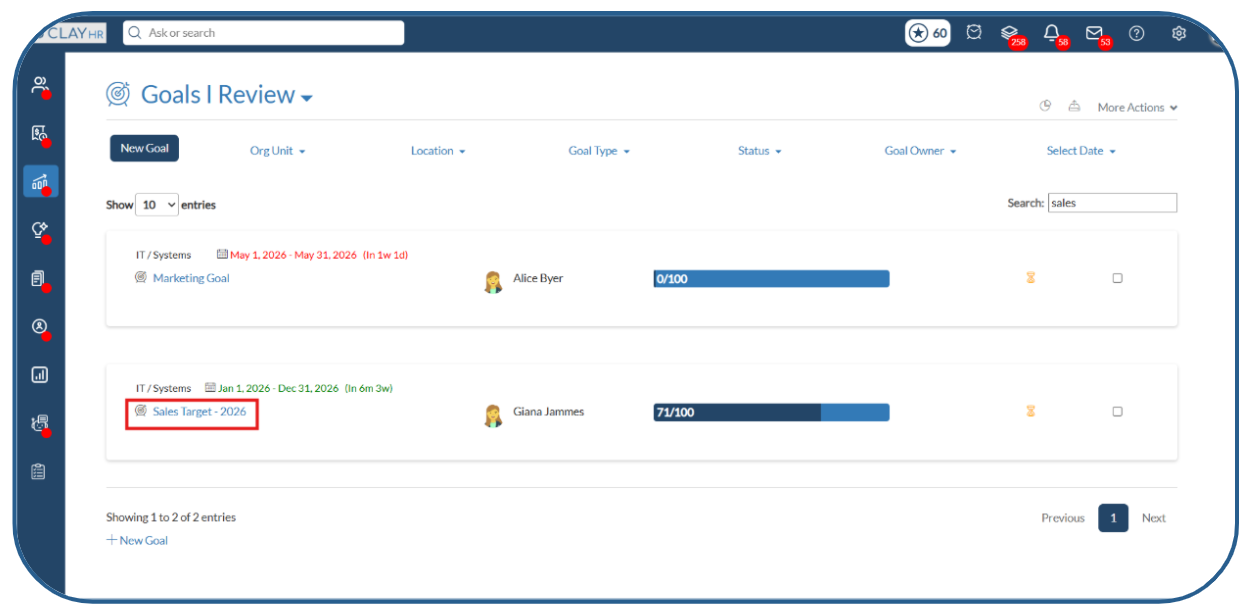
2. The goal also becomes visible to the first approver on the Goals I Review page.
3. The approver can approve or reject the goal using the Approve (👍) and Reject (👎) icons.
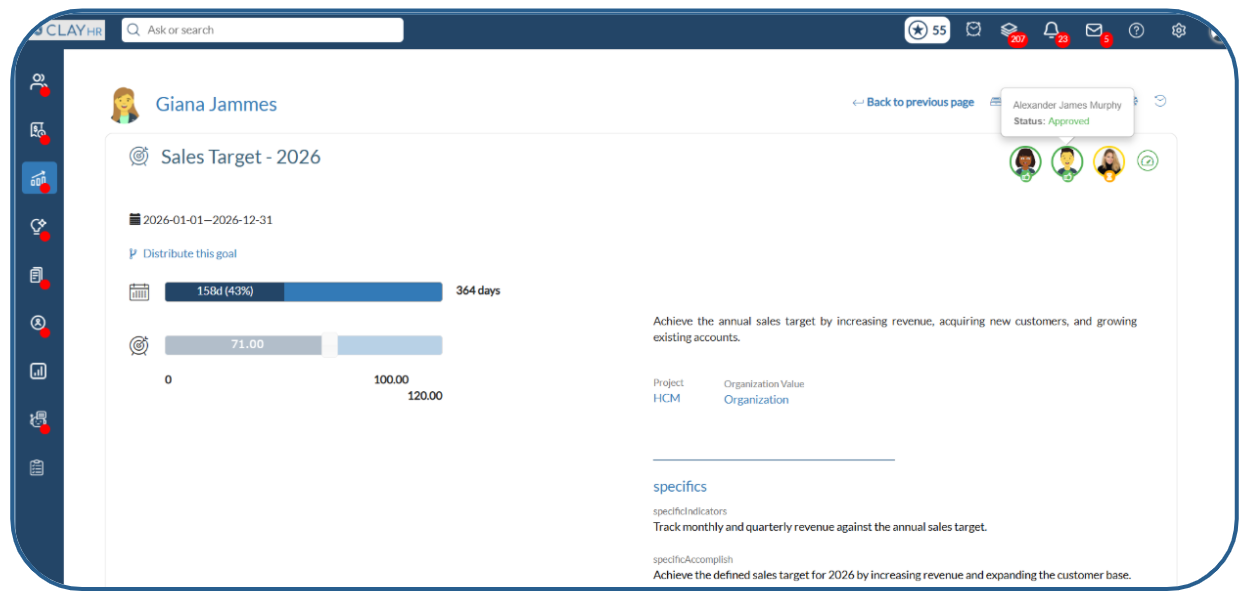
4. When the first approver approves the goal:
- The approval level is marked as Approved.
- The goal status changes to Pending Review.
- The goal moves to the next approval level, and an email notification is sent to the next approver.
- The goal becomes visible to the next approver on the Goals I Review page.
- This process continues until all approval levels have completed their review.
Step 5: Final Approval
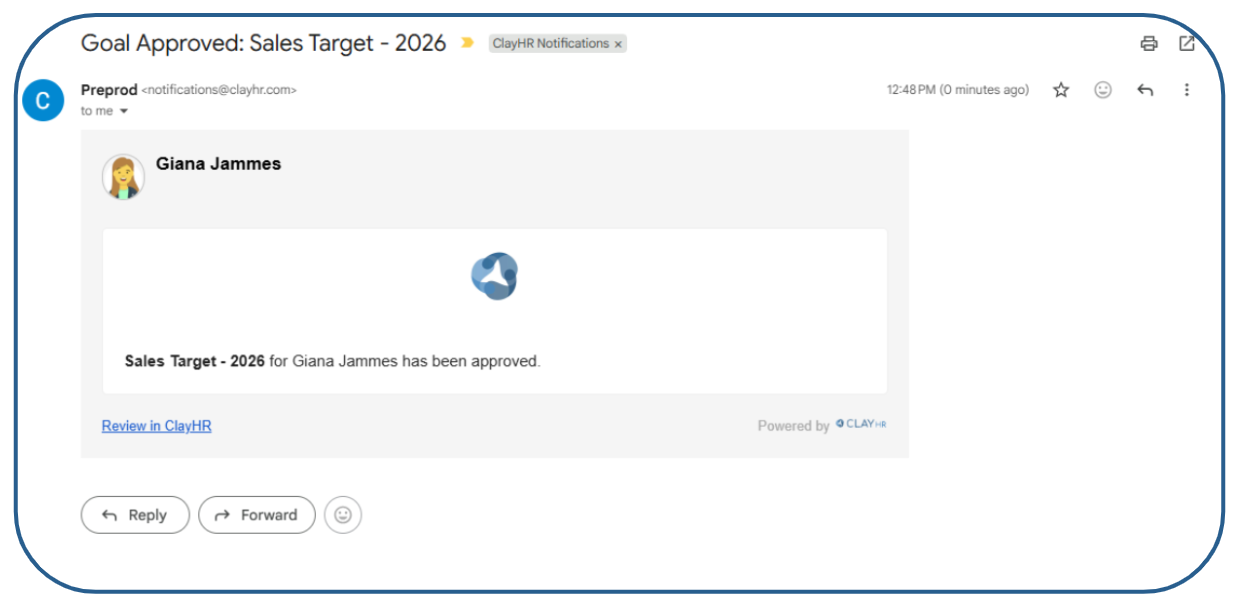
- When the final approver approves the goal, the goal status changes to Approved, and the approval process is completed.

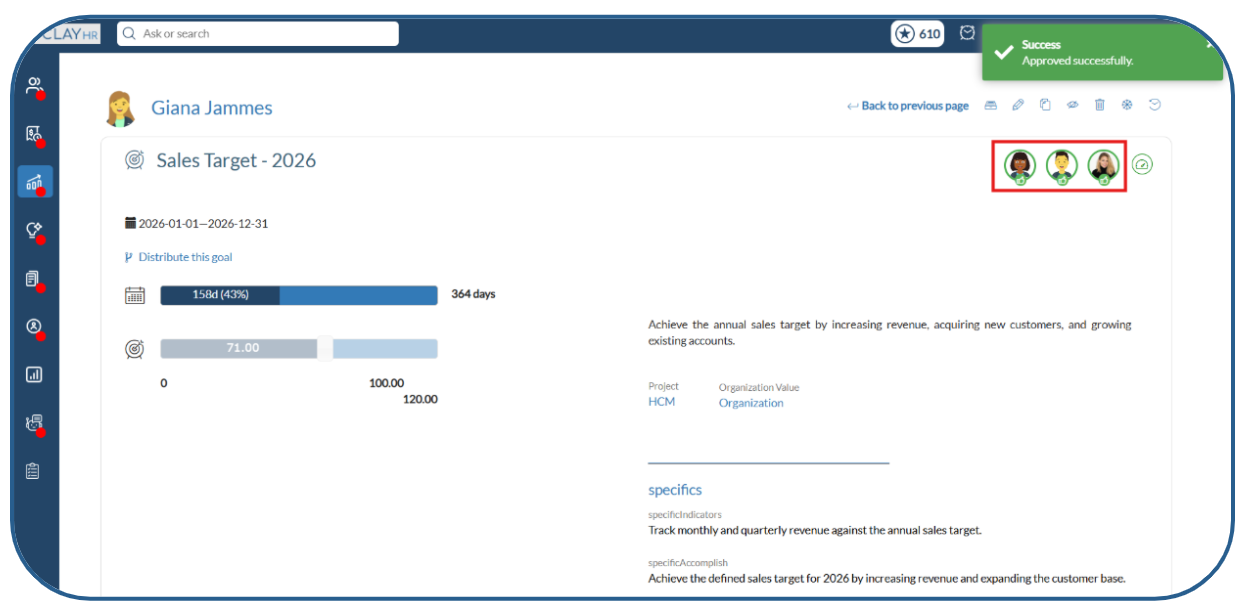
- A confirmation email is sent to the goal owner and all approvers involved in the approval flow.
Step 6: Rejecting a Goal
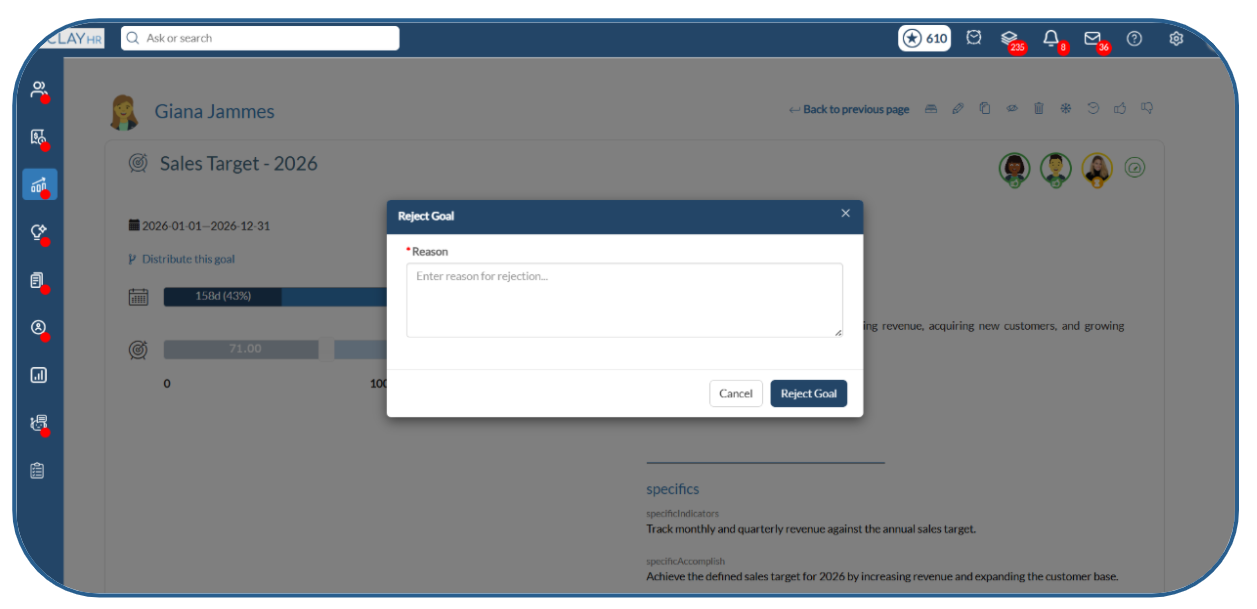
- Any approver can reject the goal by clicking the Reject icon.
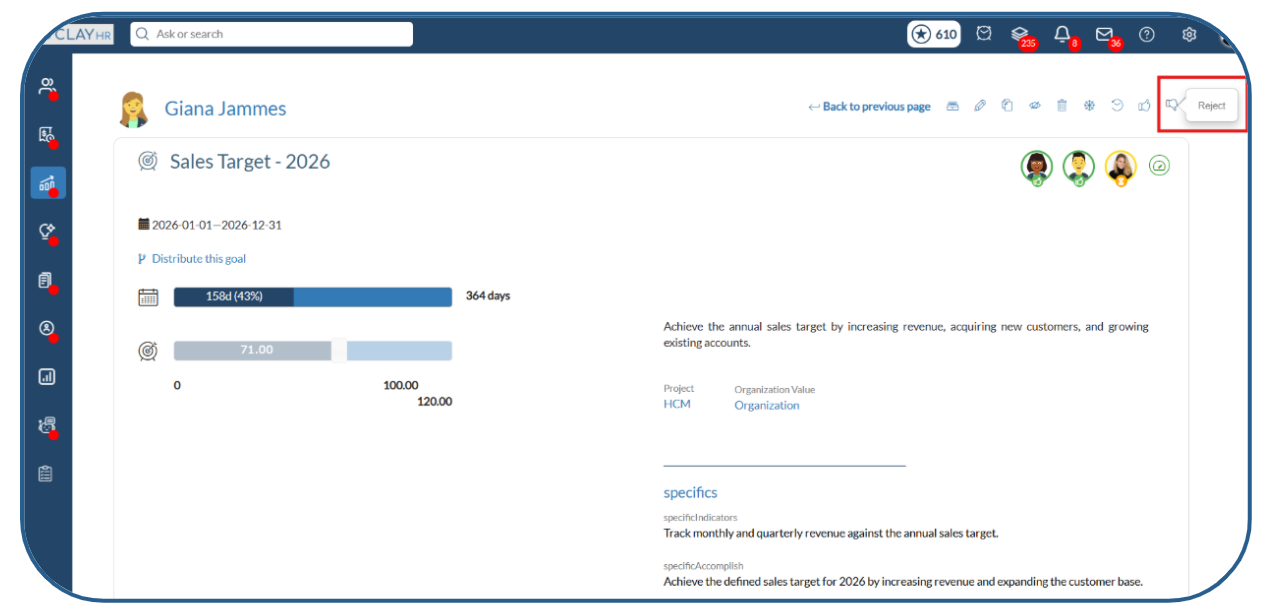
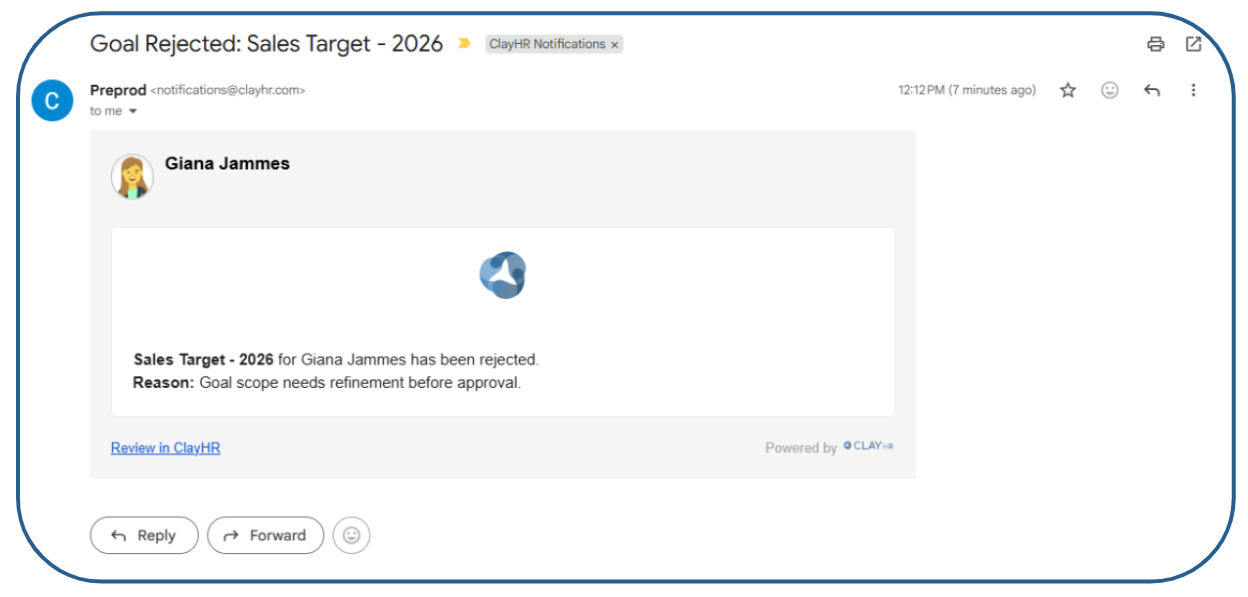
2. The approver must enter a reason for rejection and click Reject Goal.

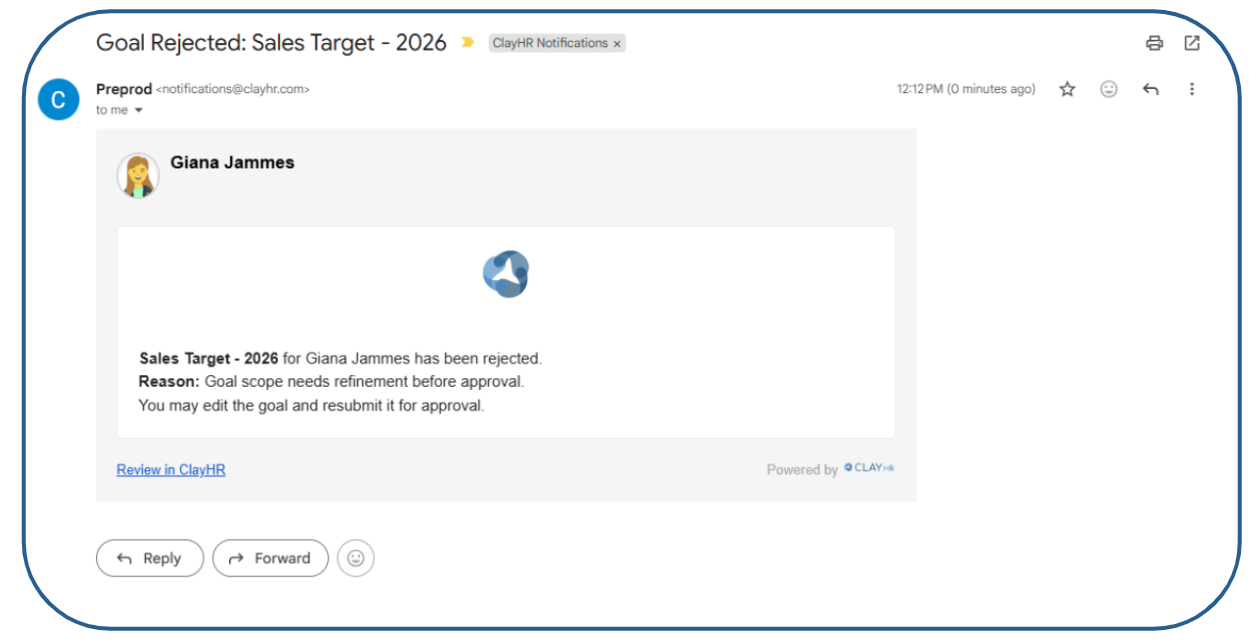
3. The goal owner receives an email notification with the rejection reason.
4. All approvers who participated in the approval process are notified that the goal has been rejected.
5. The goal unfreezes and the goal owner can review the feedback, update the goal, and resubmit it for approval.

Step 7: Resubmitting a Goal
- After making the required updates, the goal owner can click the Resend for Approval icon.
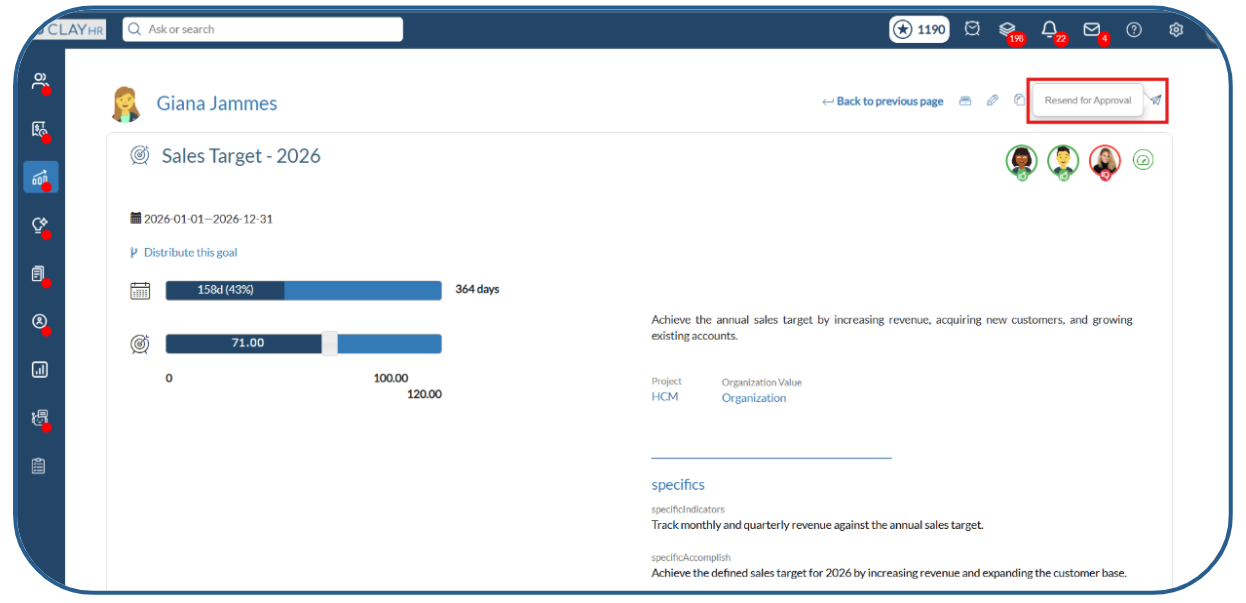
2. The goal is resubmitted, and the approval process starts again from the first approval level.

If you encounter any issues while creating or using the Multi-Level Approval Flow for Goals, please review the steps above or contact the support team or your account manager for assistance.


