Roster Scheduling
ClayHR allows you to streamline your employee's scheduling process. You can create the shifts by following the below-mentioned steps:
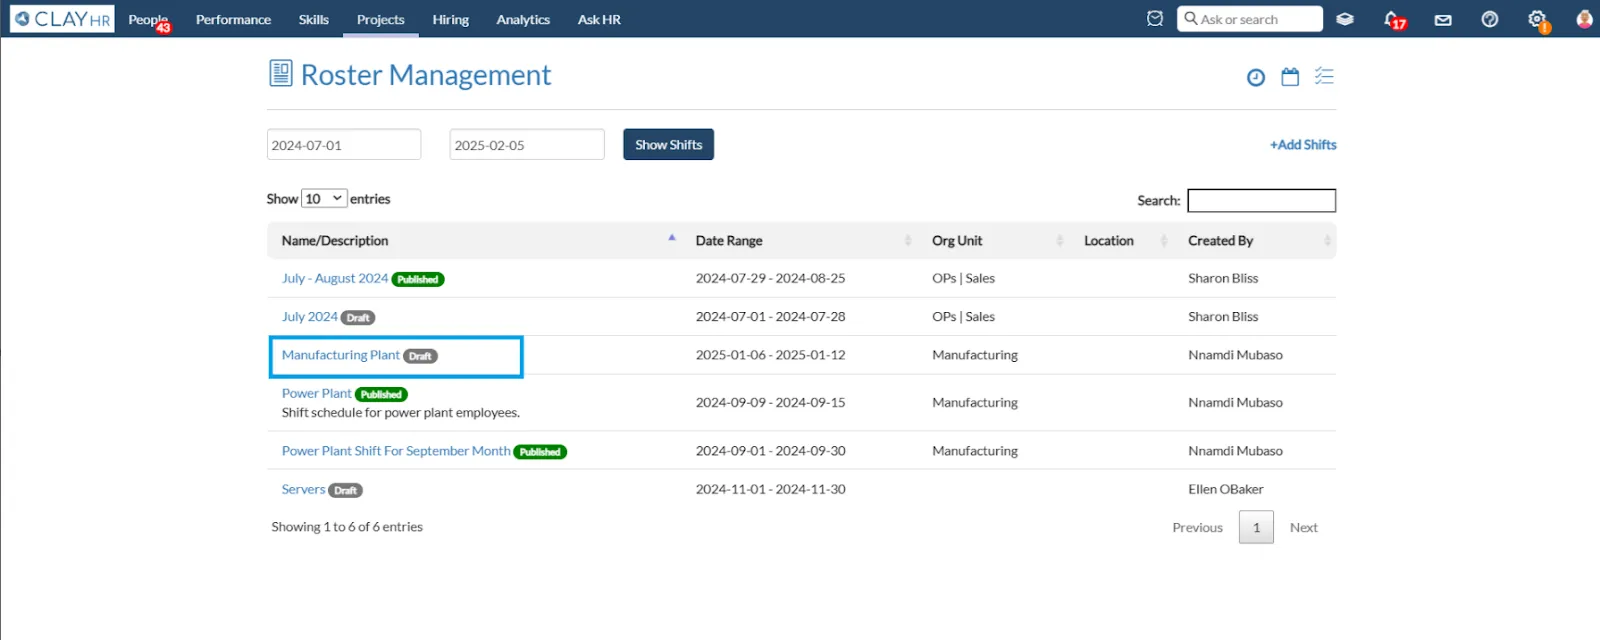
Create Roster
- Go to the “Projects” module & click on the “Roster Management” section.

- On the “Roster Management” home page, you will see the list of created shifts.
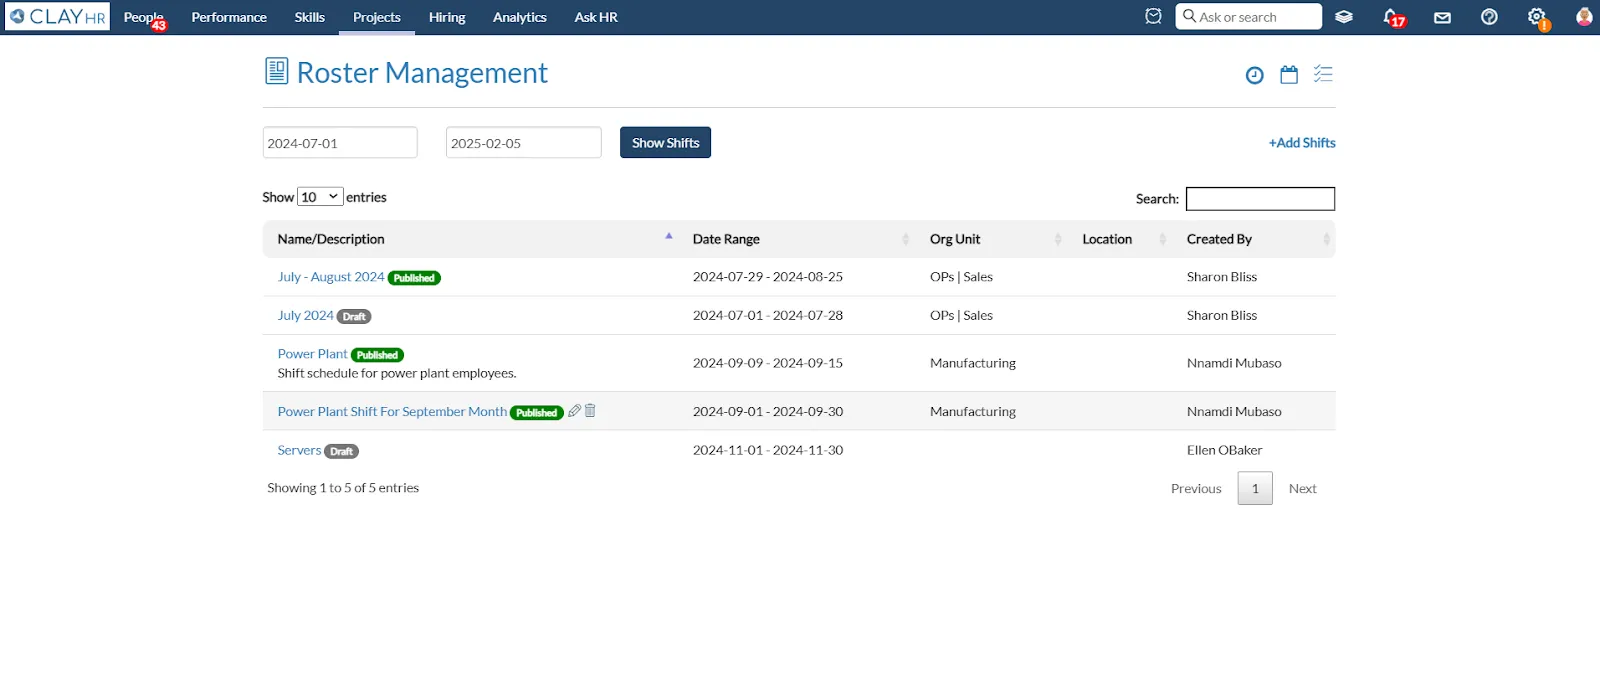
- Click on “Add Shifts” to create a new shift.

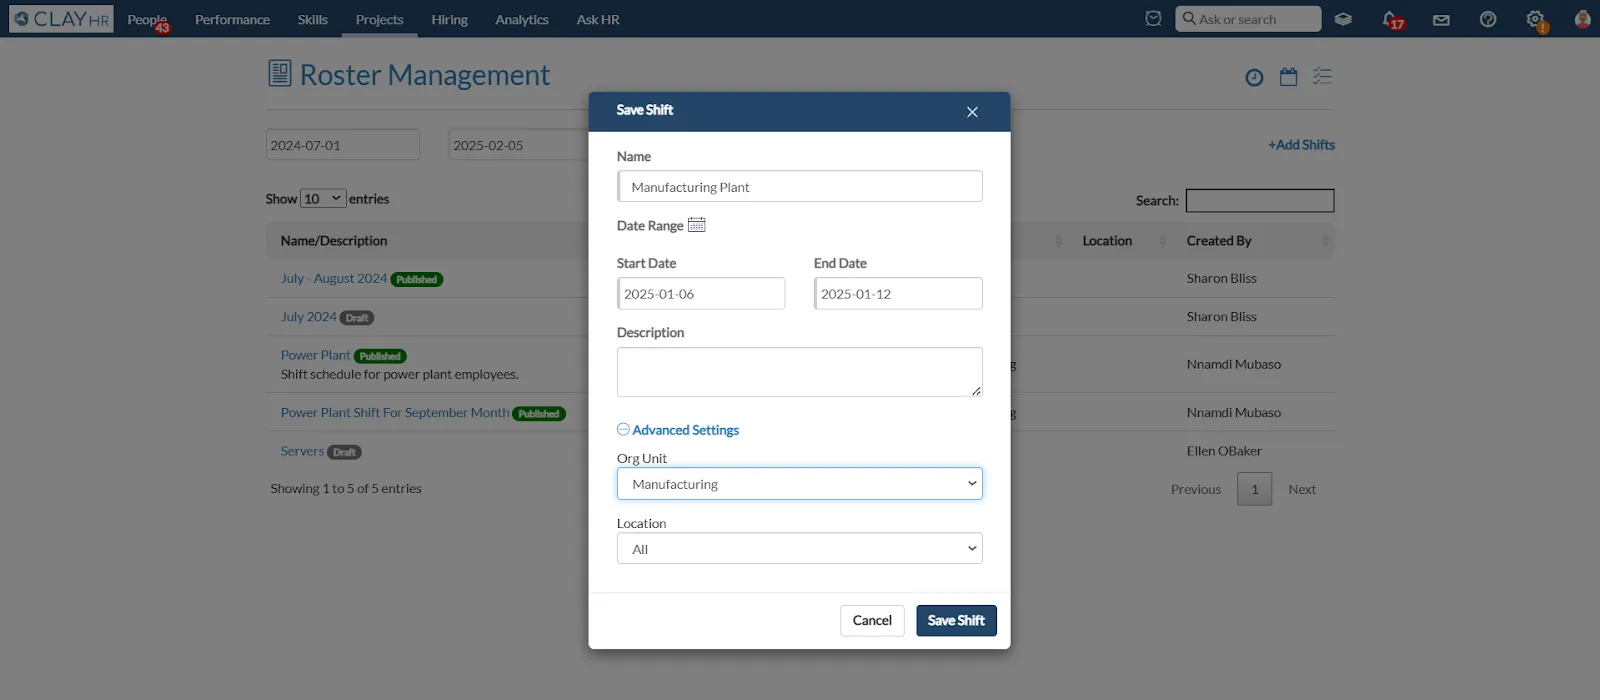
- Fill in the required details like shift name, shift duration, and description in the popup box, and after filling in all the details click on the “Save Shift” button.
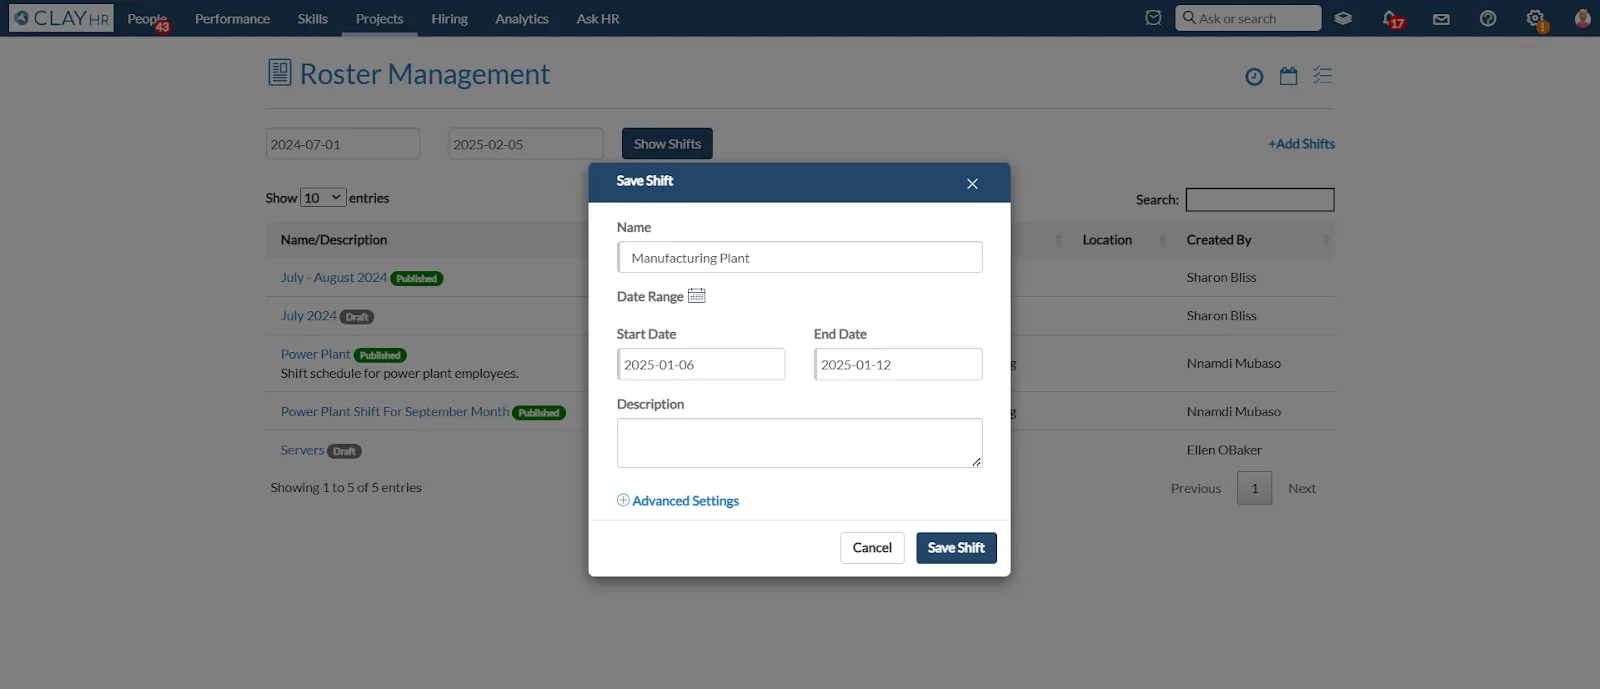
- Click on “Advance Settings” to create the shifts for a specific Org Unit or Location.
- Click on any shift's name to see the allocation of the users, if no shifts are defined then you can allocate the shifts to the users.
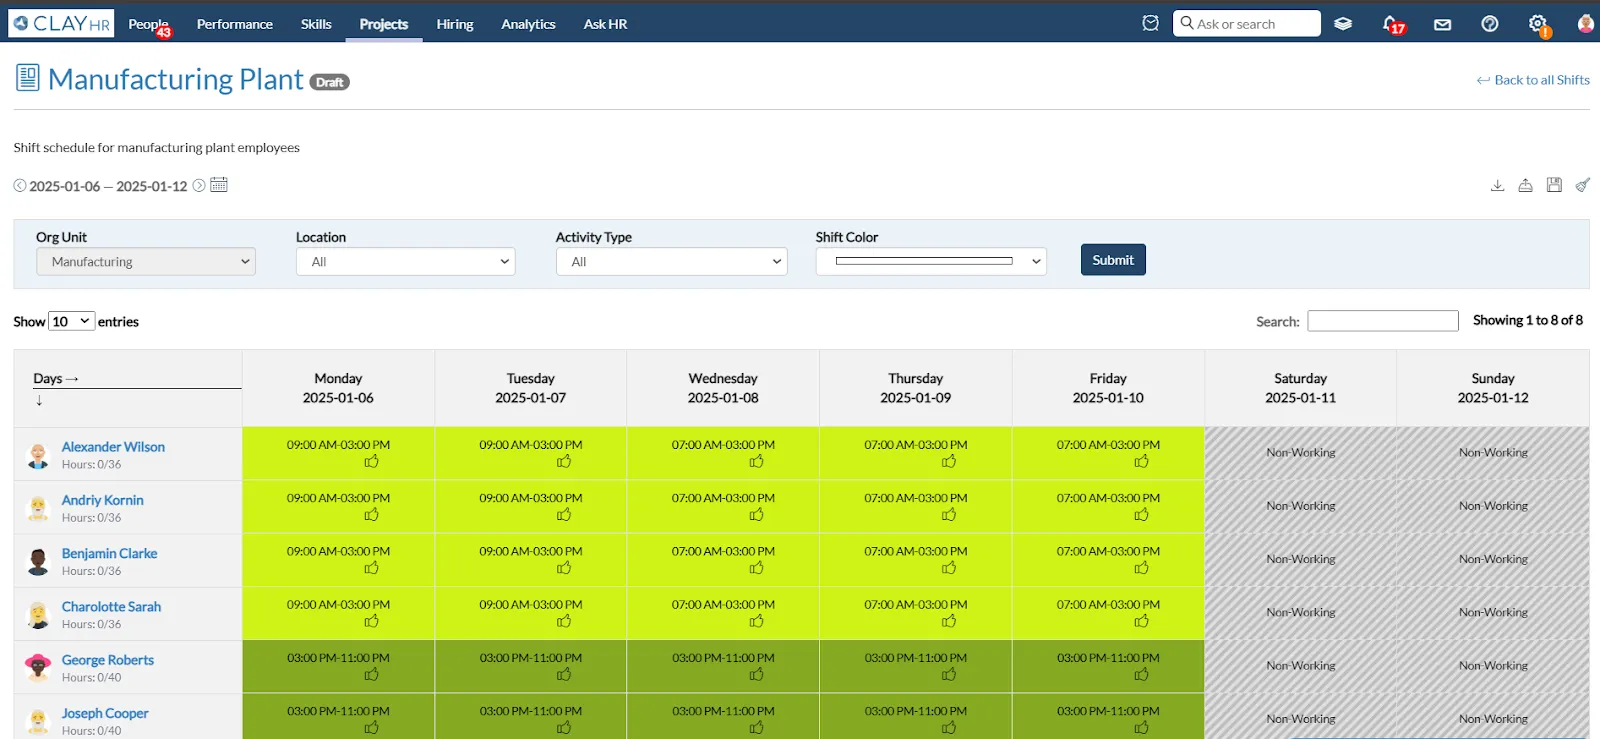
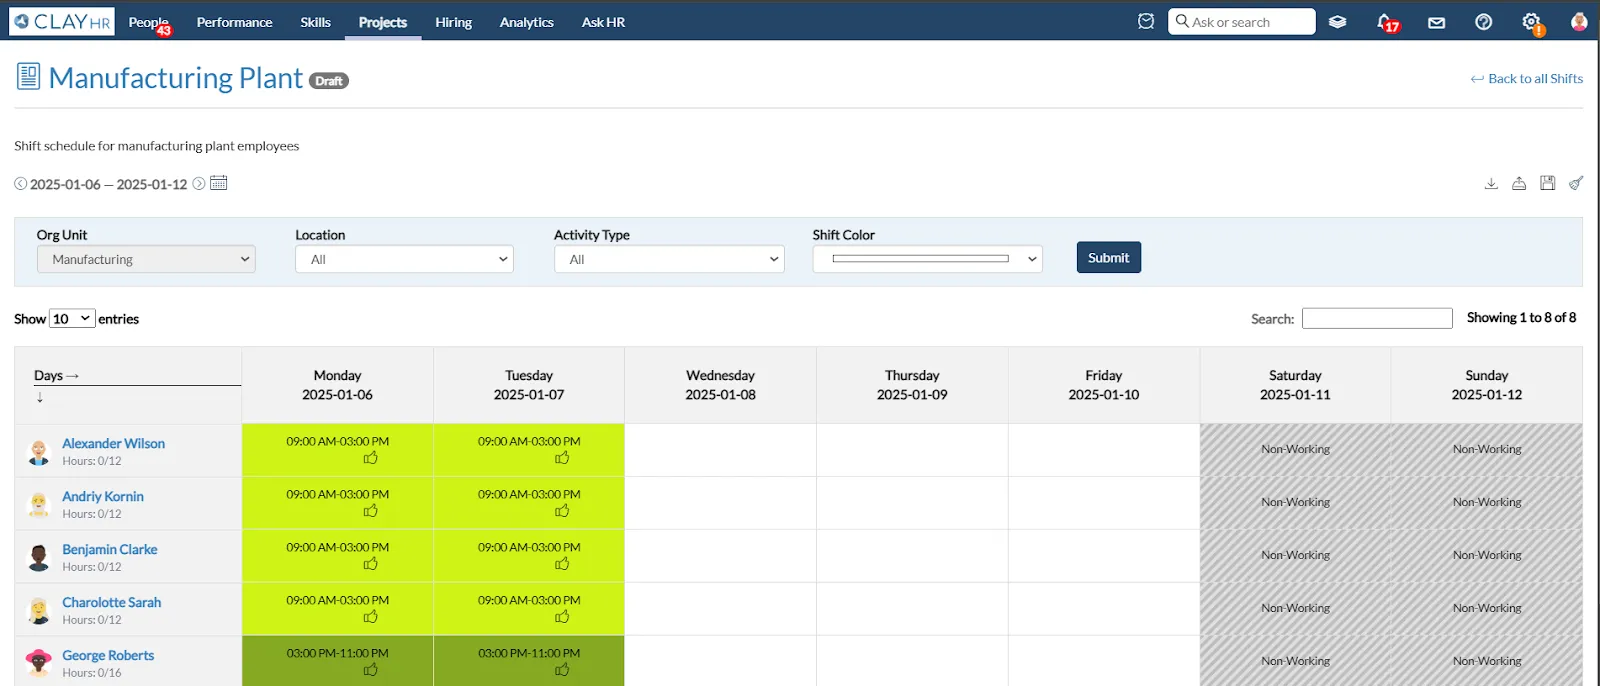
Shift’s Allocation
- Click on the shift name to view the allocated shifts of the users.
- The view page will show a list of all users with their allocated shifts.
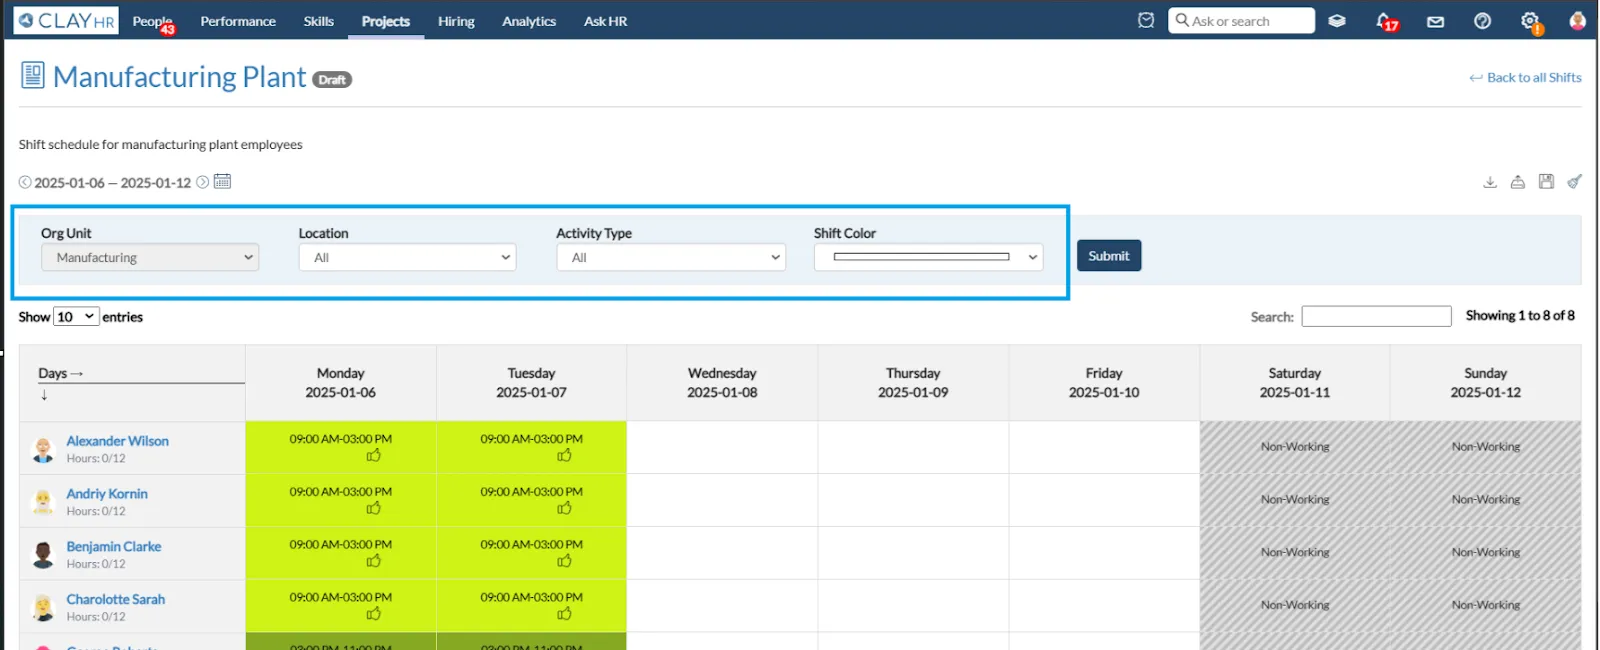
- You can apply filters such as "Location", and "Org-Unit" to view users associated with a specific location or organizational unit. Additionally, you can filter shift timings based on activity type and shift color.
- If shifts are not allocated to users, you can assign them by clicking on the cells. A popup will appear on the screen, where you can fill in the required fields such as start and end time, activity type, comments, and shift color. Additionally, you can notify the user and overtime shift by selecting their respective checkboxes.
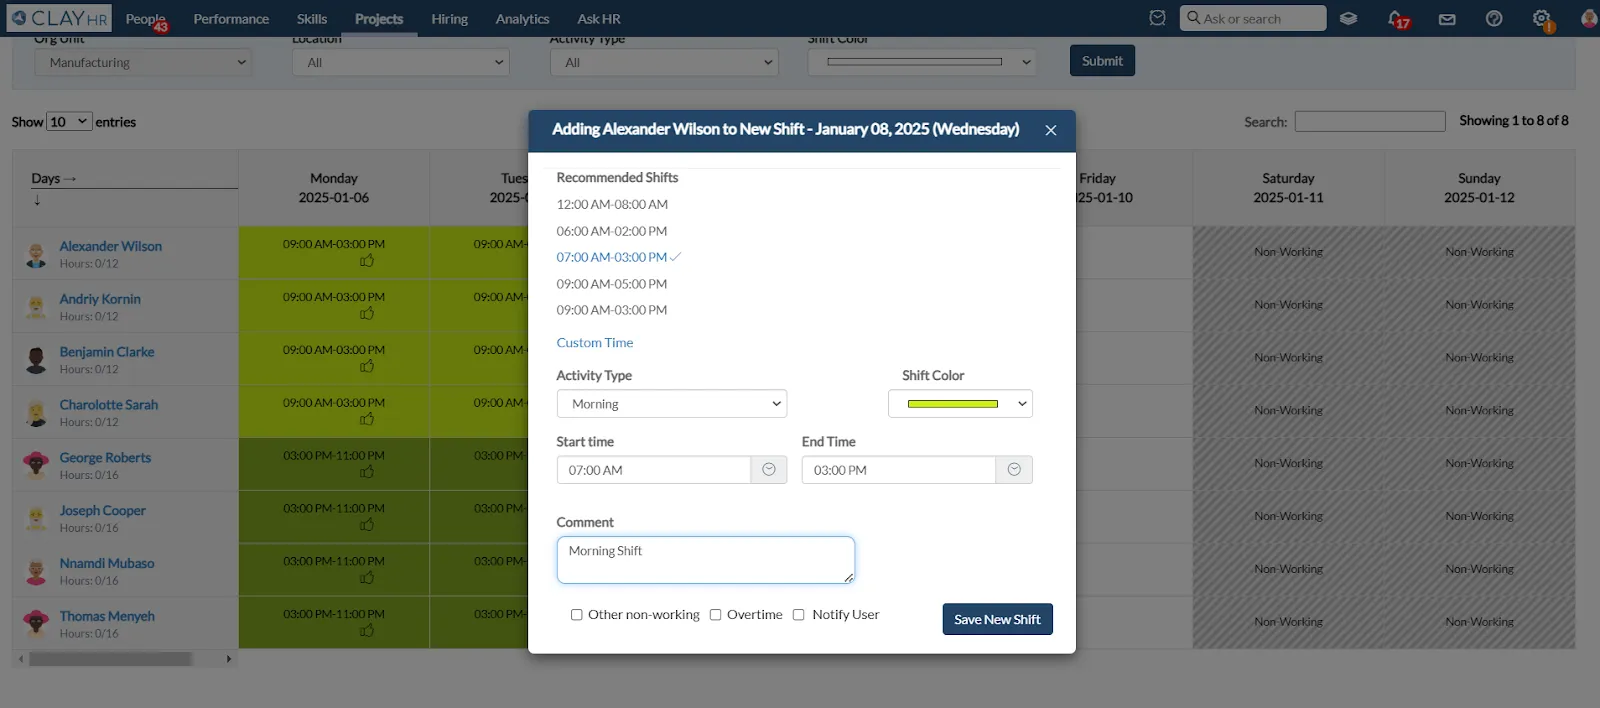
- You can allocate the shifts to the users from the recommended shifts.

- You can allocate a day as non-working to the user by clicking on the “Other non-working” checkbox.
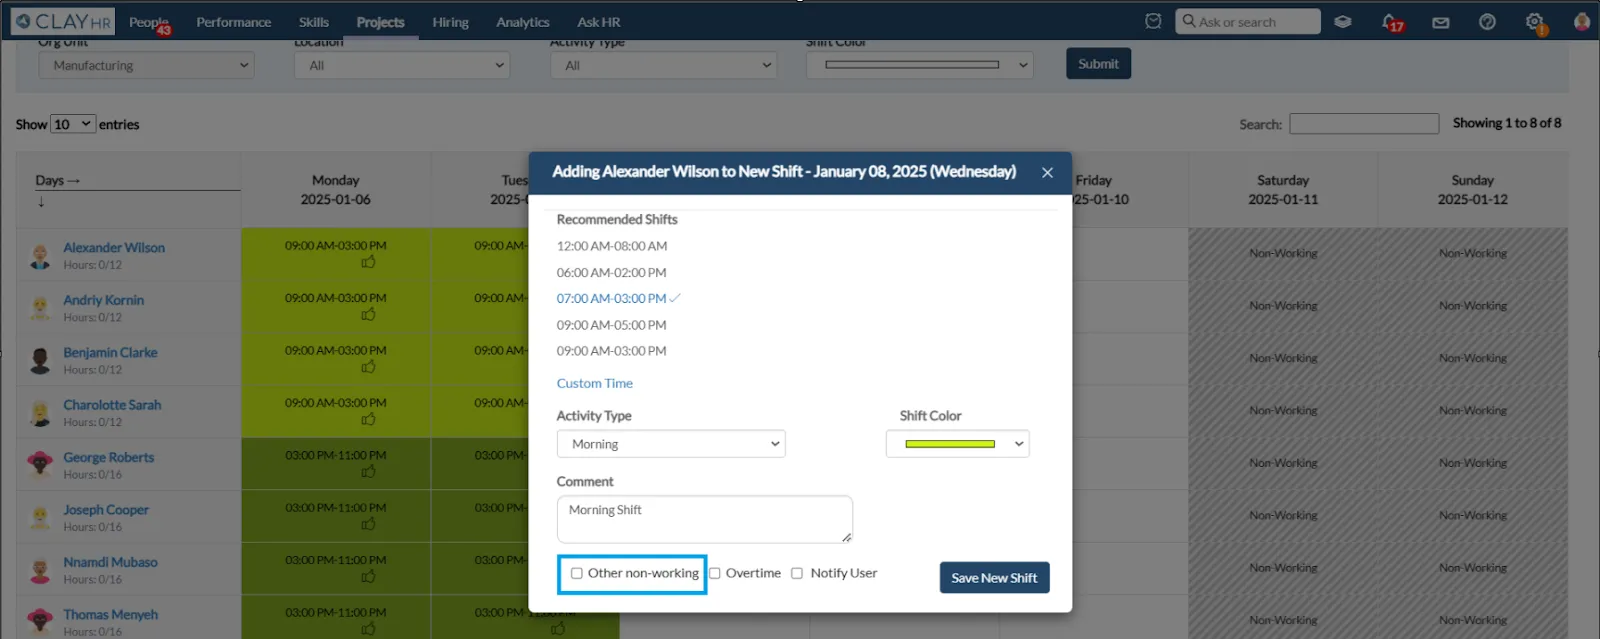
- After allocating the shift, click on the “Save New Shift” button to save the shift timing.

- After saving shift timing, you can view the allocated shift timing for the user.