How to Schedule a Report
Follow the steps to schedule a report:
A report is used to display past, present, and future data to efficiently track and optimize performance (organization/individual). A report can be scheduled for a specific user or a group of users.
1. Open the report and from the top right corner click on the pencil icon to open the designer page

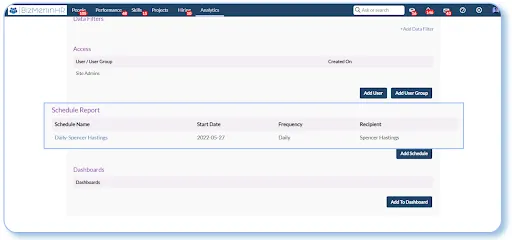
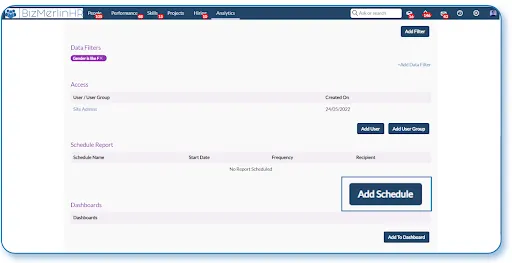
2. On the edit page scroll down to the ‘Schedule Report’.
3. Clicking on the ‘Add Schedule’ popup will appear.
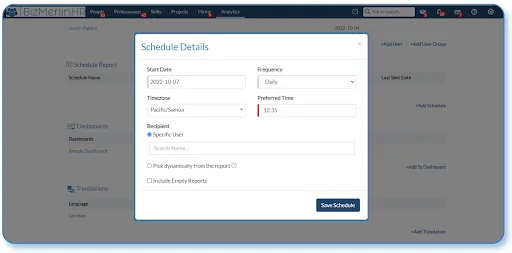
4. After filling in the details click on the ‘Save schedule’.
1) Start date – Effective date of the report
2) Frequency – Report can be sent ‘Daily’, ‘Monthly’, ‘Yearly’
3) Timezone – User’s timezone area
4) Preferred time – At what time user will receive the scheduled report by email
5) Recipient: Specific user – Particular users can be added
6) Recipient: Pick from the report – Fetch the email addresses from the report to send the same report to that particular group of people.
6.1) All records: If the user selects “Email” from the “Pick dynamically from the report” field and selects the “All record” option, the records of all users who are in the report will be shared via email.
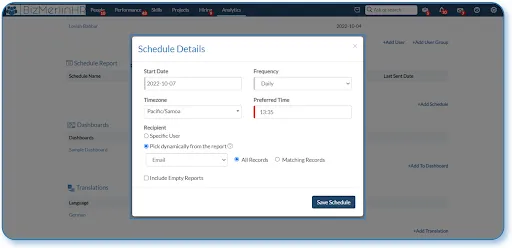
6.2) Matching records: If the user selects “Manager Email” from the “Pick dynamically from the report” field and selects the “Matching Records” option, the records of users who are reporting to you will be shared via email.

5. The report is scheduled and the user will receive the email for the report.