ClayHR Kiosk Application Setup
After installing the ClayHR Kiosk, register your device using the following
- Subdomain
- Password
![](https://cdn.prod.website-files.com/63c50a0cab4c86831ccbeef6/6464a72d7ee1eb6a20d80dcc_KB%20Article%20-%20Setting%20up%20the%20ClayHR%20Kiosk%20Application.png)
Site Admin can approve the registered device as follows
- Login to the account, and click on the Gear icon → “Security & Permissions”.
![](https://cdn.prod.website-files.com/63c50a0cab4c86831ccbeef6/6464a4639ba2e8b8a8fbedf8_203aa4c8.png)
- In the Security and Permissions page, select “ClayHR Kiosk”.
![](https://cdn.prod.website-files.com/63c50a0cab4c86831ccbeef6/6464a46255ca873fff996dd0_5fb22627.png)
- To authorize the device, click on the toggle button under the status bar.
![](https://cdn.prod.website-files.com/63c50a0cab4c86831ccbeef6/6464a462a29218d1c92f951e_470941e9.png)
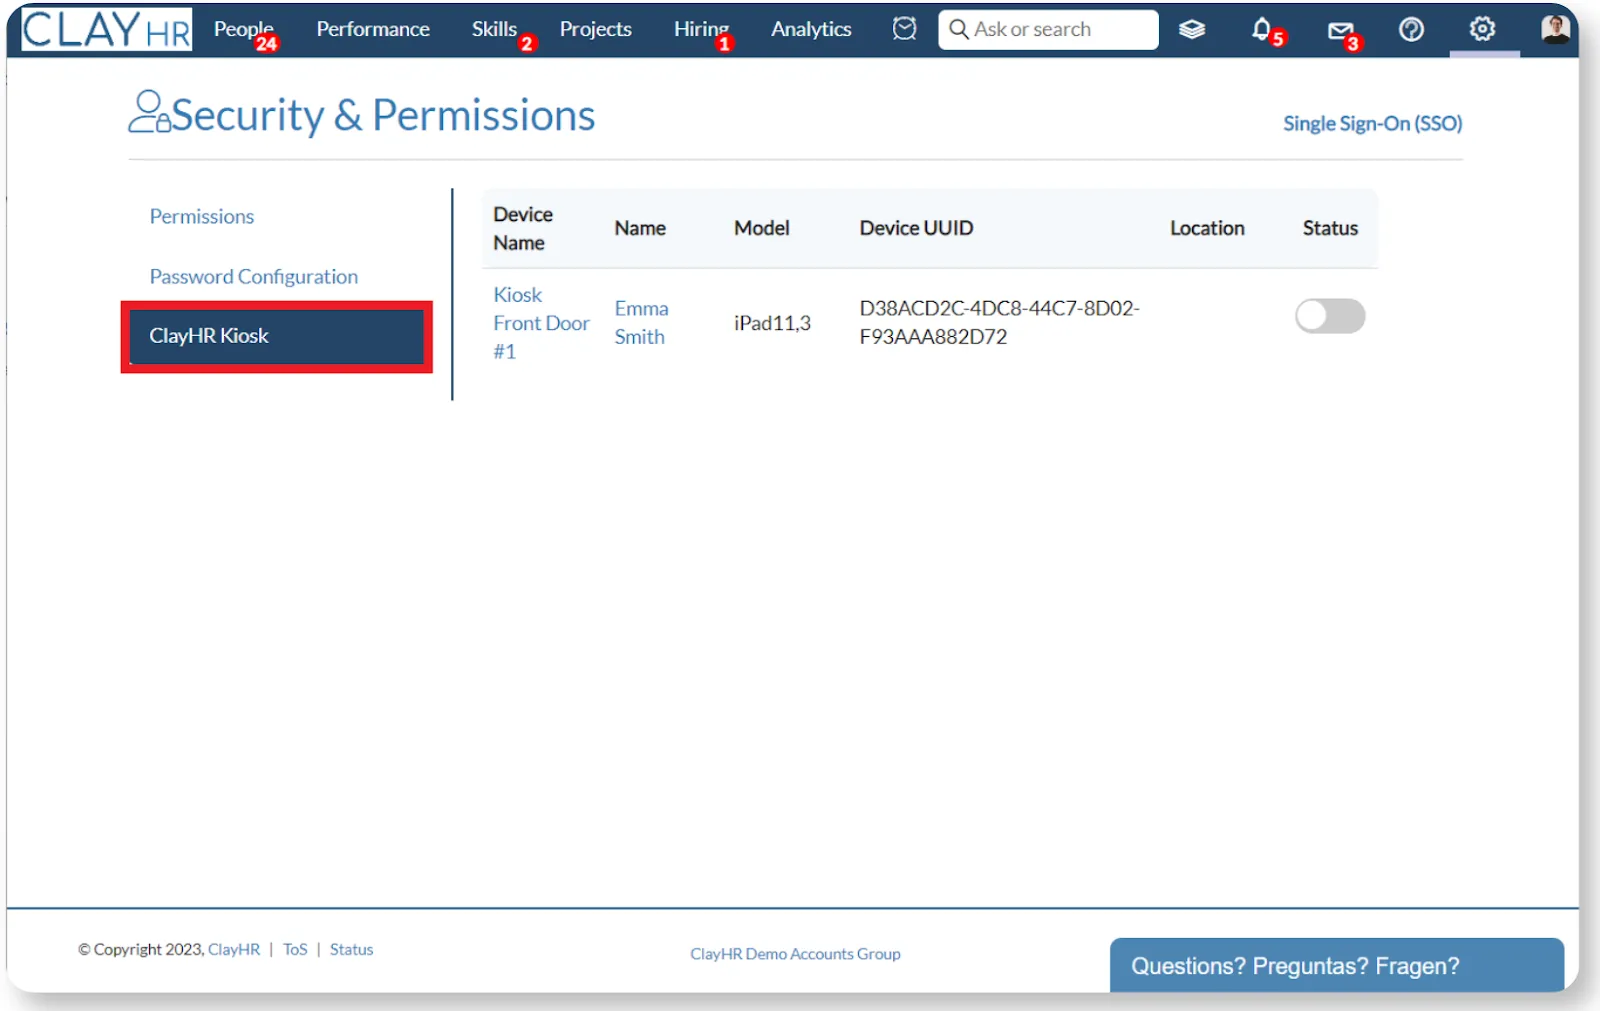
- Once approved, it will be ready to use.
![](https://cdn.prod.website-files.com/63c50a0cab4c86831ccbeef6/6464a9917ee1eb6a20d95d81_image%20(52).png)
How can users connect using Kiosk Application?
To setup your kiosk password follow these steps
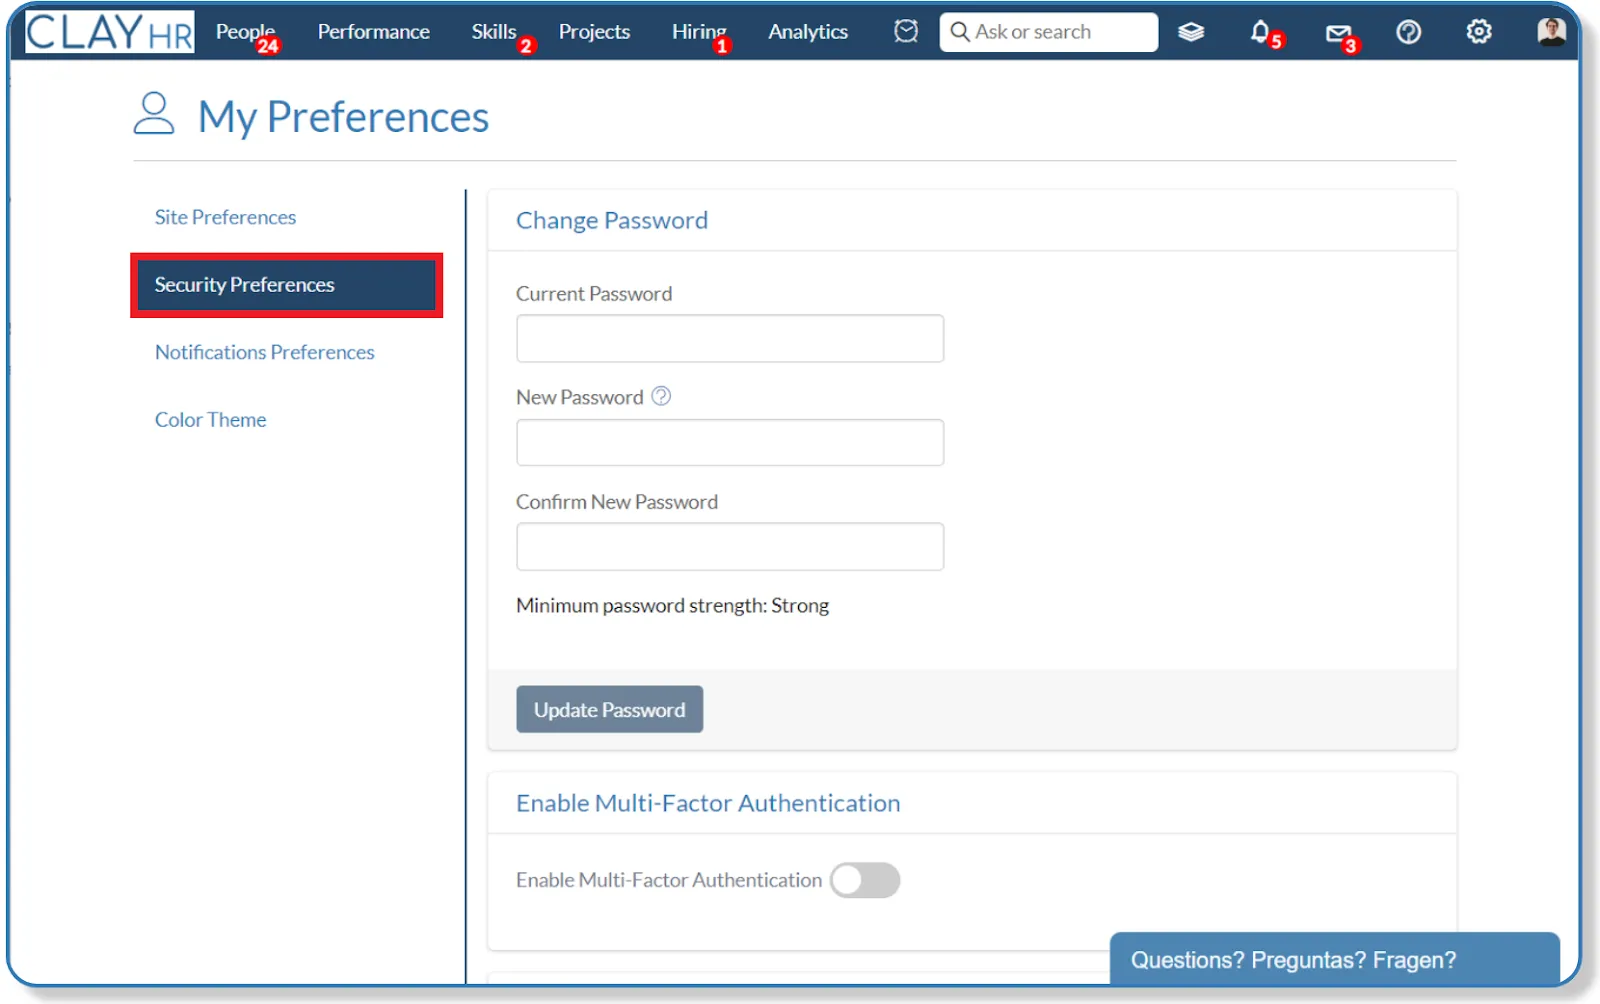
- After logging in, hover over the “Profile” icon and select “My Preferences”.
![](https://cdn.prod.website-files.com/63c50a0cab4c86831ccbeef6/6464a4639ba2e8b8a8fbee44_fa70c9a6.png)
- Select the “Security Preferences” tab, now scroll down to “Create Passcode For ClayHR Kiosk” and set your login kiosk passcode.
![](https://cdn.prod.website-files.com/63c50a0cab4c86831ccbeef6/6464a4624602101c8a177752_9f0419d0.png)
![](https://cdn.prod.website-files.com/63c50a0cab4c86831ccbeef6/6464a4639b4a3303c3919045_4aceb046.png)
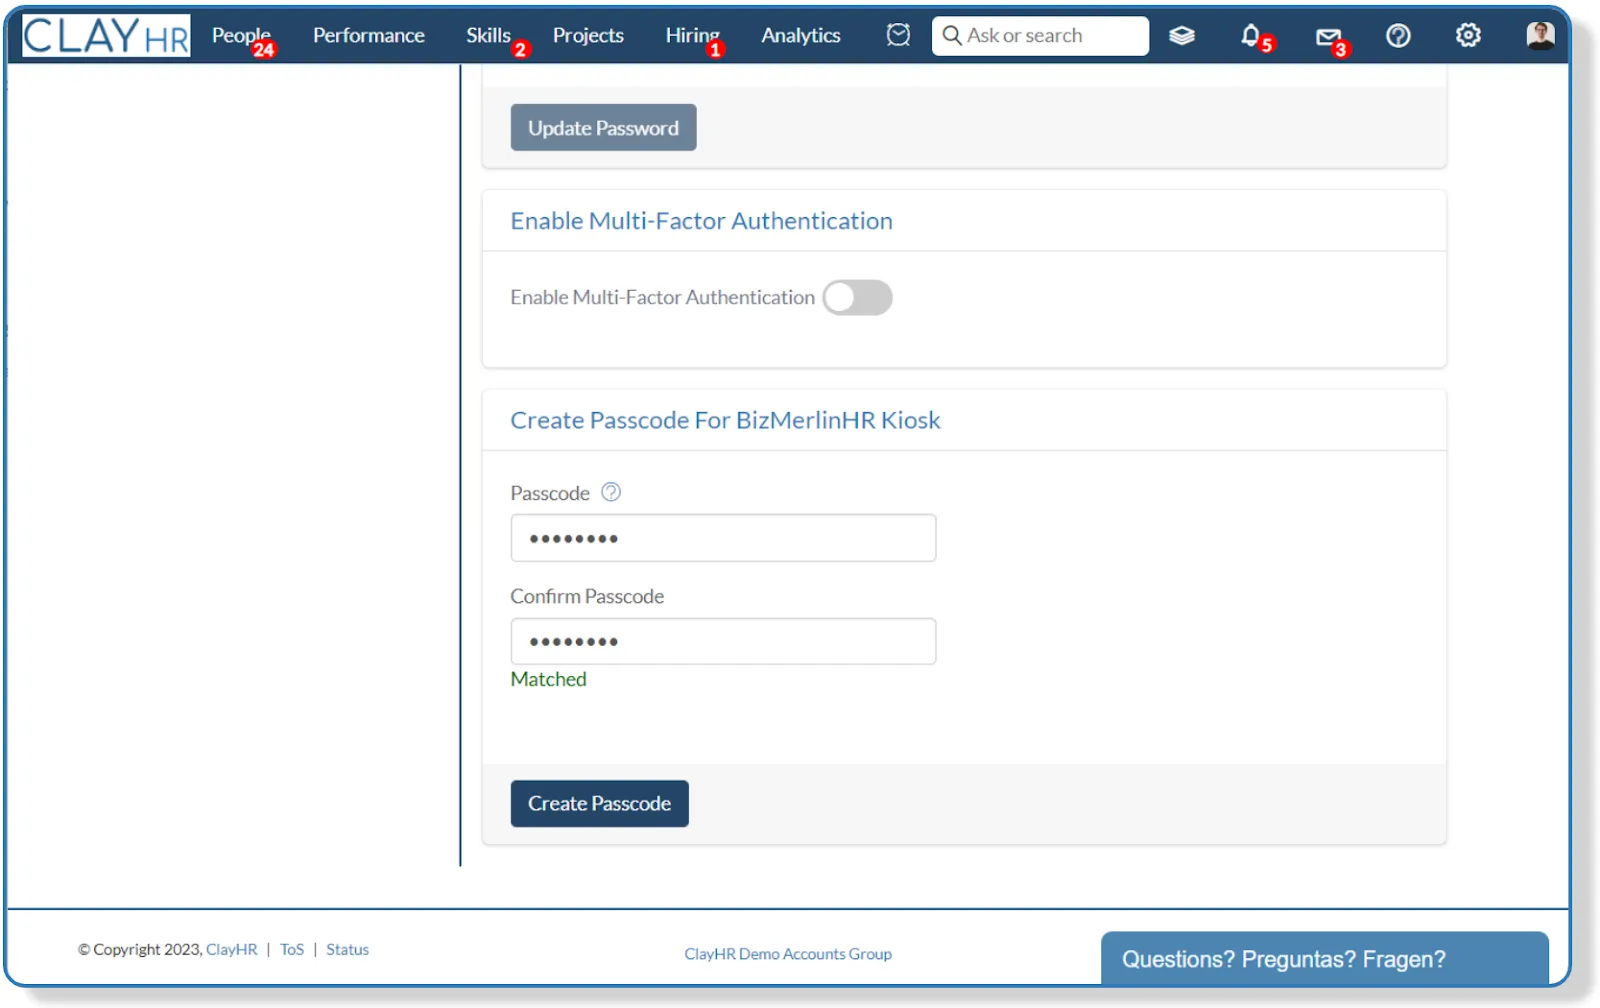
- Now users can use the application as shown below.