How to Use Custom Tables in Forms
How to Use Custom Tables in Dynamic Forms
Custom Tables allow Dynamic Forms to collect and manage multiple records of the same type within a single form. Instead of asking users to complete a fixed number of fields, Custom Tables enable participants to add, edit, or remove rows of information as needed.
This makes them ideal for collecting information that varies in quantity from one employee or request to another, such as certifications, licenses, emergency contacts, dependents, previous employers, assets, professional memberships, training history, or any other repeating data.
Dynamic Forms can also use Custom Tables to automatically update the employee record, ensuring that information collected through the form becomes structured employee data rather than remaining only within the submitted form.
Note: If you're new to Dynamic Forms, we recommend first reading Getting Started with Dynamic Forms, which explains how forms integrate with employee records, workflows, approvals, and business automation.
1. What Are Custom Tables?
A Custom Table is a collection of related records stored within the employee record.
Unlike standard employee fields, which store a single value (such as Job Title or Hire Date), a Custom Table can store multiple entries of the same type.
For example, an employee may have:
- Multiple professional certifications
- Several emergency contacts
- Numerous training courses
- Multiple previous employers
- Various company-issued assets
Each of these records becomes a separate row within the Custom Table.
2. Why Use Custom Tables in Forms?
Using Custom Tables allows forms to collect an unlimited number of records without requiring administrators to create duplicate fields.
Instead of asking users to complete:
- Certification 1
- Certification 2
- Certification 3
Users simply add as many certifications as necessary.
This creates a much cleaner user experience while making information easier to report on and maintain over time.
3. How Custom Tables Work in Dynamic Forms
When designing a Dynamic Form, administrators can include a Custom Table as one of the form components.
During form completion, users can:
- Add new rows
- Edit existing rows (when permitted)
- Remove rows (when permitted)
- Enter multiple records within the same form
Each row contains the fields configured for that Custom Table.
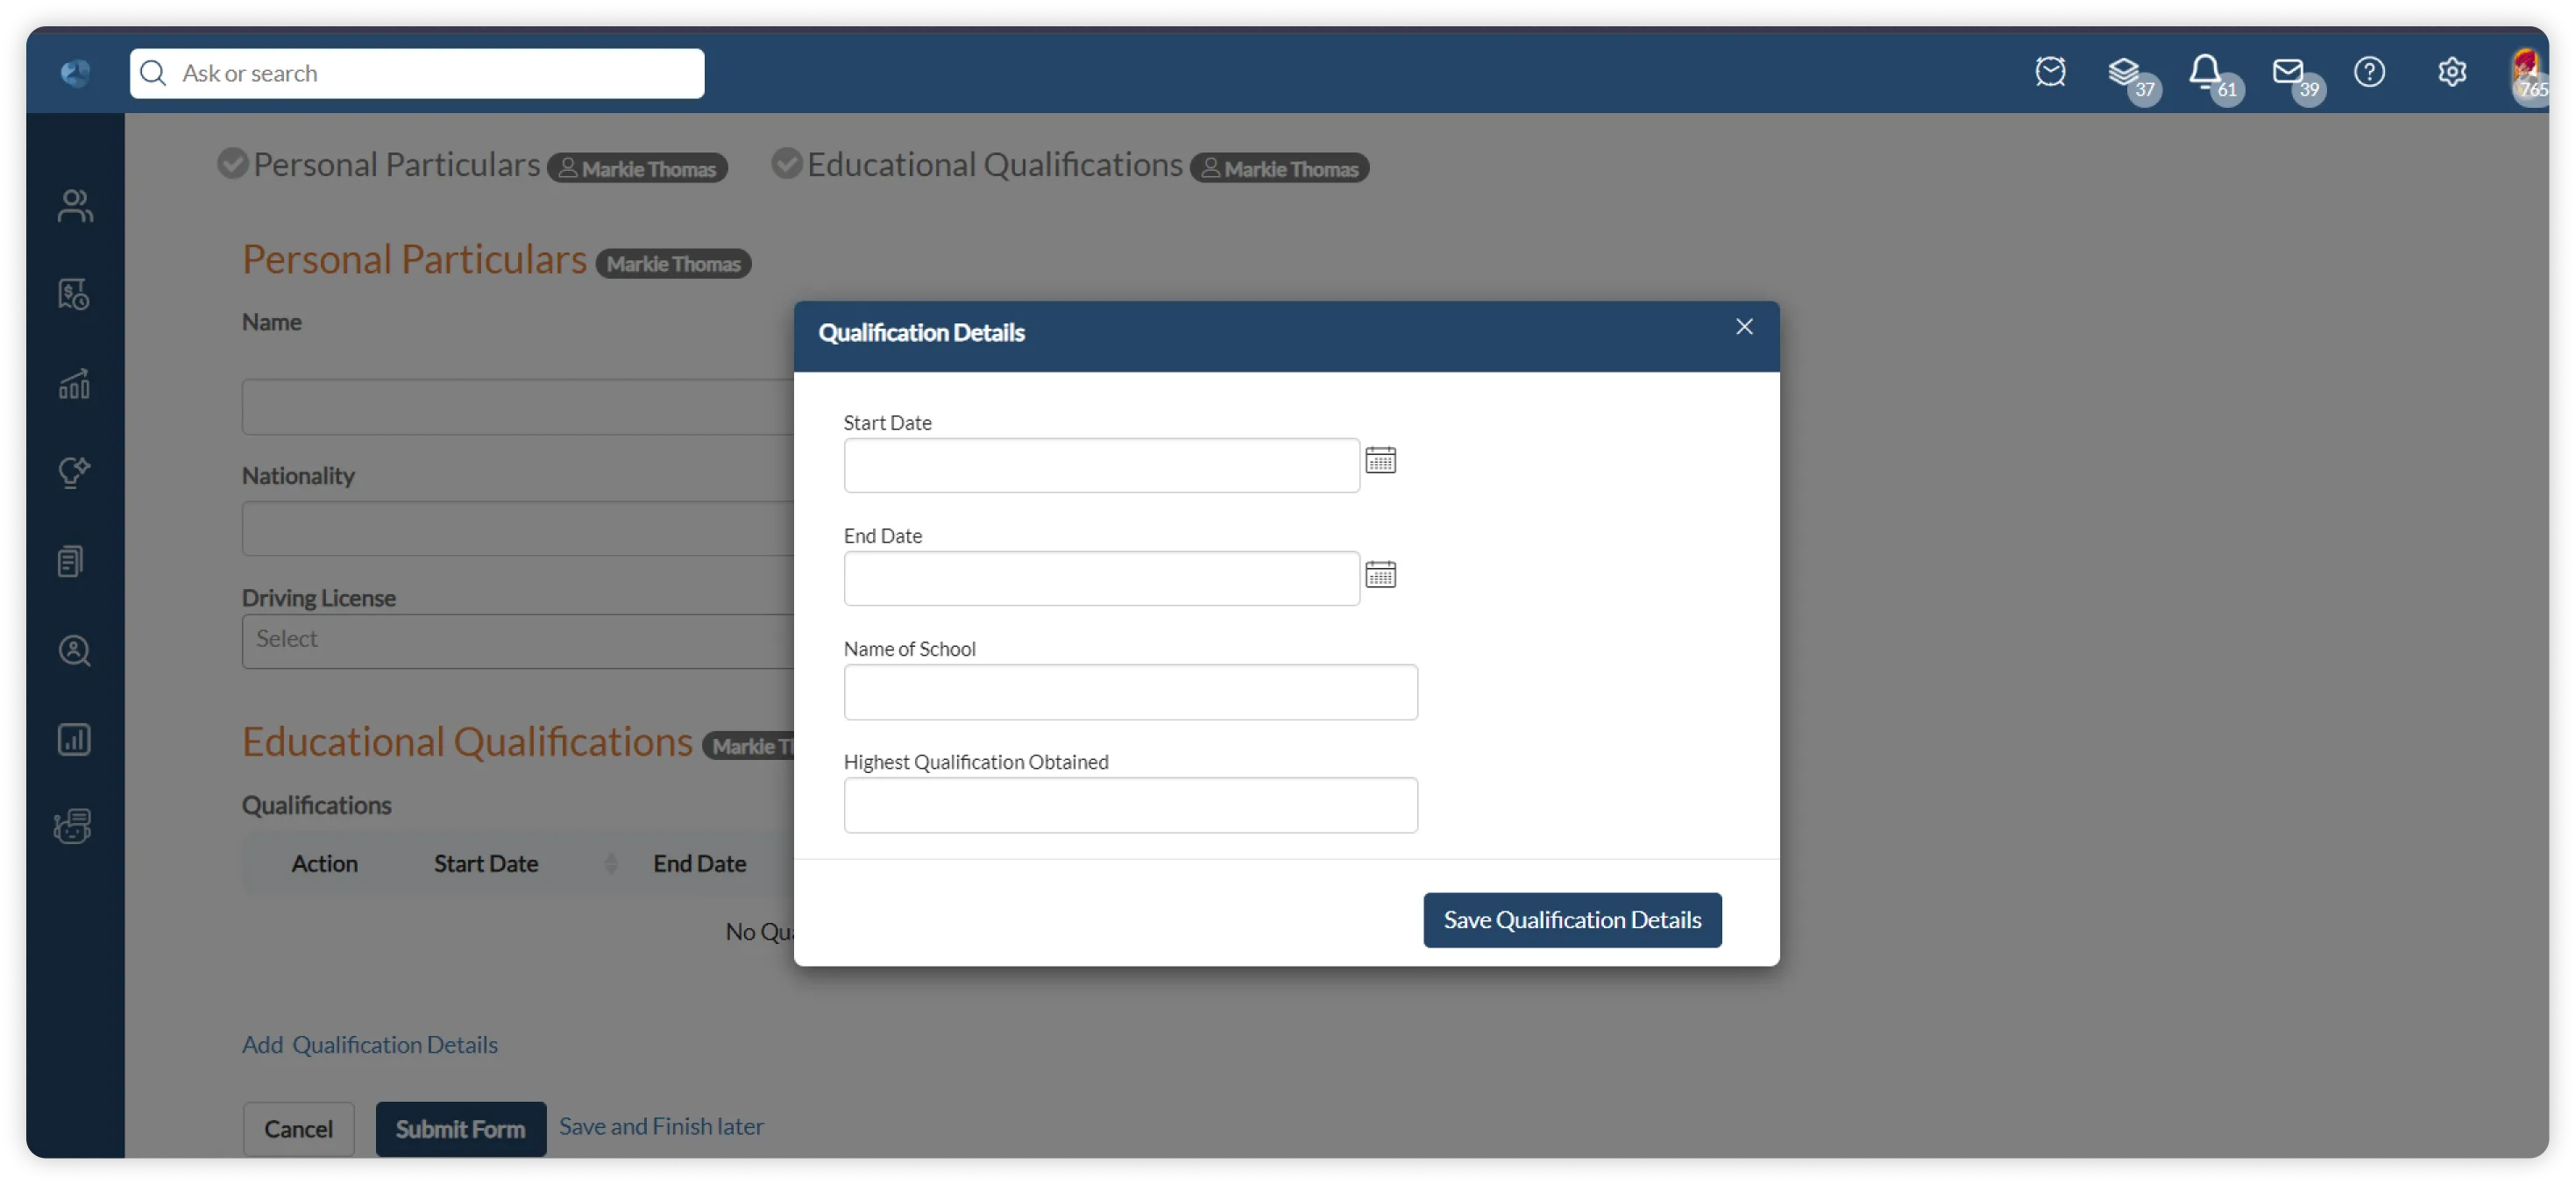
For example, a Certifications table might include:
- Certification Name
- Issuing Organization
- Issue Date
- Expiration Date
- Certification Number
- Attachment
Users simply add one row for each certification they wish to provide.
4. Updating Employee Records
One of the most powerful capabilities of Dynamic Forms is their ability to write information directly into employee records.
When configured accordingly, information entered into a Custom Table can automatically populate the corresponding Custom Table within the employee profile.
This means the submitted information becomes part of the employee's structured data and is immediately available throughout ClayHR.
The same information can then be used in:
- Employee Profiles
- Reports
- Dashboards
- Workflows
- Performance Reviews
- Talent Management
- Compliance processes
- Other Dynamic Forms
This "collect once, use everywhere" approach eliminates duplicate data entry while maintaining a single source of truth for employee information.
5. Common Business Uses
Custom Tables are commonly used to collect information such as:
- Professional memberships in industry associations
- Customer or client accounts assigned to an employee
- Product certifications specific to the organization's products
- Software application access records
- Company-issued uniforms and sizes
- Parking permits and assigned parking spaces
- Building, office, or laboratory access authorizations
- Security clearances
- Union memberships and local chapters
- Patents, publications, or research projects
- Speaking engagements or conference participation
- Internal committee or board memberships
- Volunteer activities sponsored by the organization
- Mentoring relationships (mentor/mentee assignments)
- Business travel preferences
- Remote work equipment inventories
- Professional awards or internal recognitions
- Authorized company vehicles
- Cost center allocations
- Special workplace accommodations (where appropriate to manage administratively)
Because users can add as many records as needed, Custom Tables are particularly useful whenever the number of entries varies from one employee to another.
6. Best Practices
When using Custom Tables in Dynamic Forms, consider the following recommendations:
- Use Custom Tables whenever users may need to enter multiple records of the same type.
- Avoid creating repeated groups of identical fields within a form.
- Keep each table focused on a single type of information.
- Include only the columns that are necessary for the business process.
- Configure forms to update employee records whenever the information should become part of the employee profile.
- Use standard employee fields instead of Custom Tables when only a single value is required.
Following these practices helps create forms that are easier to complete, maintain, and report on.
Related Articles
- Getting Started with Dynamic Forms
- Designing Dynamic Forms
- Smart Data Integration
- Understanding Dynamic Form Fields
- Working with Employee Custom Fields
- Working with Custom Tables
--------
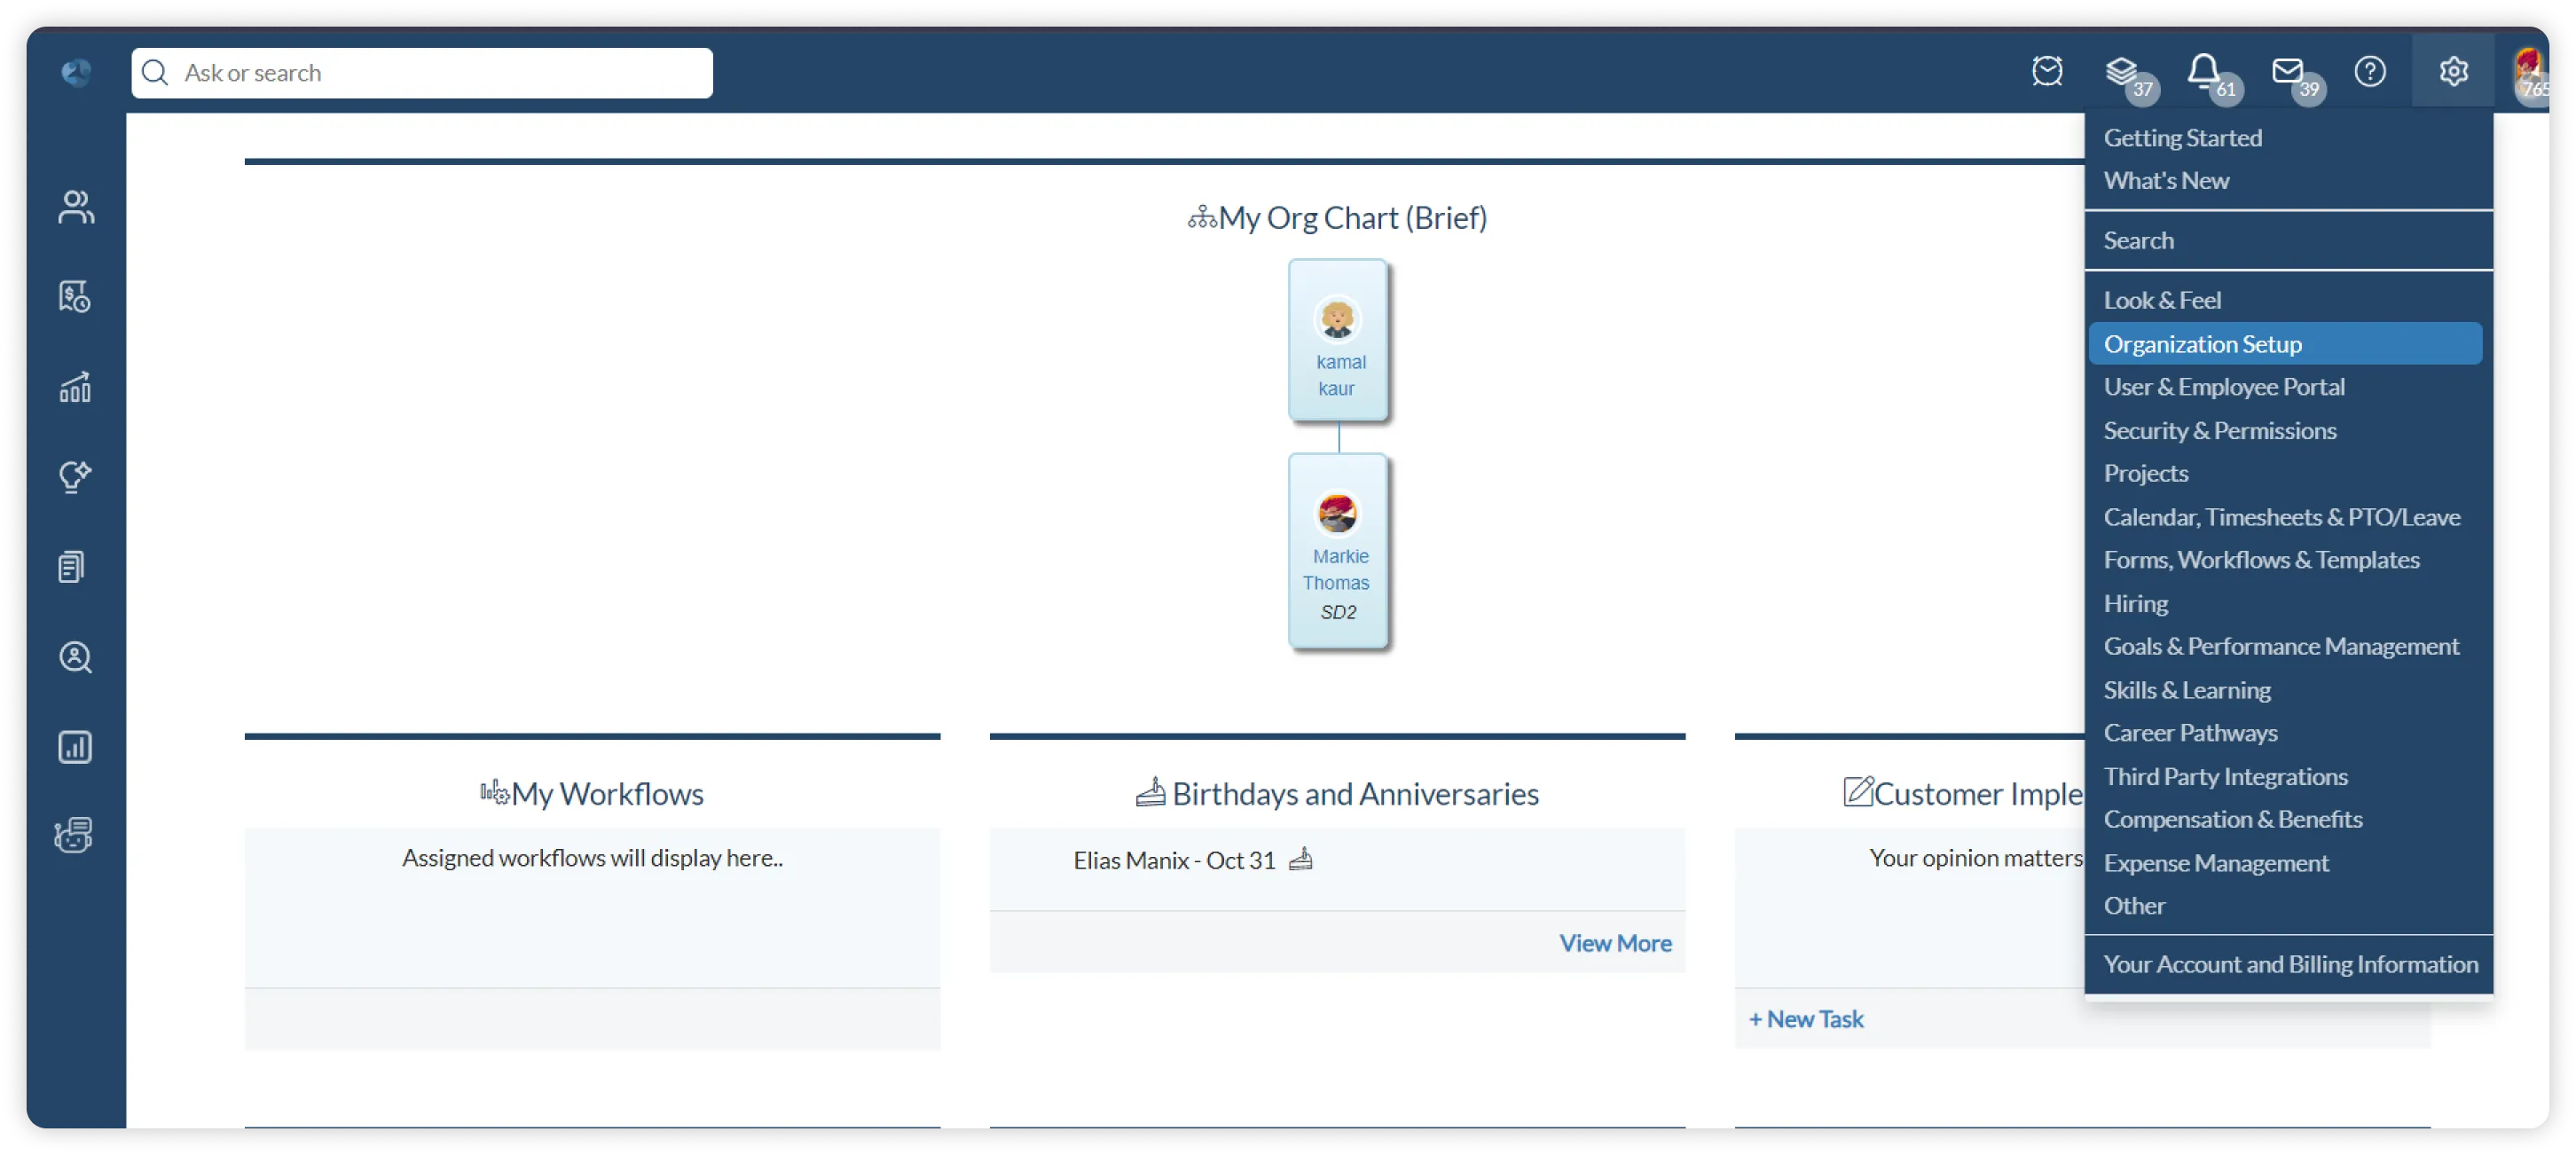
- Go to the gear icon, select ‘Organization Setup’, and choose ‘Custom Tables’.
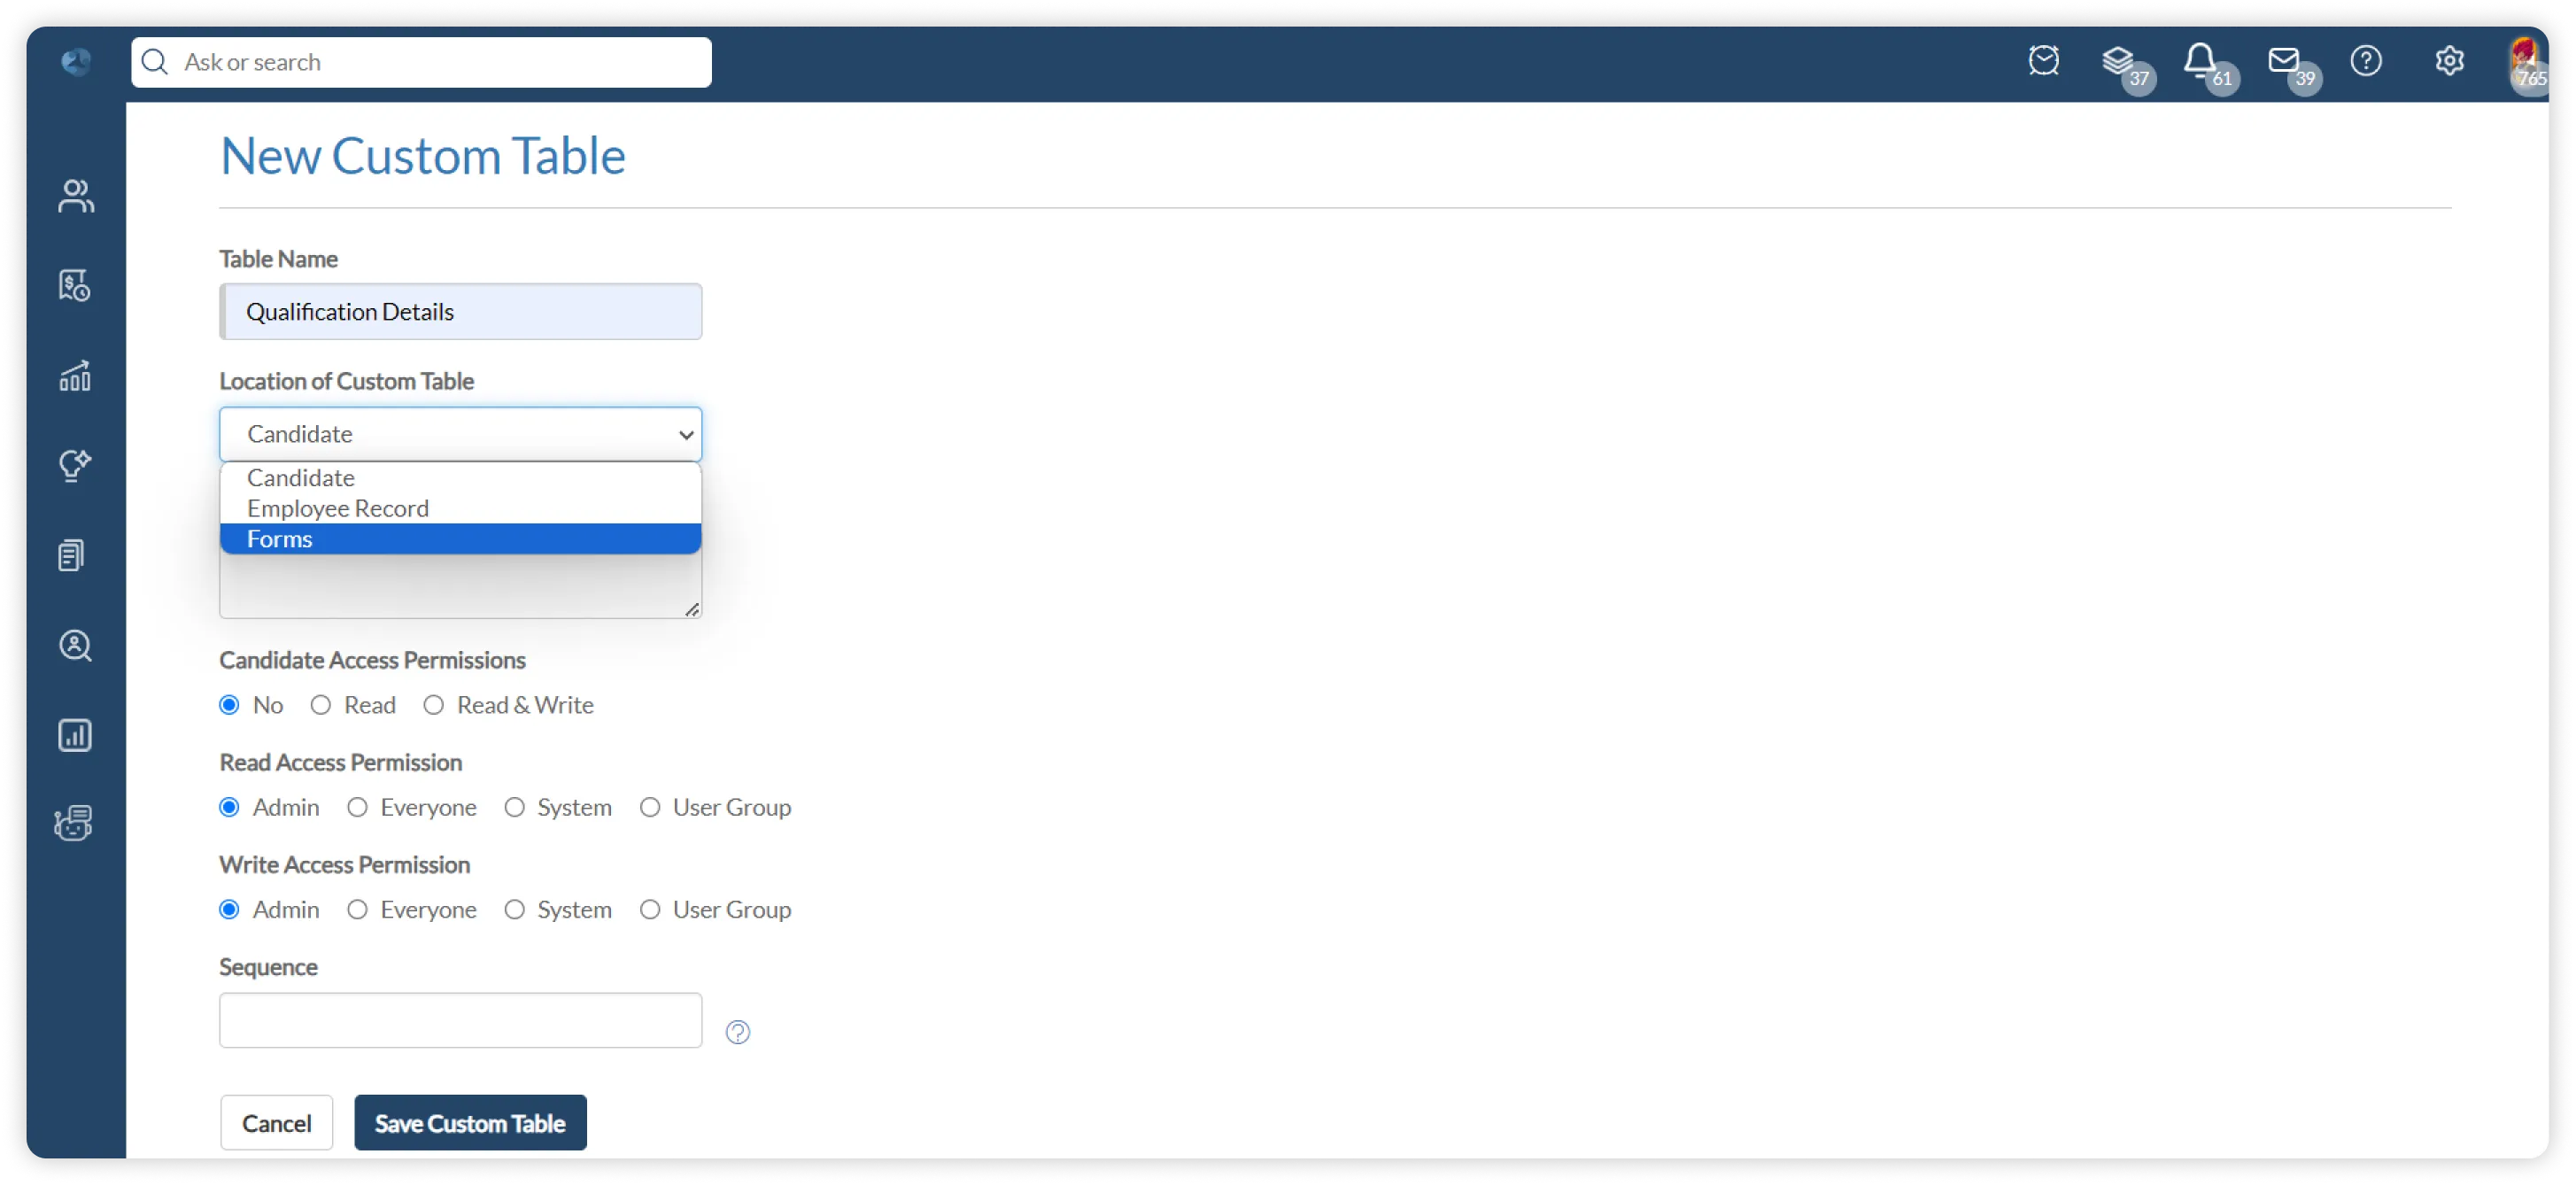
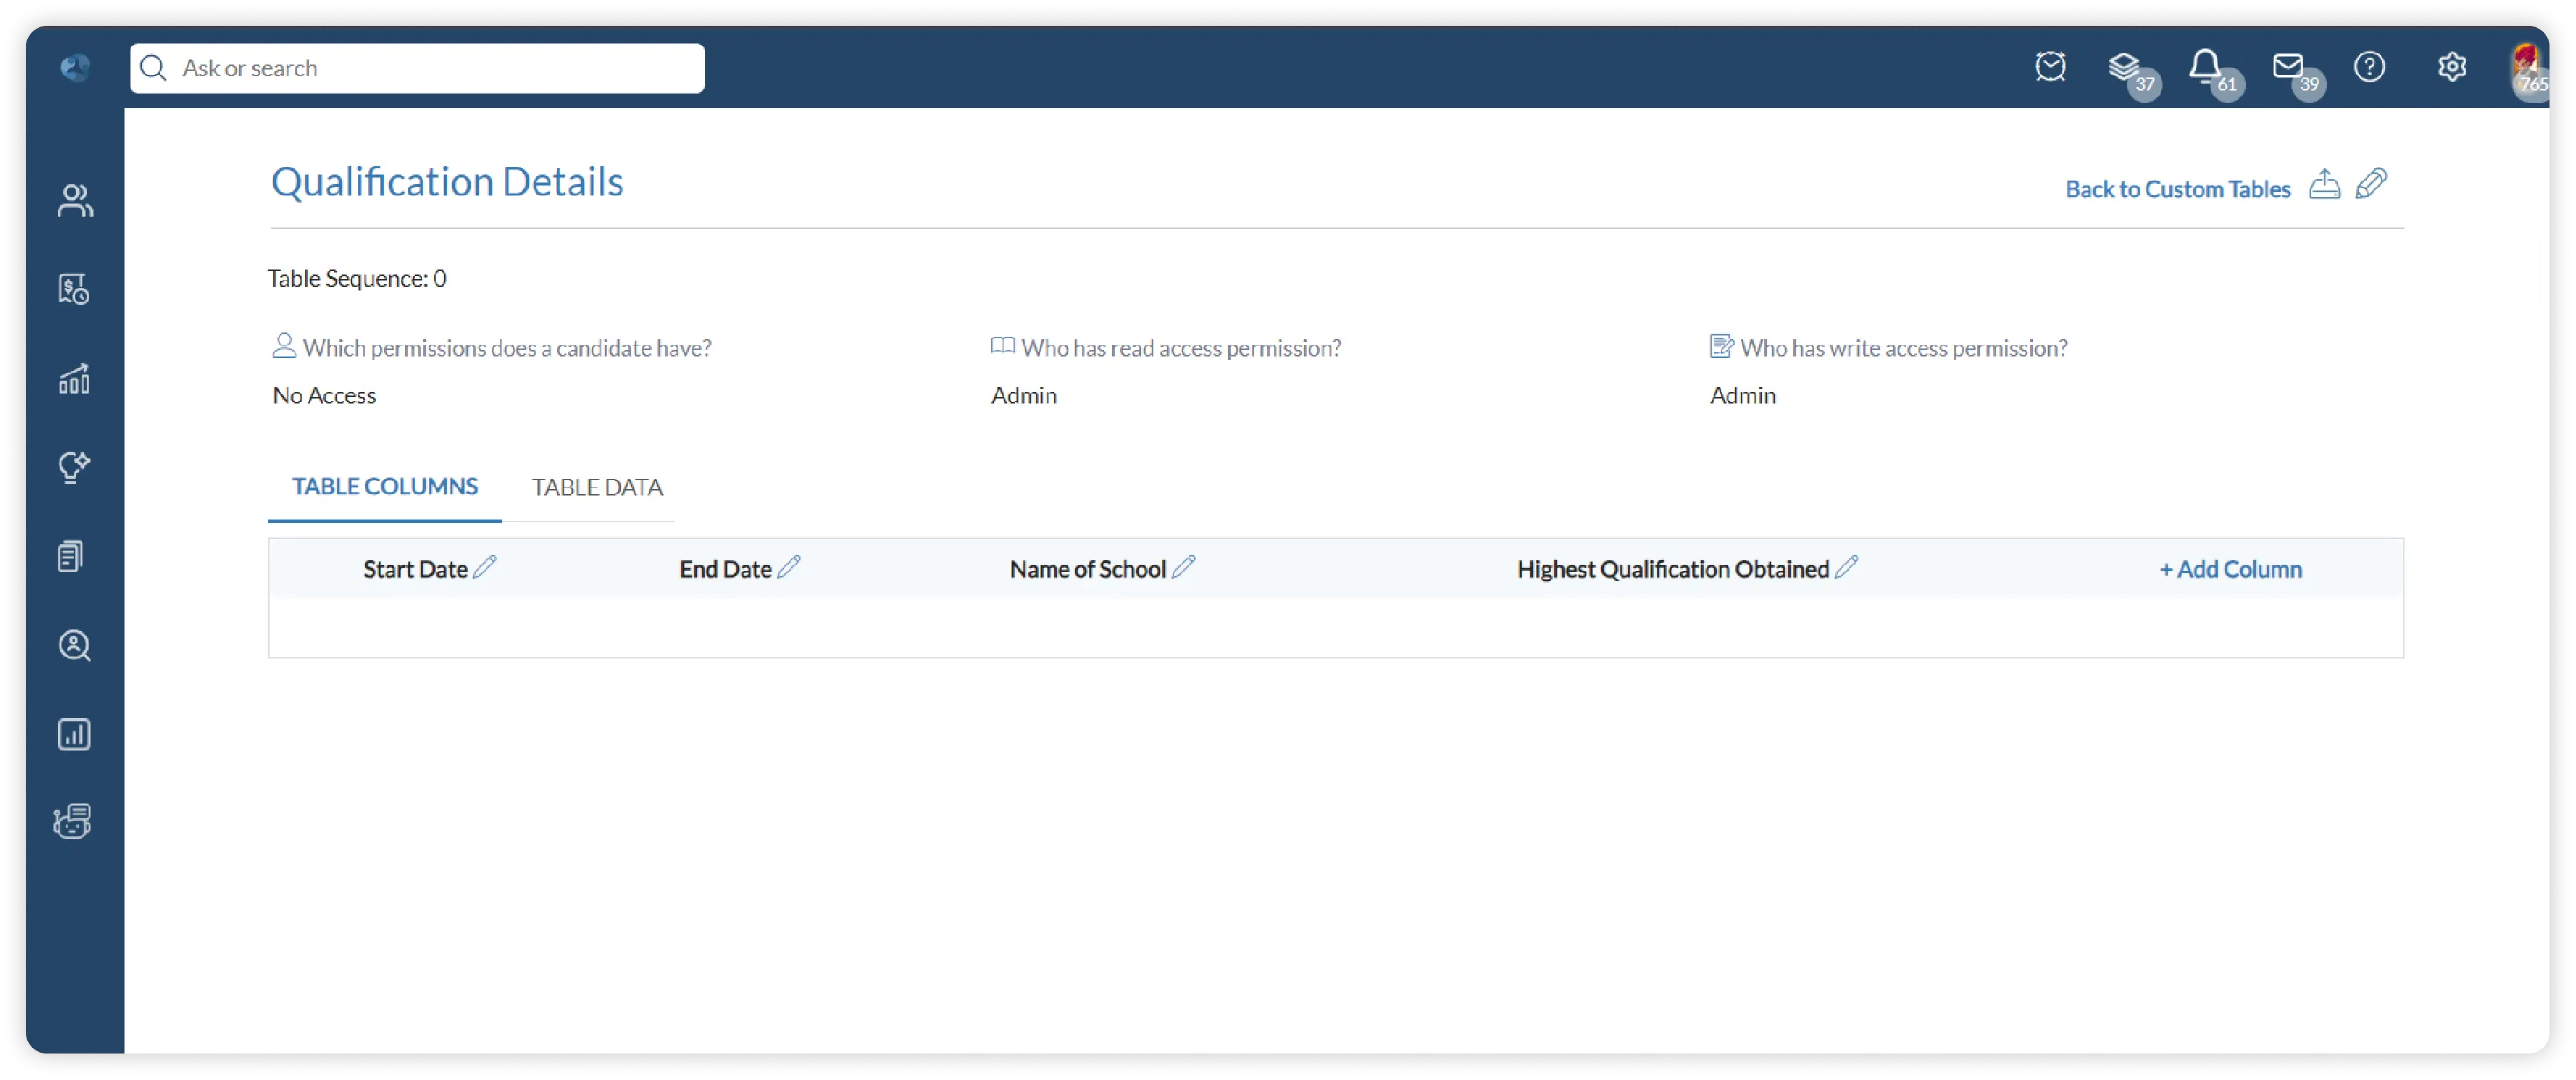
- Click on ‘New Custom Table’ to create a new custom table of type ‘FORM’.
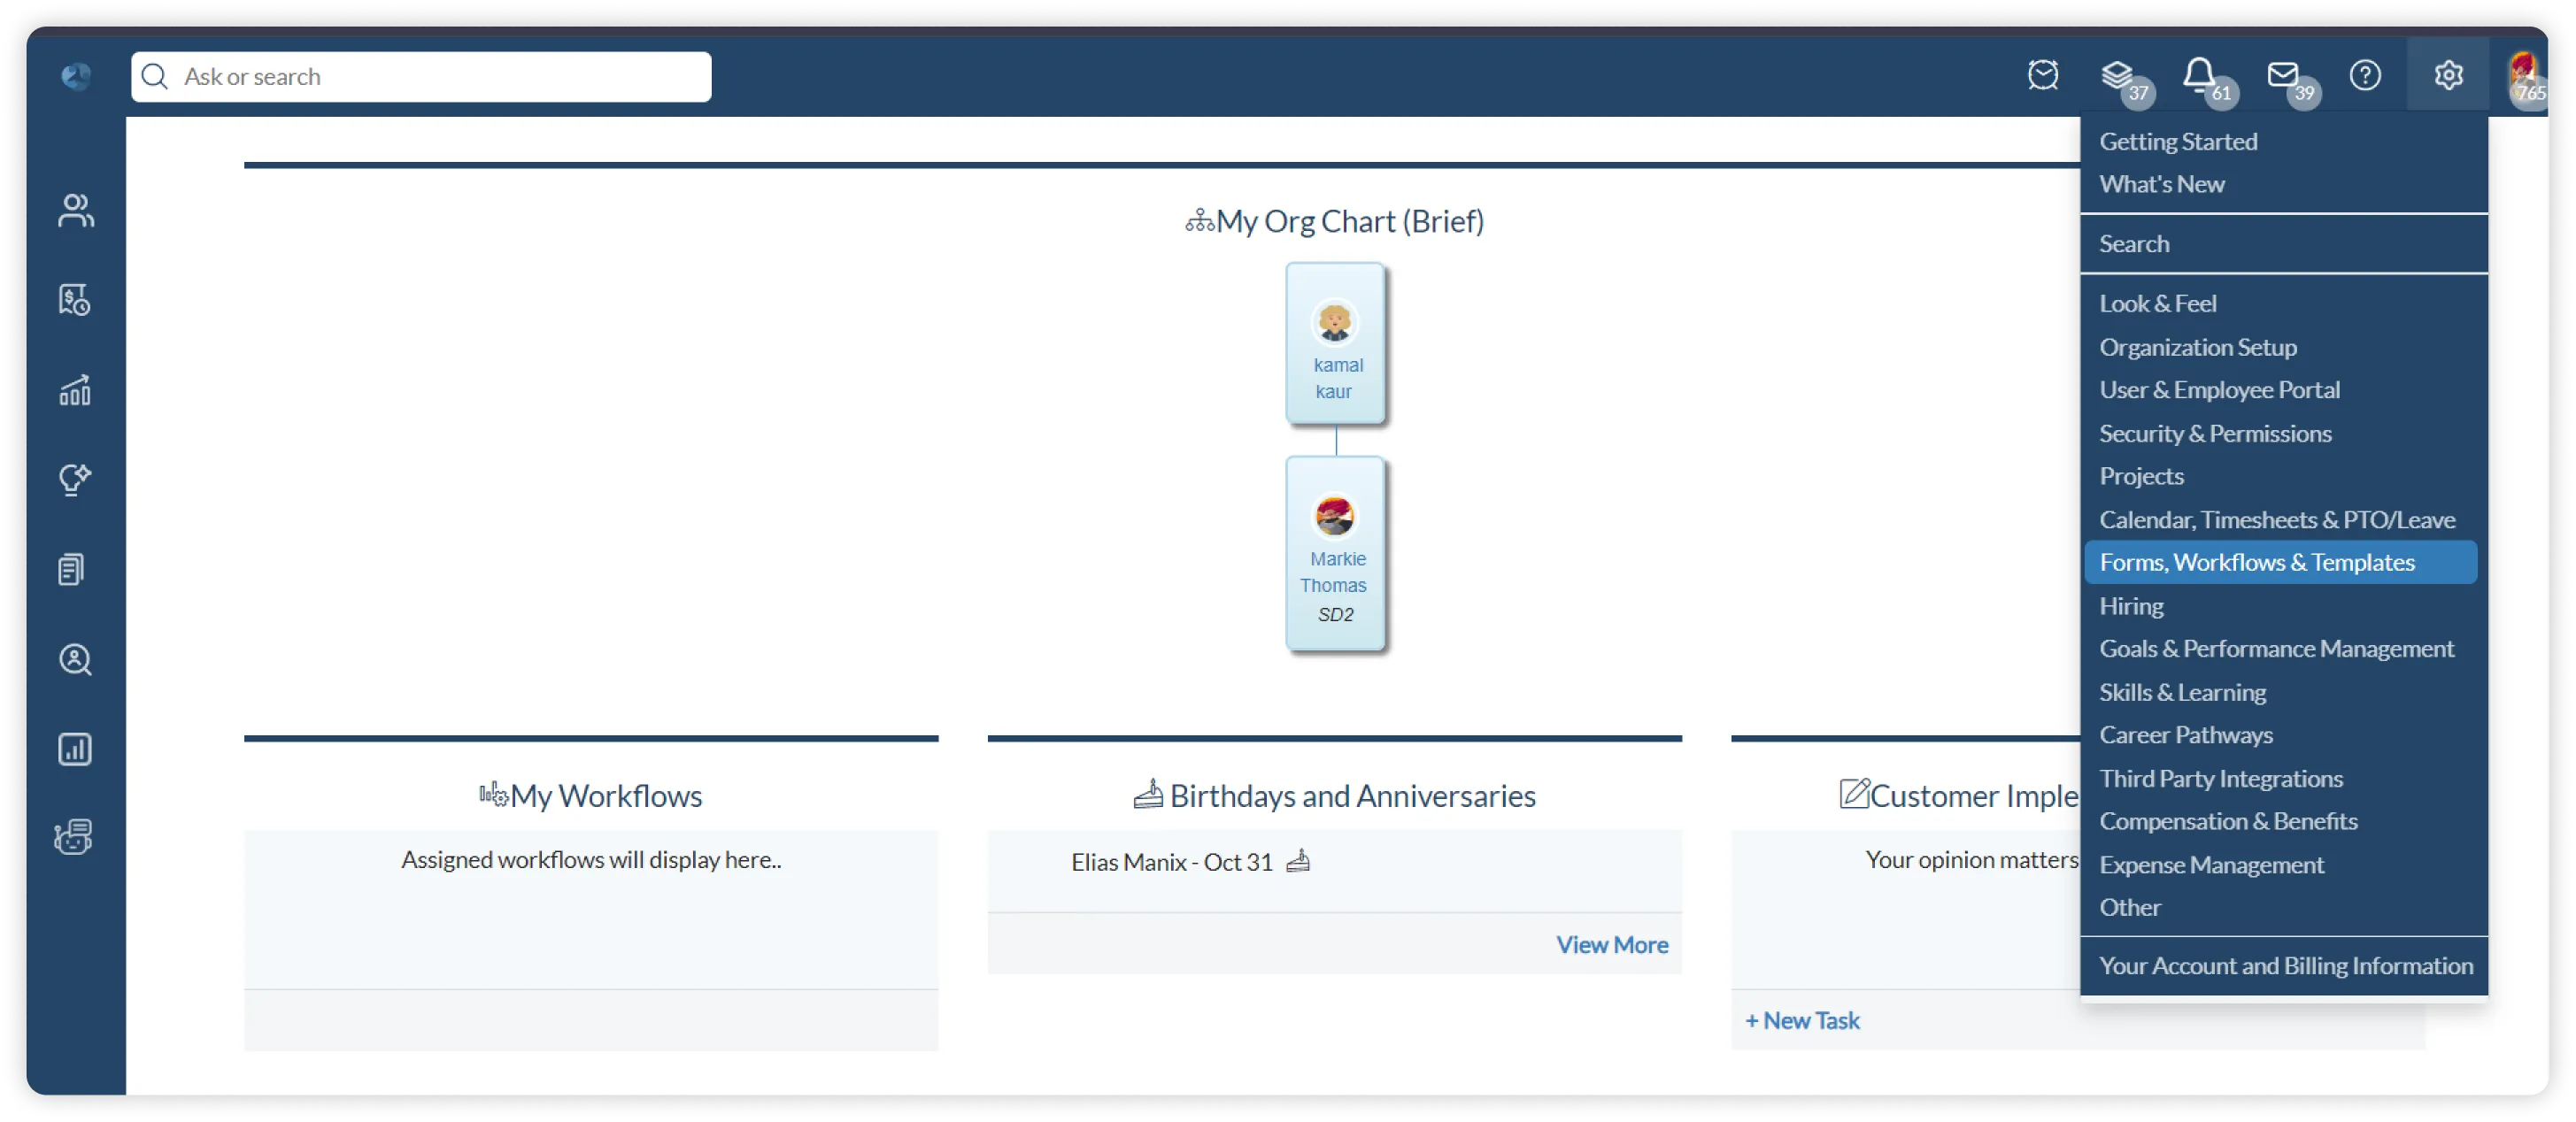
- Select ‘Forms, Workflows & Templates’, and Select ‘Forms’.
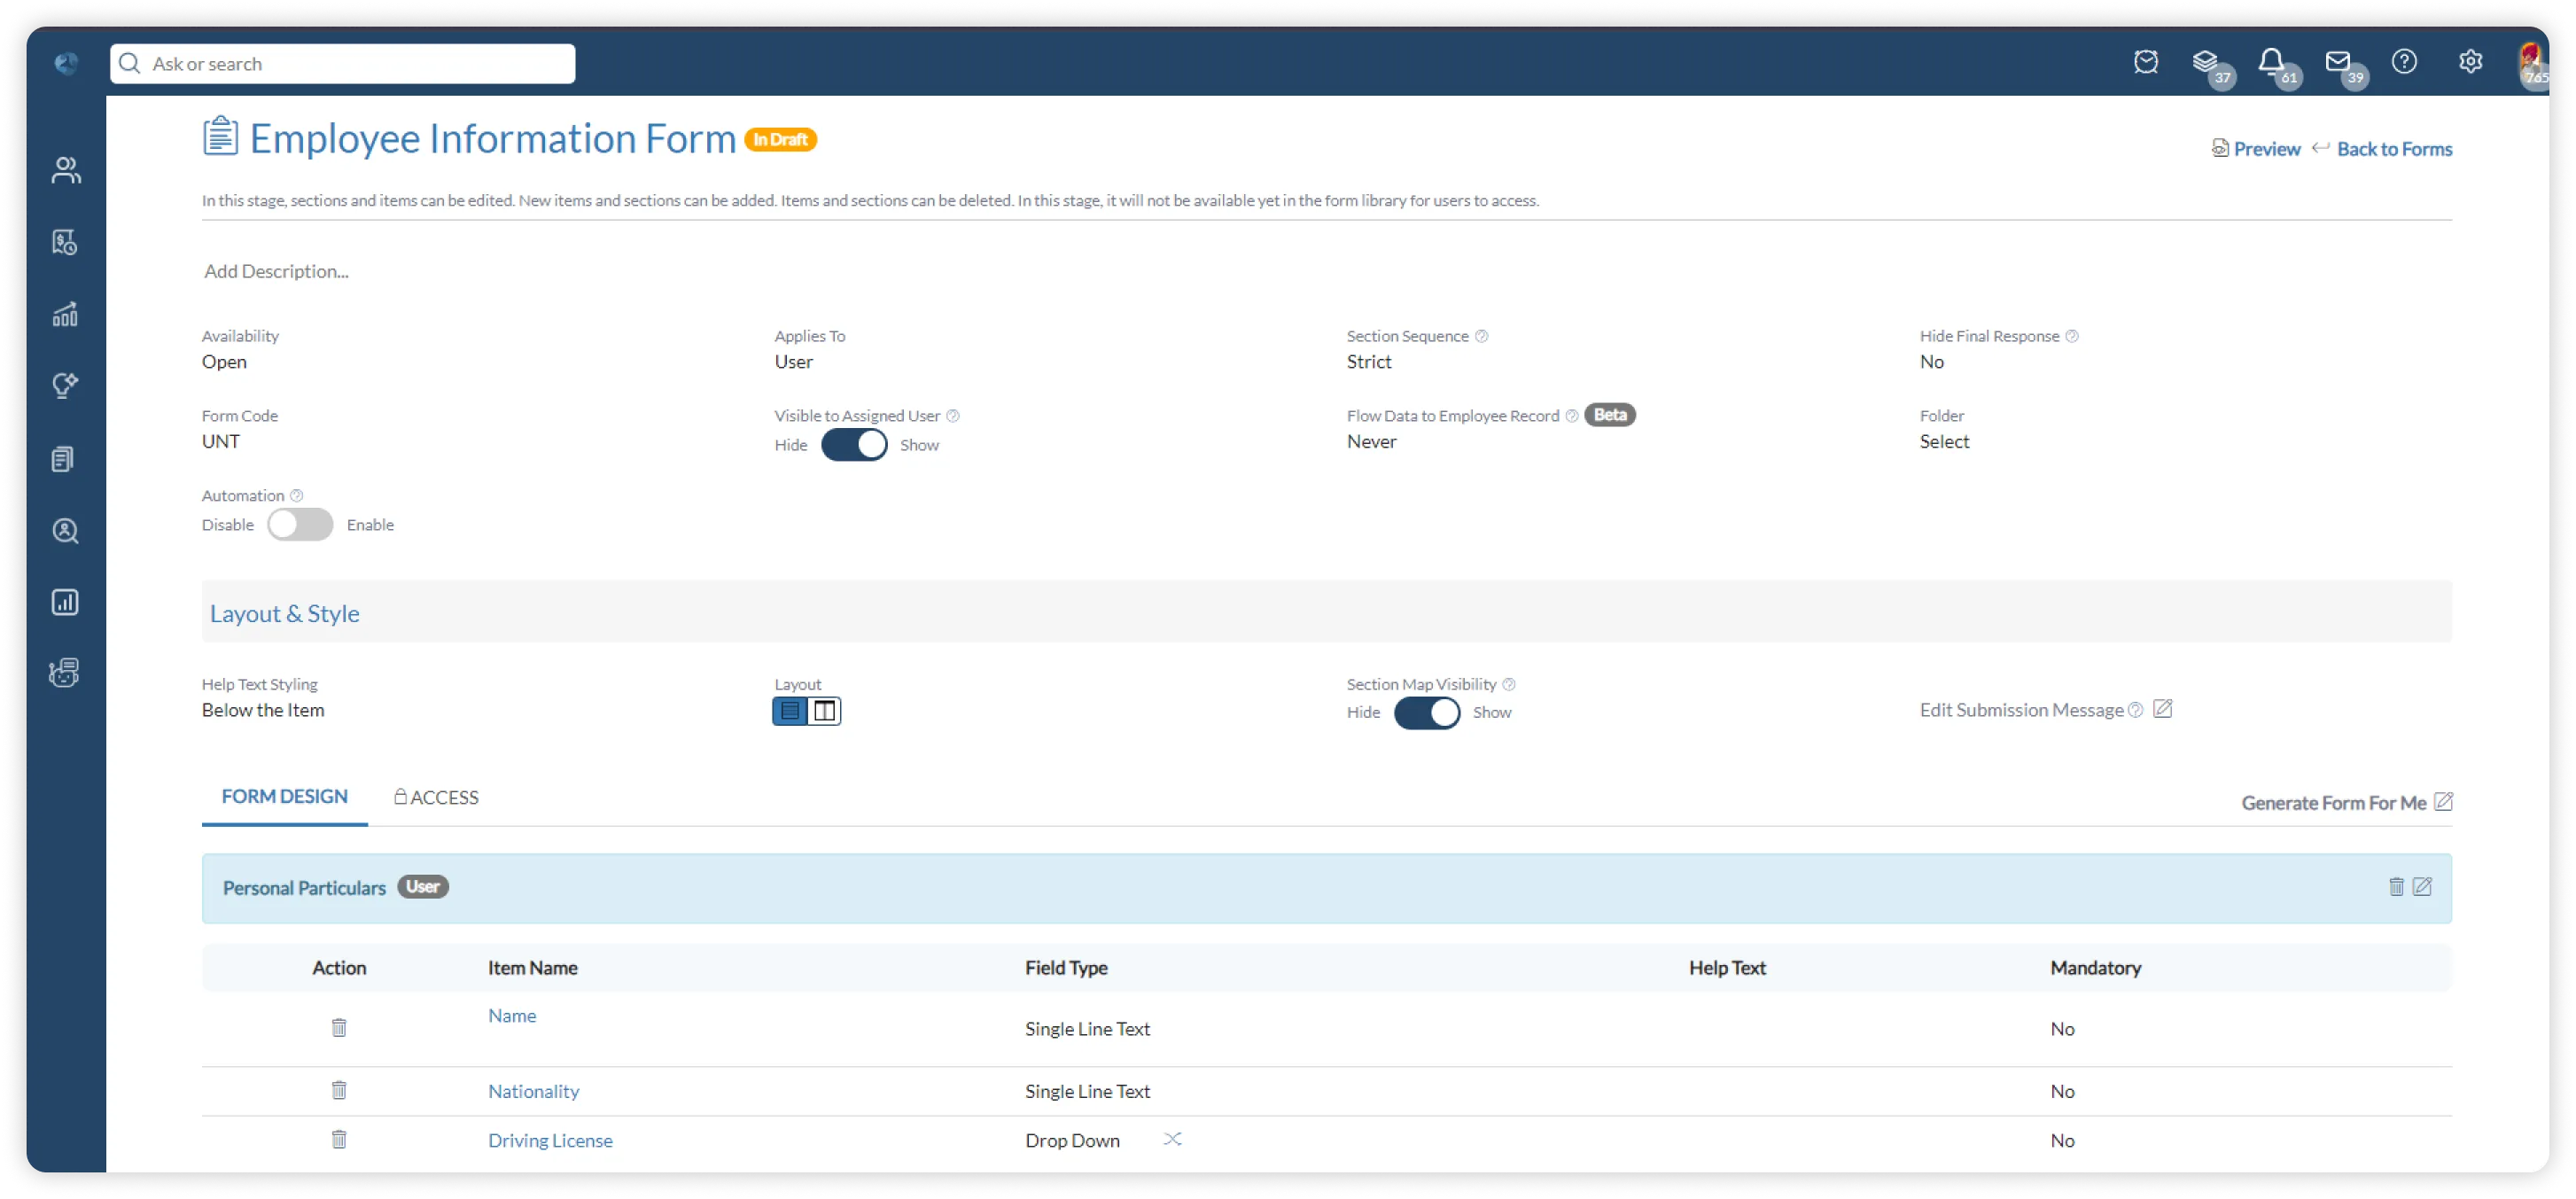
- To create a new form, click on “New Forms’’.
- You can add sections to the form and also add different form items under section
- While creating the item, select the field type as ‘Custom Table’ to add in your form.
- Select the form type as the custom table to include in the form.
- Click on the ‘Publish Form’ button, to publish the form.
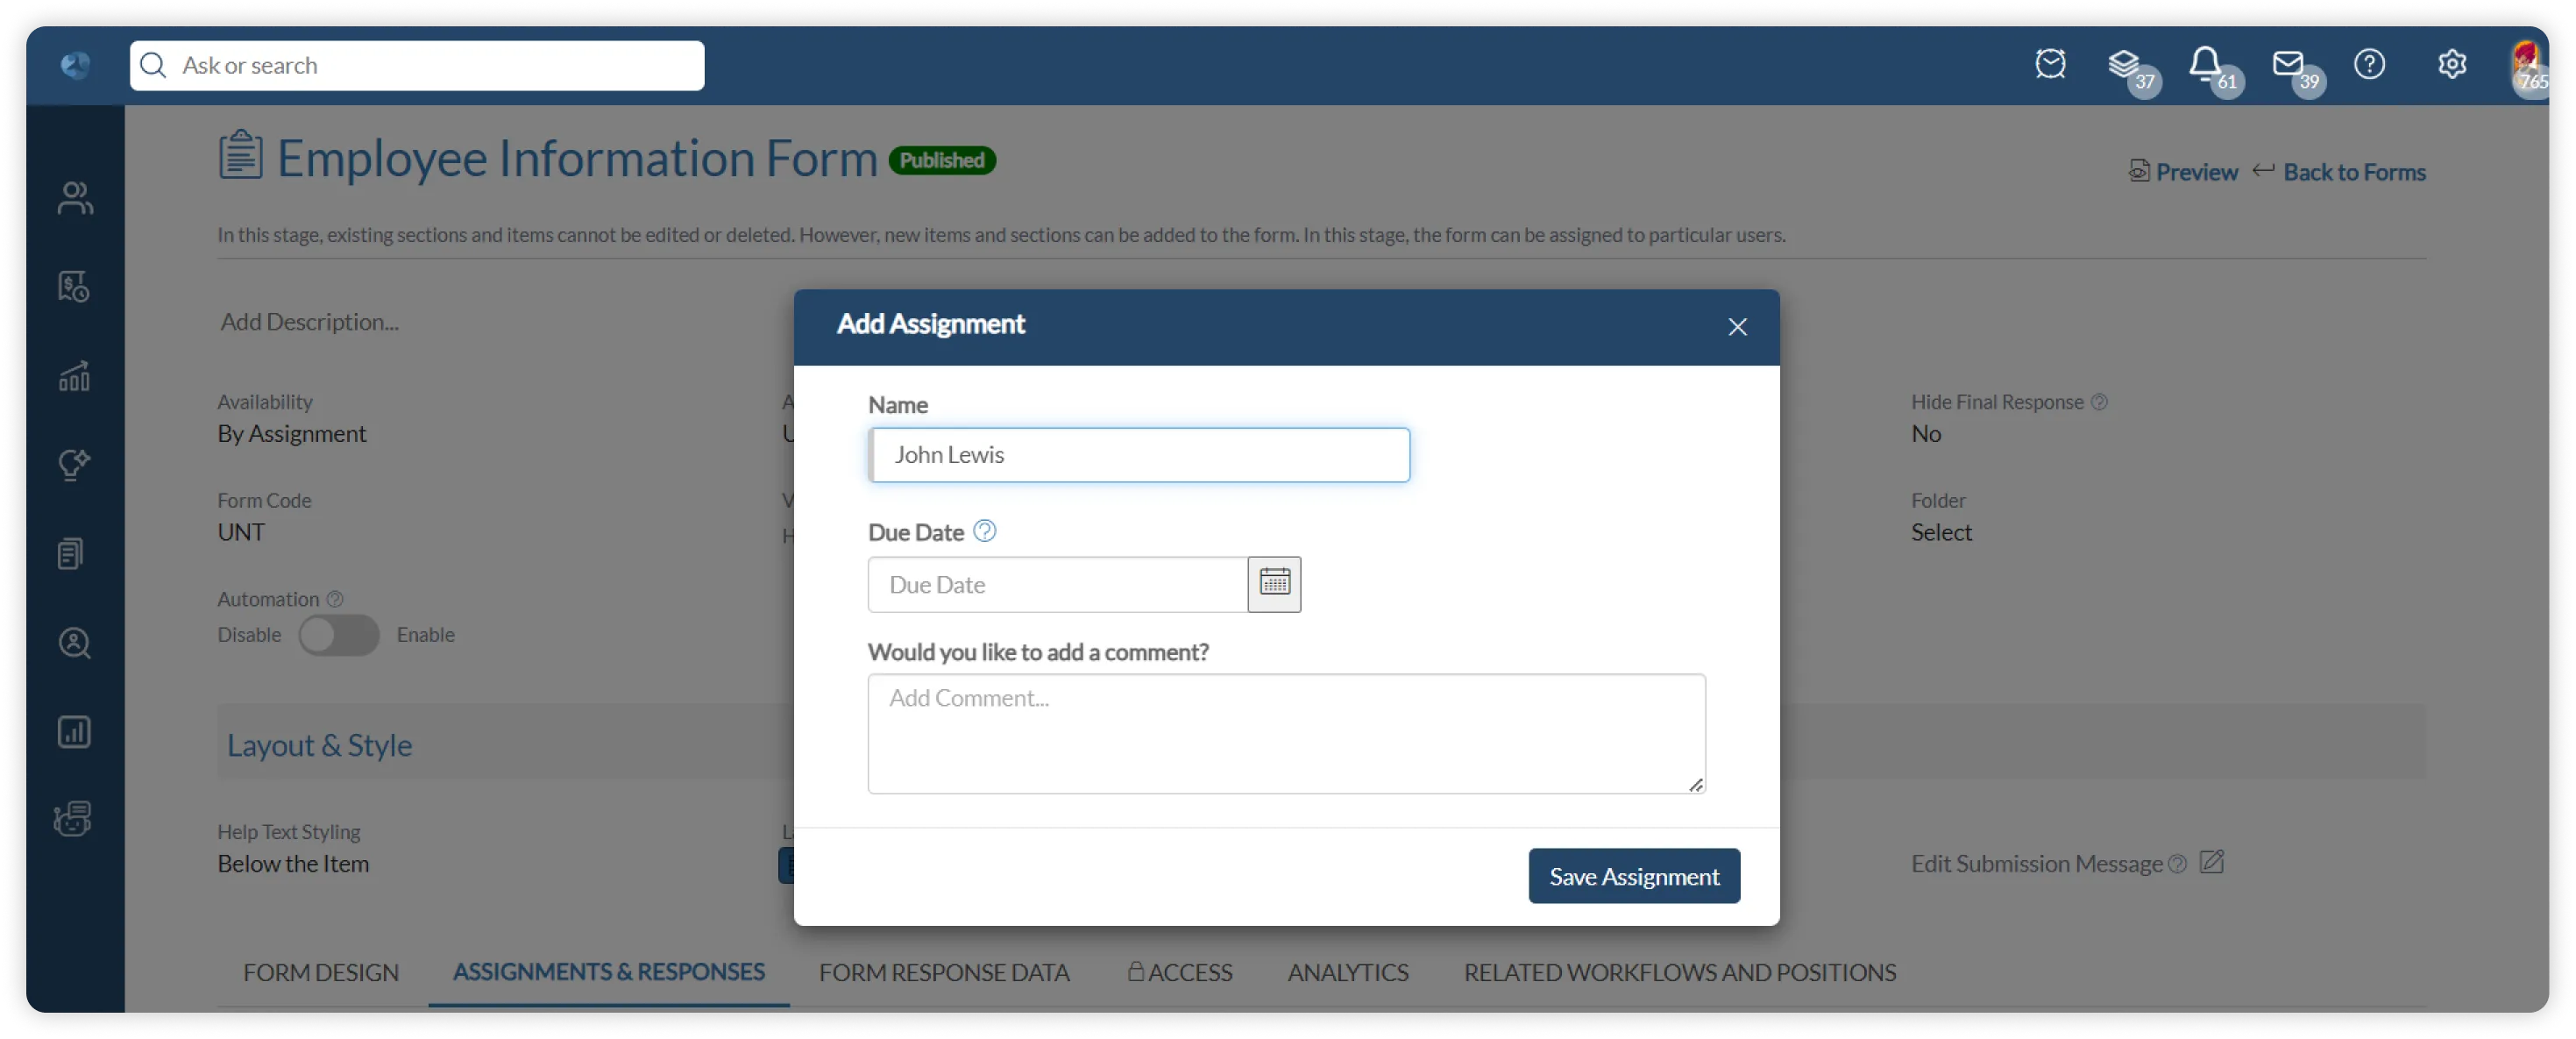
- Now assign the form to the user.
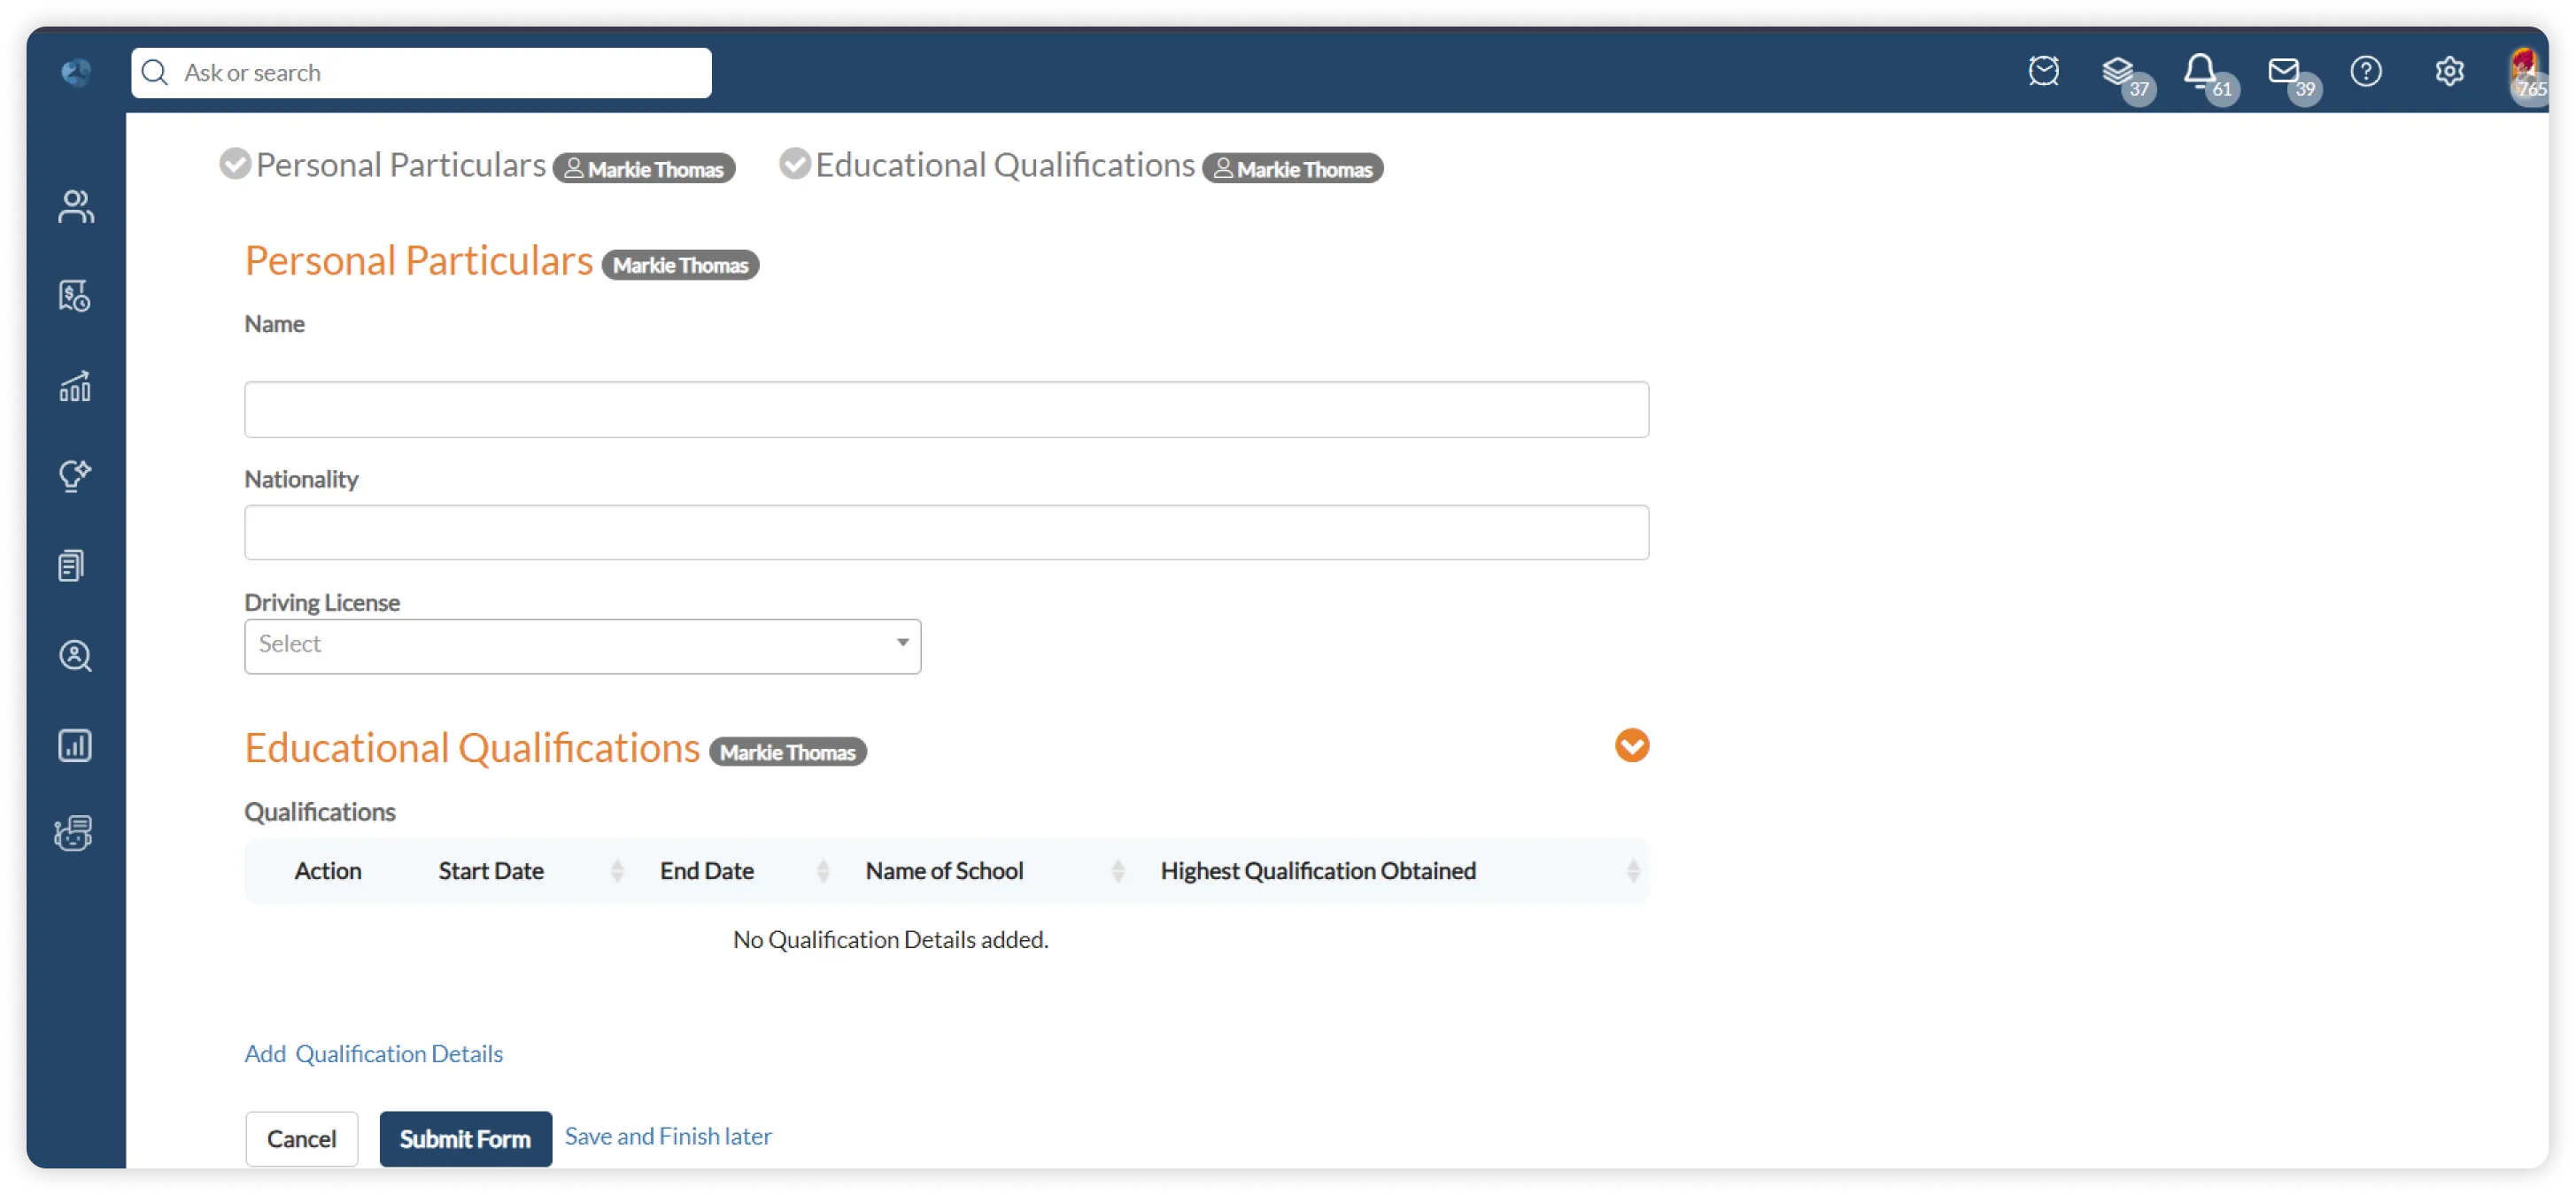
- Fill in the values and submit the form.
1. Go to the gear icon, select ‘Organization Setup’, and choose ‘Custom Tables’.

- Click on ‘New Custom Table’ to create a new custom table of type ‘FORM’.
- Then, go to the gear icon, select ‘Forms, Workflows & Templates’, and Select ‘Forms’.
- To create a new form, click on “New Forms’’.

- You can add sections to the form and also add different form items under sections.
- While creating the item, select the field type as ‘Custom Table’ to add in your form.
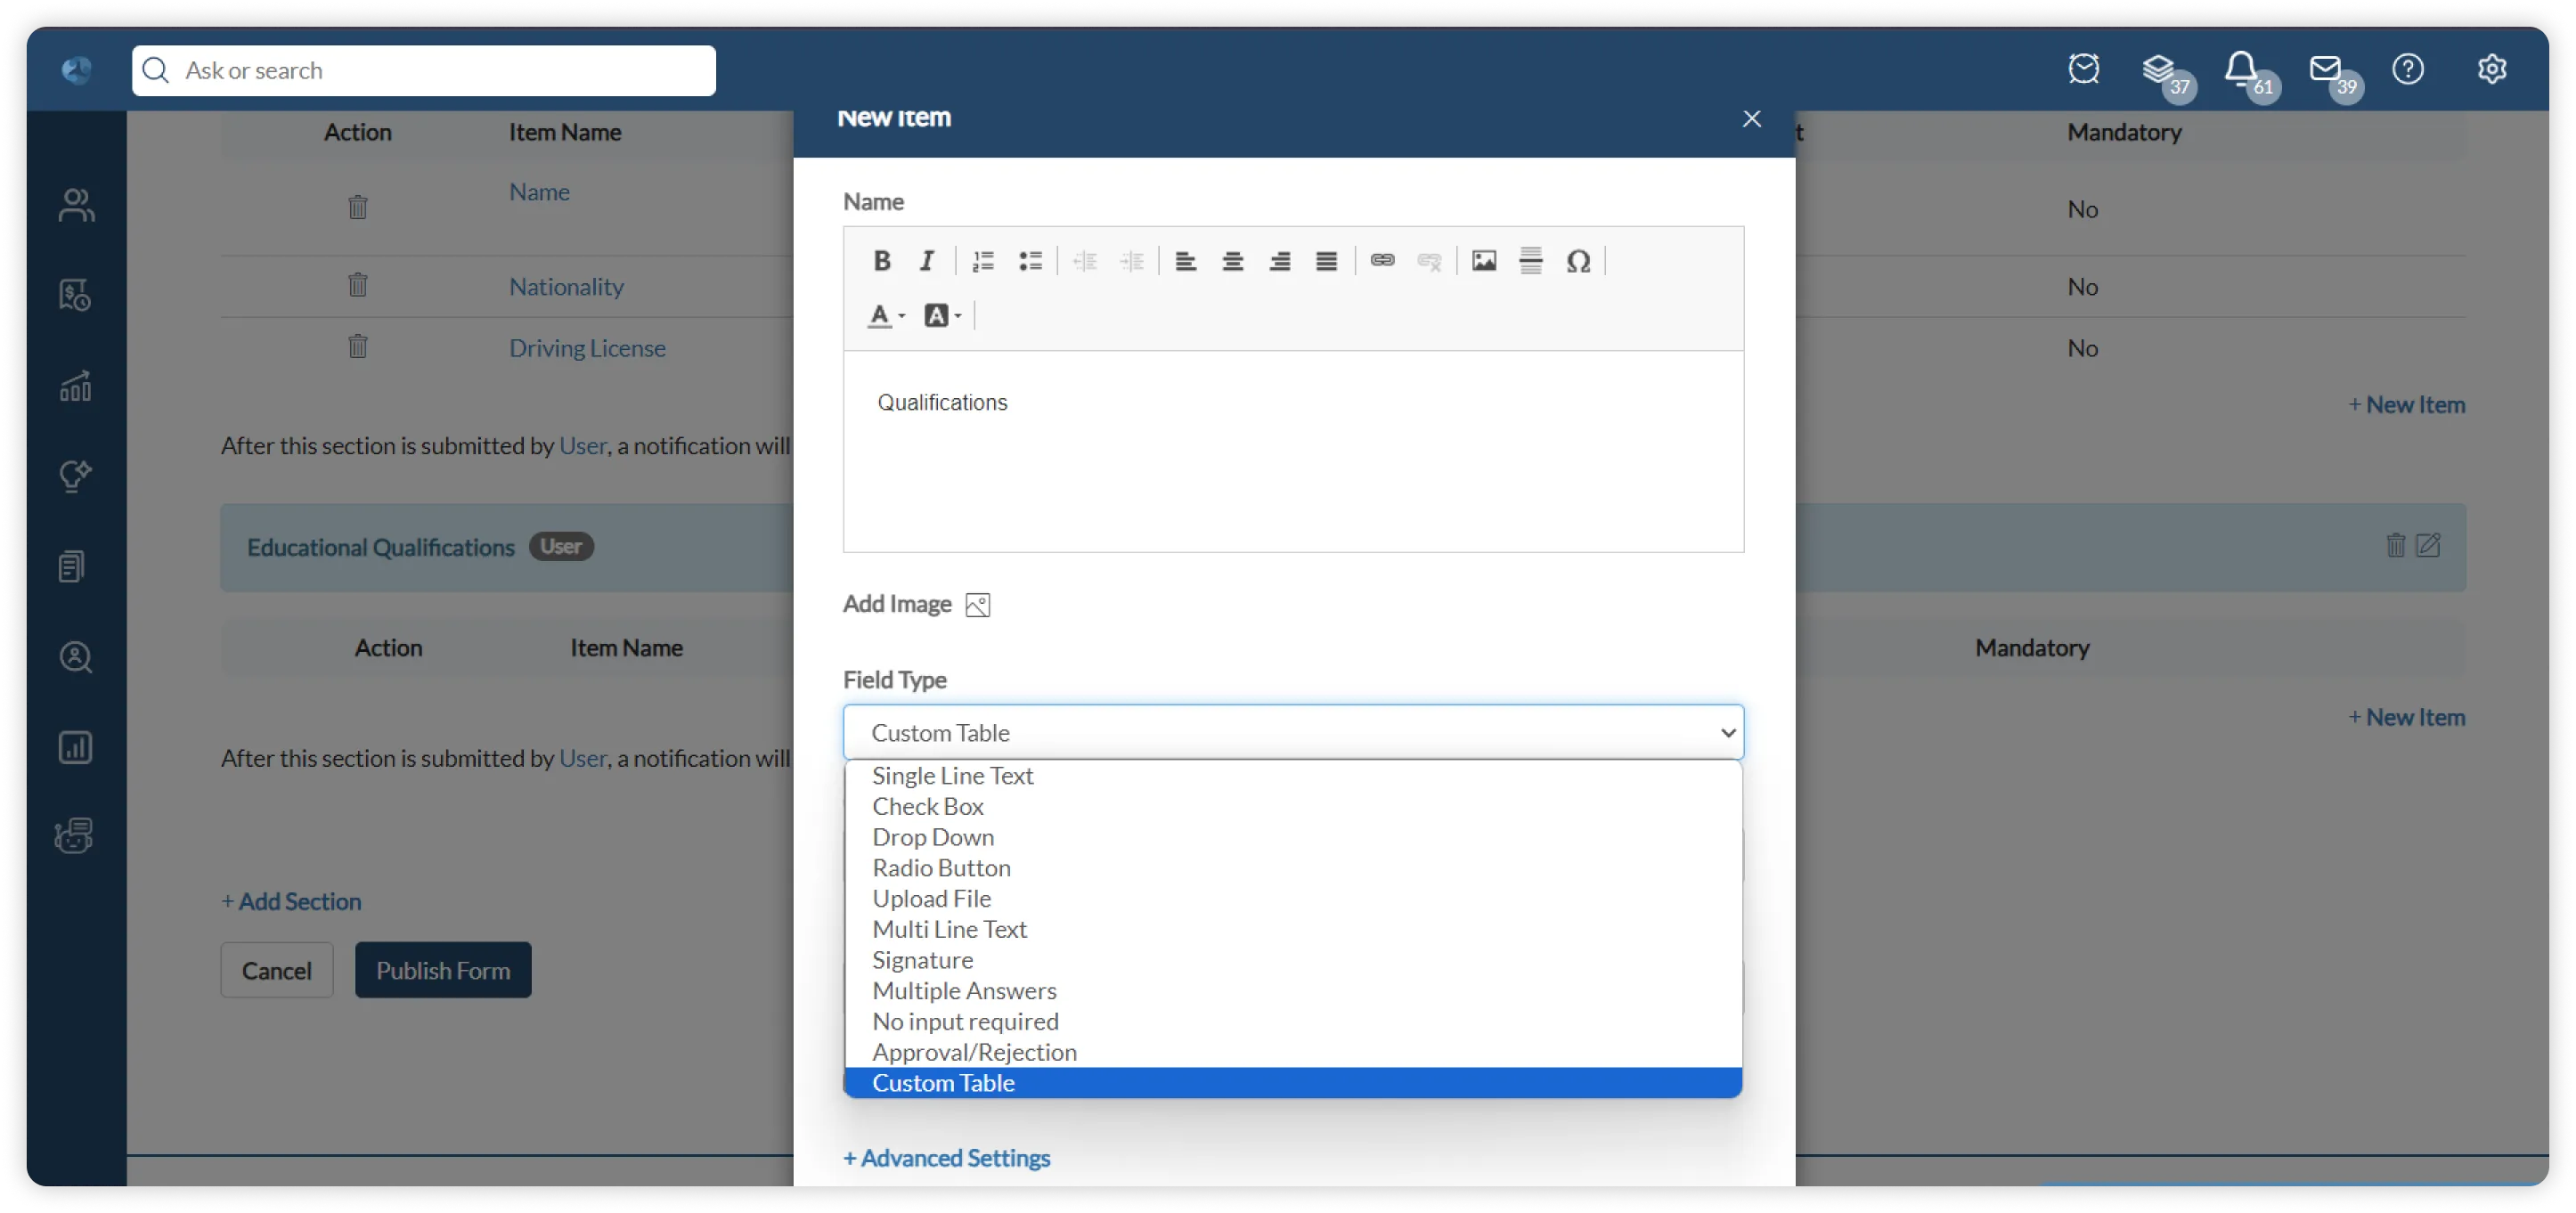
- Select the form type as the custom table to include in the form.

- Click on the ‘Publish Form’ button, to publish the form.

- Now assign the form to the user.
- Fill in the values and submit the form.
.webp)