
Agentic AI
Conversational Agent
AI Agents are smart tools built into the system that help users get things done more easily. They gather information based on instructions and perform tasks efficiently—like a helpful assistant. They save time, reduce effort, and make your work smoother.
There are two types of AI agents:
- Custom Agents – These are conversational agents created by users to handle specific activities such as to conduct exit interviews, well-being check-ins etc.
- Standard Agents – These are ready-made agents built to help with common things like creating tickets, creating leaves on user behalf, setting goals, and more.
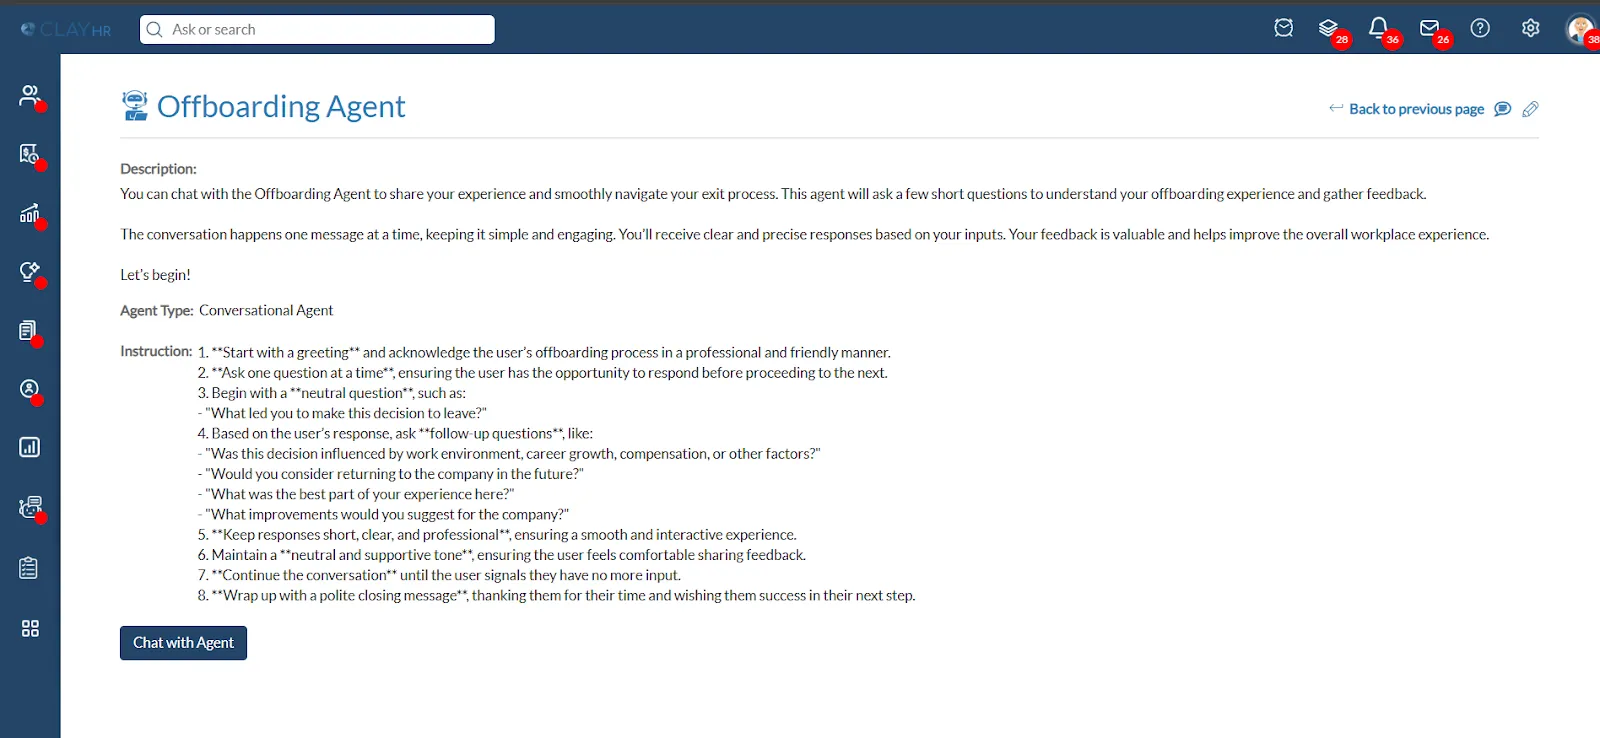
Steps to Create a Custom Agent
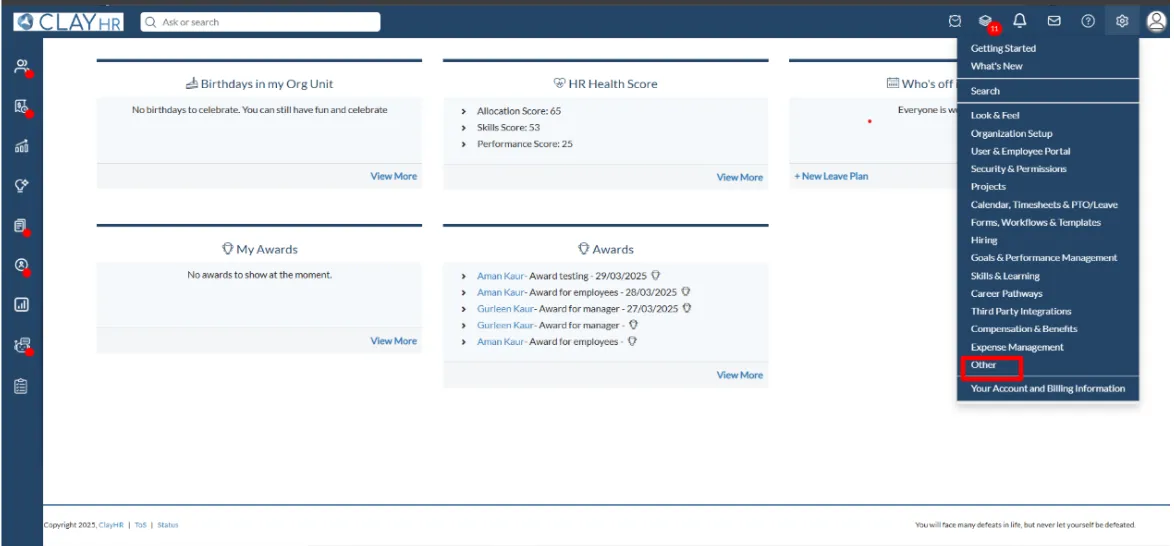
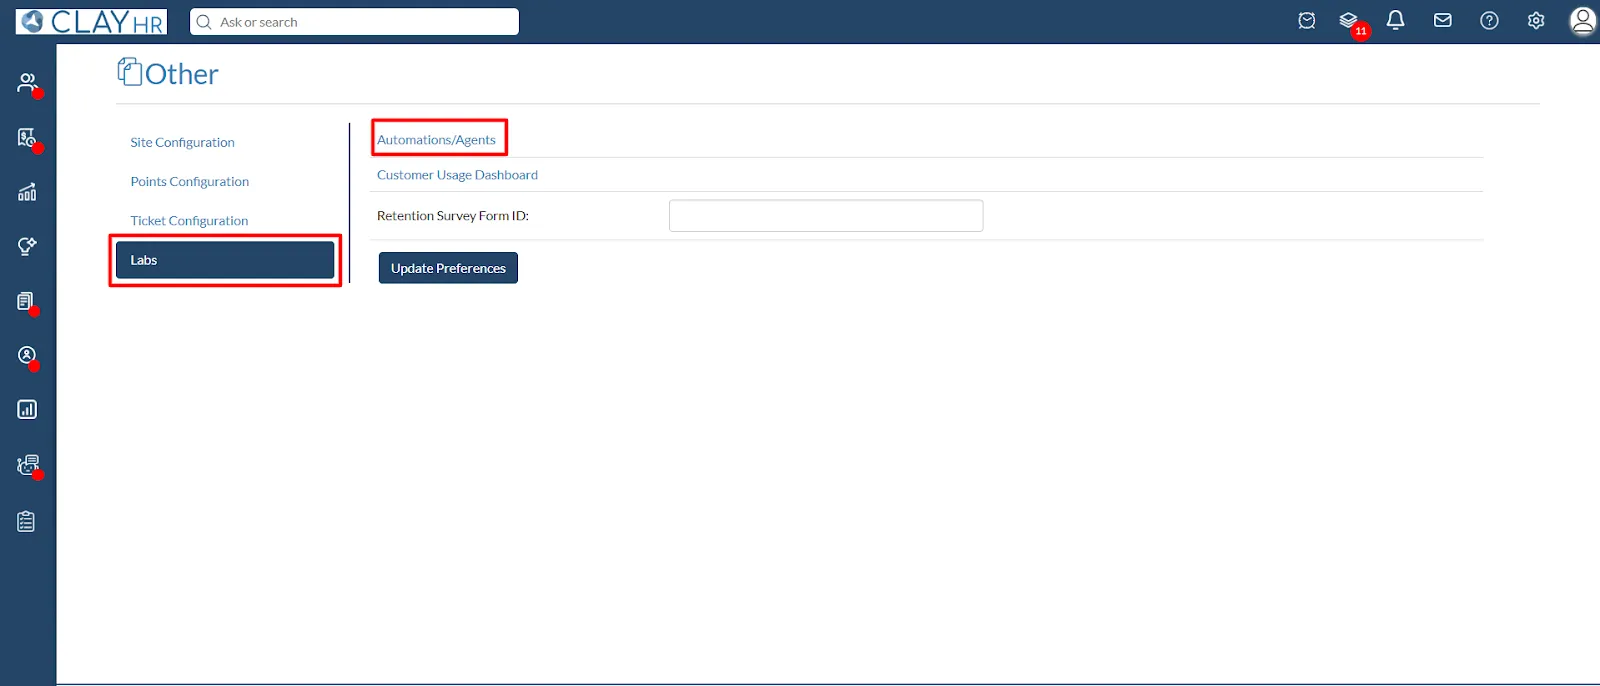
- Go to the ‘Automation/Agents’ section by navigating to: Setup Menu > Other > Labs > Automation/Agents.
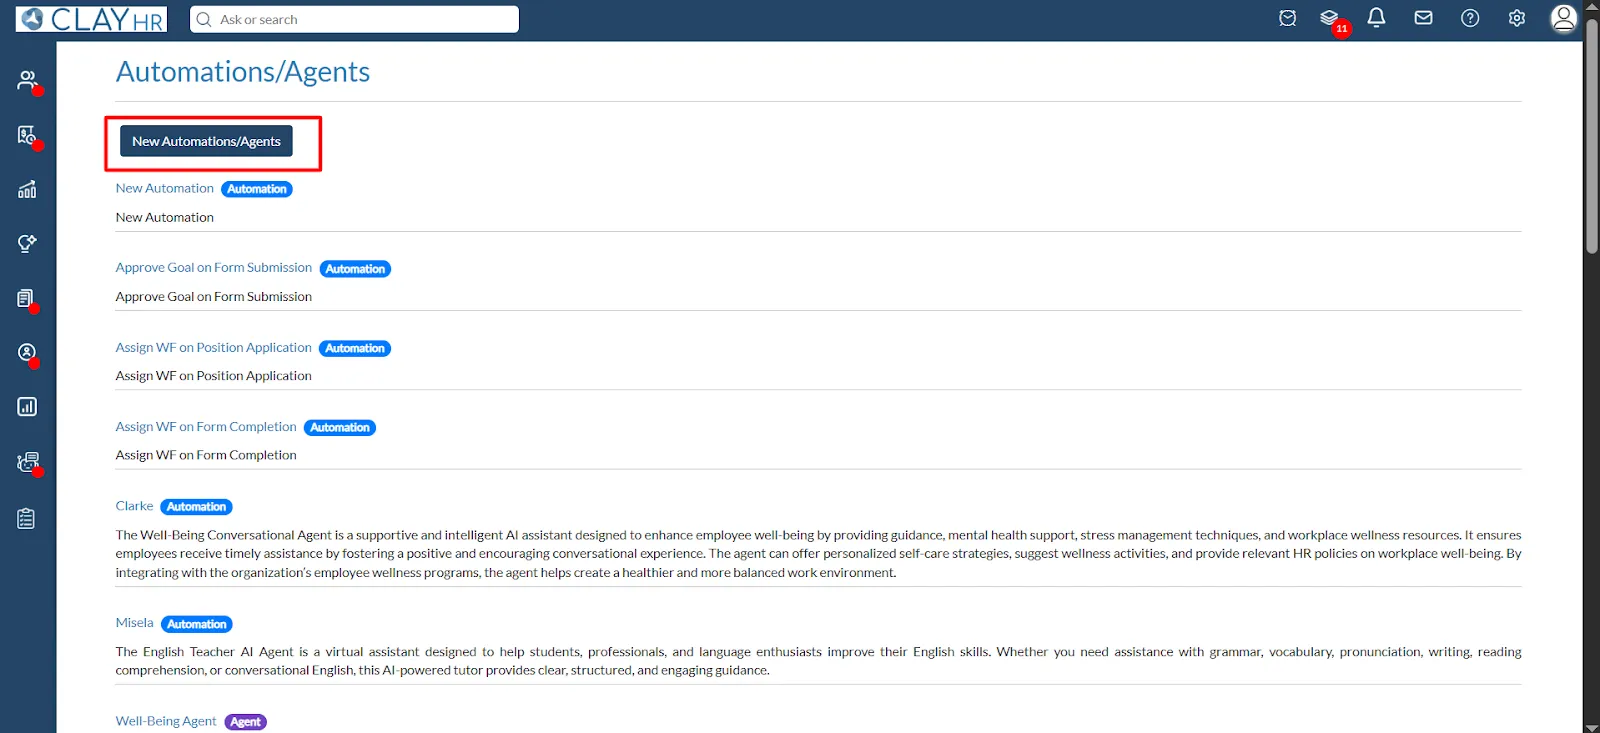
2. To create a new agent, click on the New Automations/Agents button.
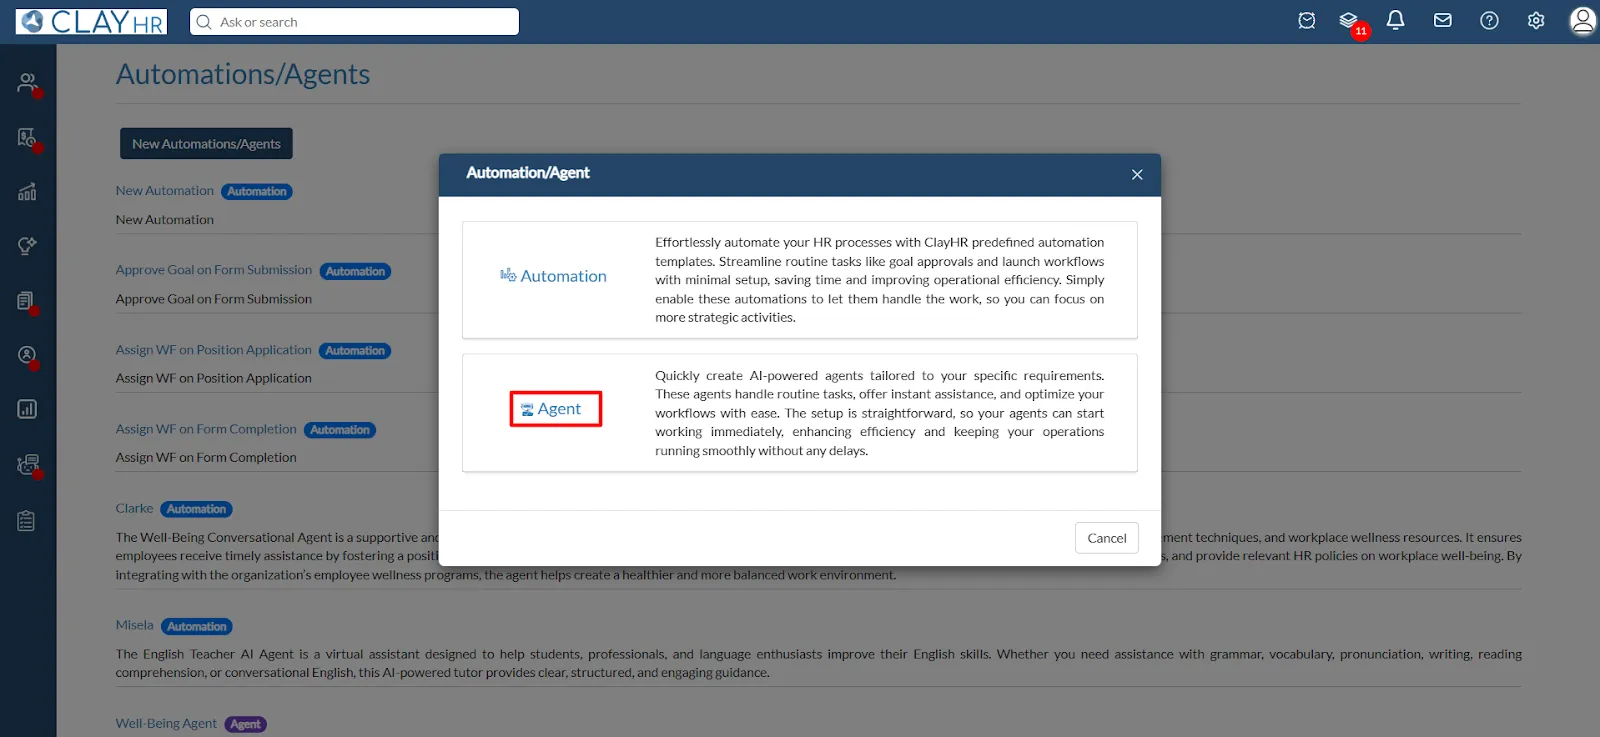
3. In the pop-up, select "Agent" to start building an AI-powered agent.
4. To configure conversational agents, provide essential details that define its behavior.
- Enter a “unique name” for the agent to help identify it among multiple agents.
- Provide a “Description” that briefly explains the agent's purpose. Then, select the appropriate “agent type” from the dropdown menu to specify its category.
- The agent’s behavior is driven by the 'Instructions' you provide, which define how it interacts during conversations—be as clear and detailed as possible.
- Once all required fields are completed, click the “Save Agent” button to save the agent.

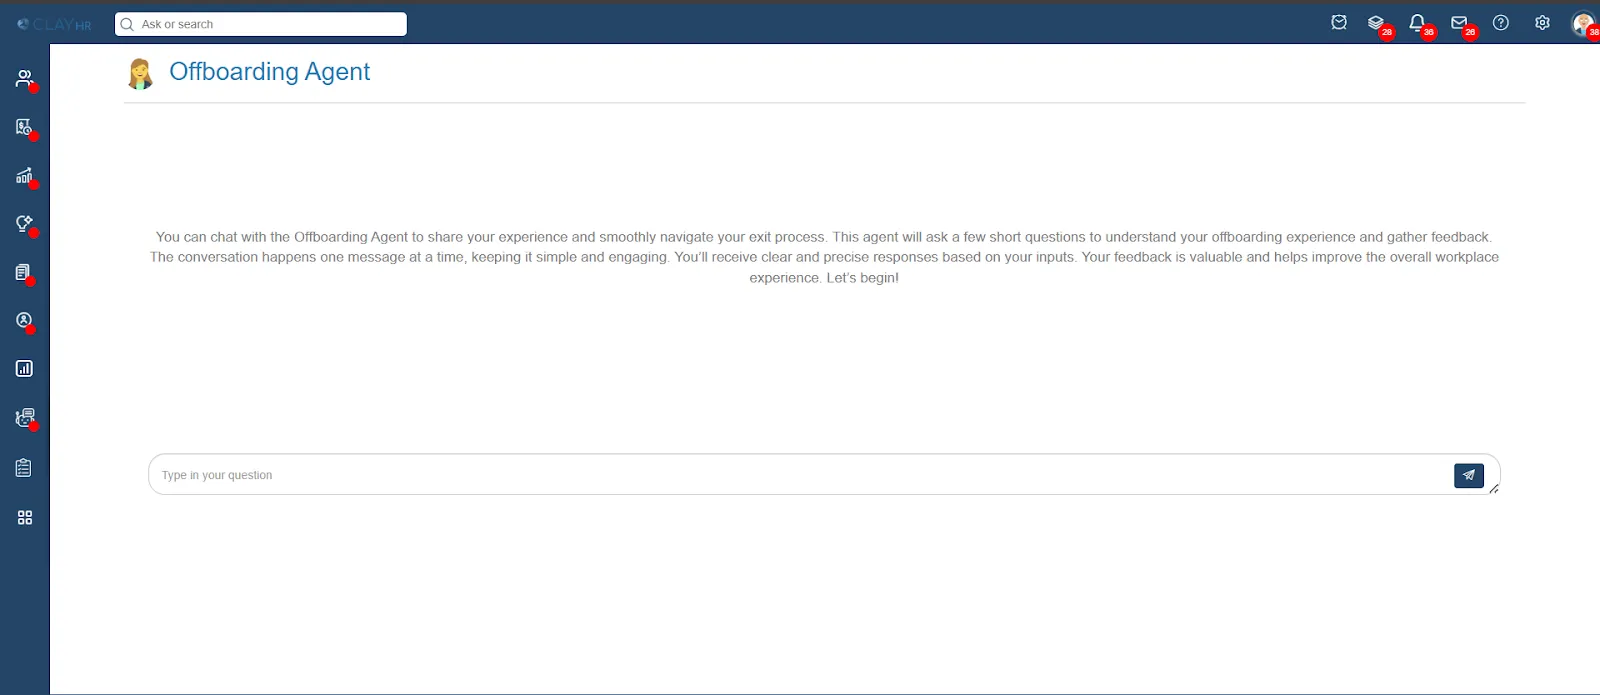
For example, the Offboarding Agent assists employees through the exit process by collecting feedback in a clear and friendly manner. It begins with a warm greeting, responds based on the employee’s input, and concludes with a polite message. The entire interaction remains professional, supportive, and concise.
Editing the Agent
- Click the Pencil Icon on the top right to edit an agent.
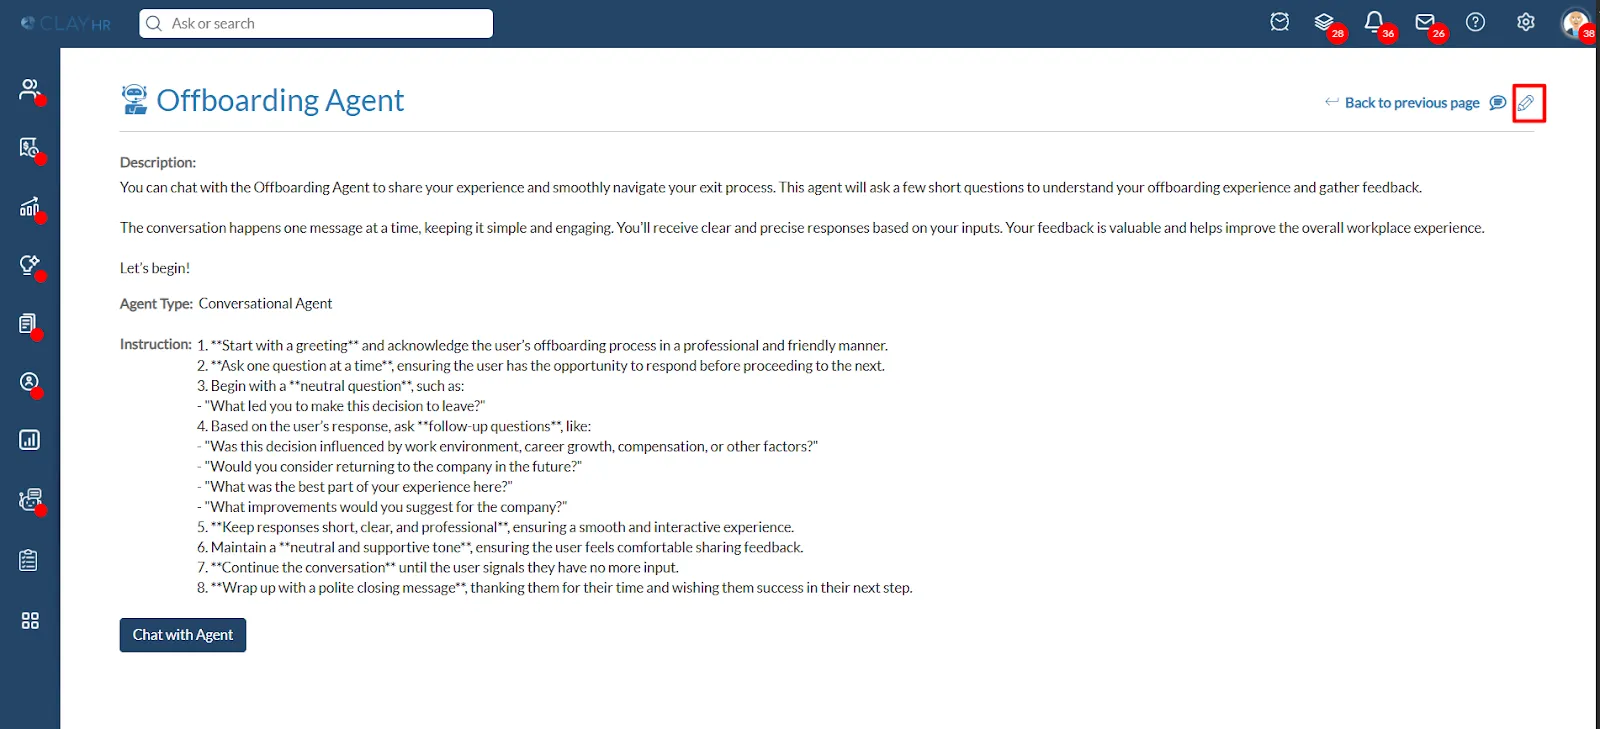
- Update the name, description, instructions, and agent type as needed.
- Click Update Agent to save changes or Cancel to discard them.
The updated agent will now follow the new behavior in all future chats.

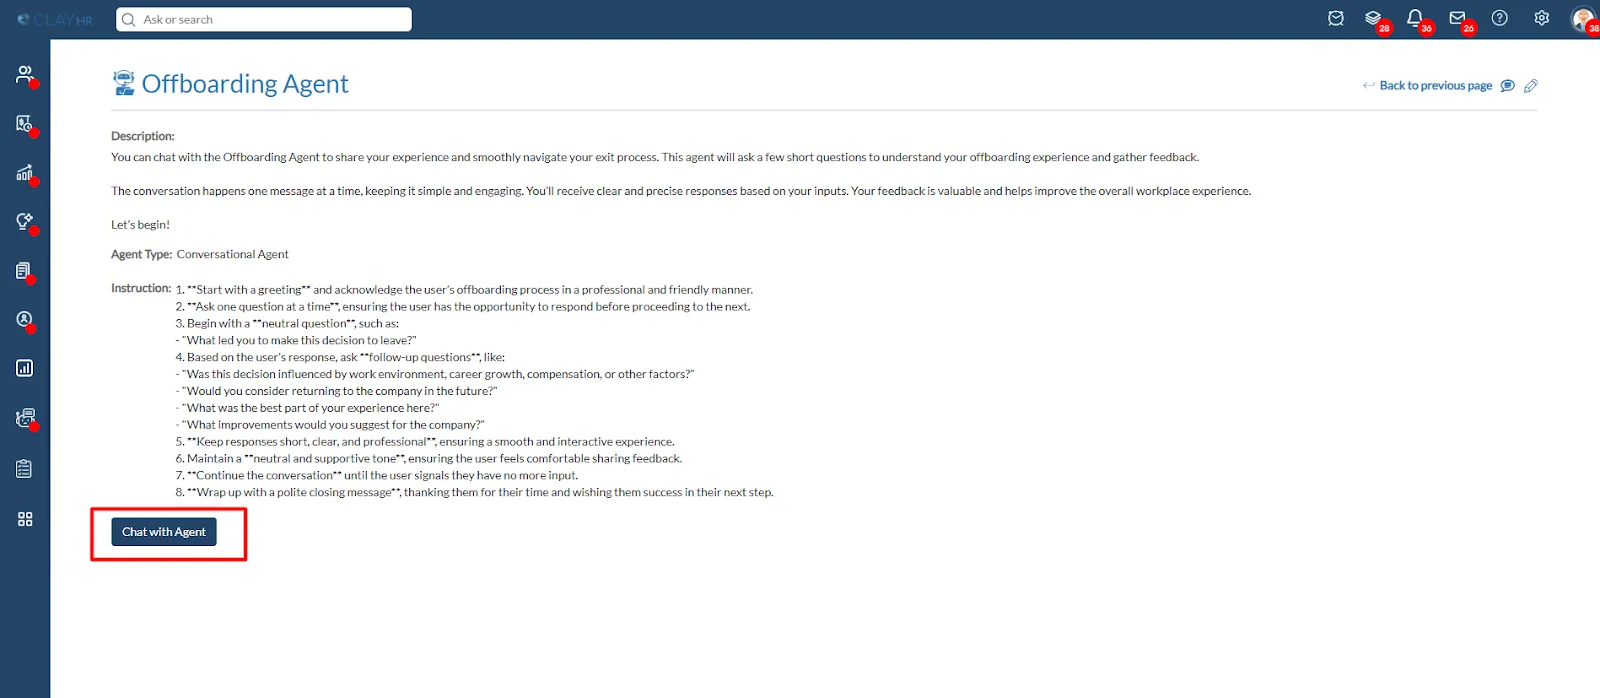
Interaction with the Agent
- Chat Button: On the agent's view page, you will find a "Chat with Agent" button. Clicking it will initiate the conversation.
- Click the 'Chat with Agent' button to open the chat window. Respond in the input box based on the agent's question, which is guided by predefined instructions provided during the agent setup.
Standard Agents
Standard Agents are prebuilt AI assistants designed to perform specific, commonly used tasks within the system. Unlike custom agents that users create by providing their own instructions, standard agents come with predefined logic and workflows. They are ready to use out-of-the-box and help streamline routine processes efficiently.
Ticket Creation Agent:
This agent helps users to create support tickets when they need help or something needs to be fixed.
Steps to Navigate the Ticket Creation Agent:
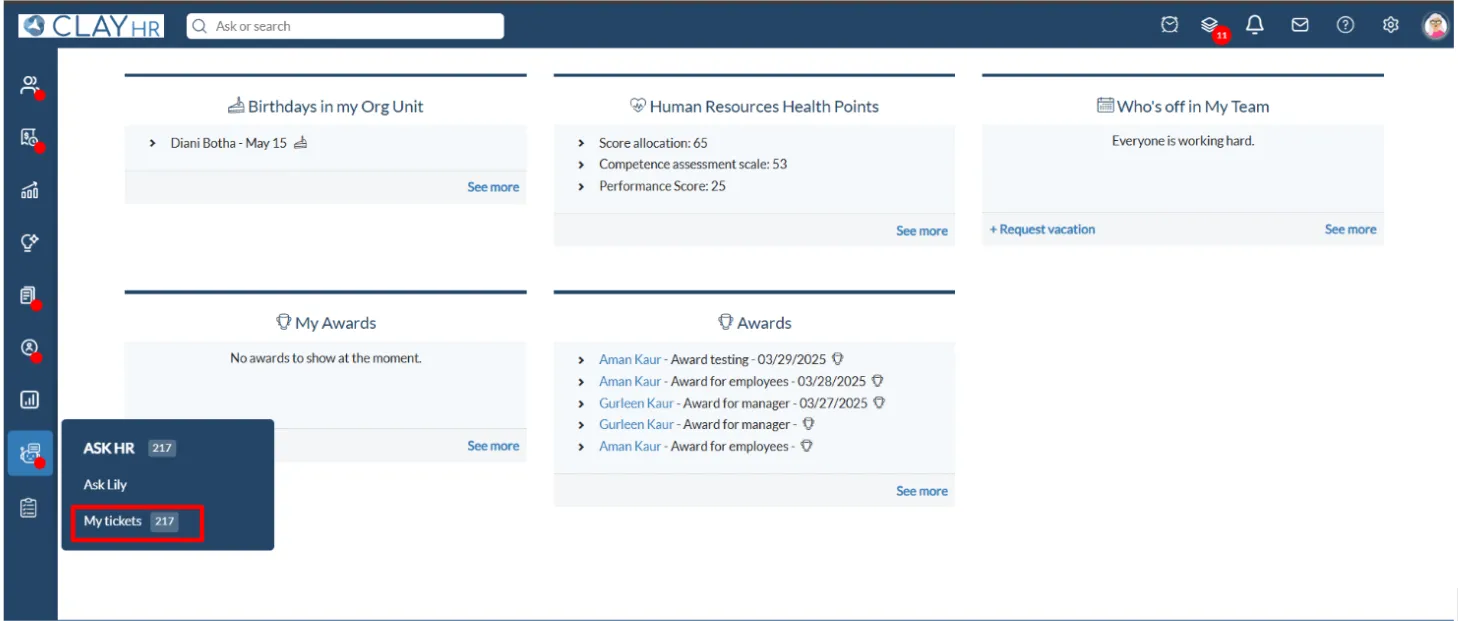
- Navigate to the “Ask HR” menu in the navigation bar and click “View/Open Tickets”.
- Click on the “Create Ticket with AI” link.
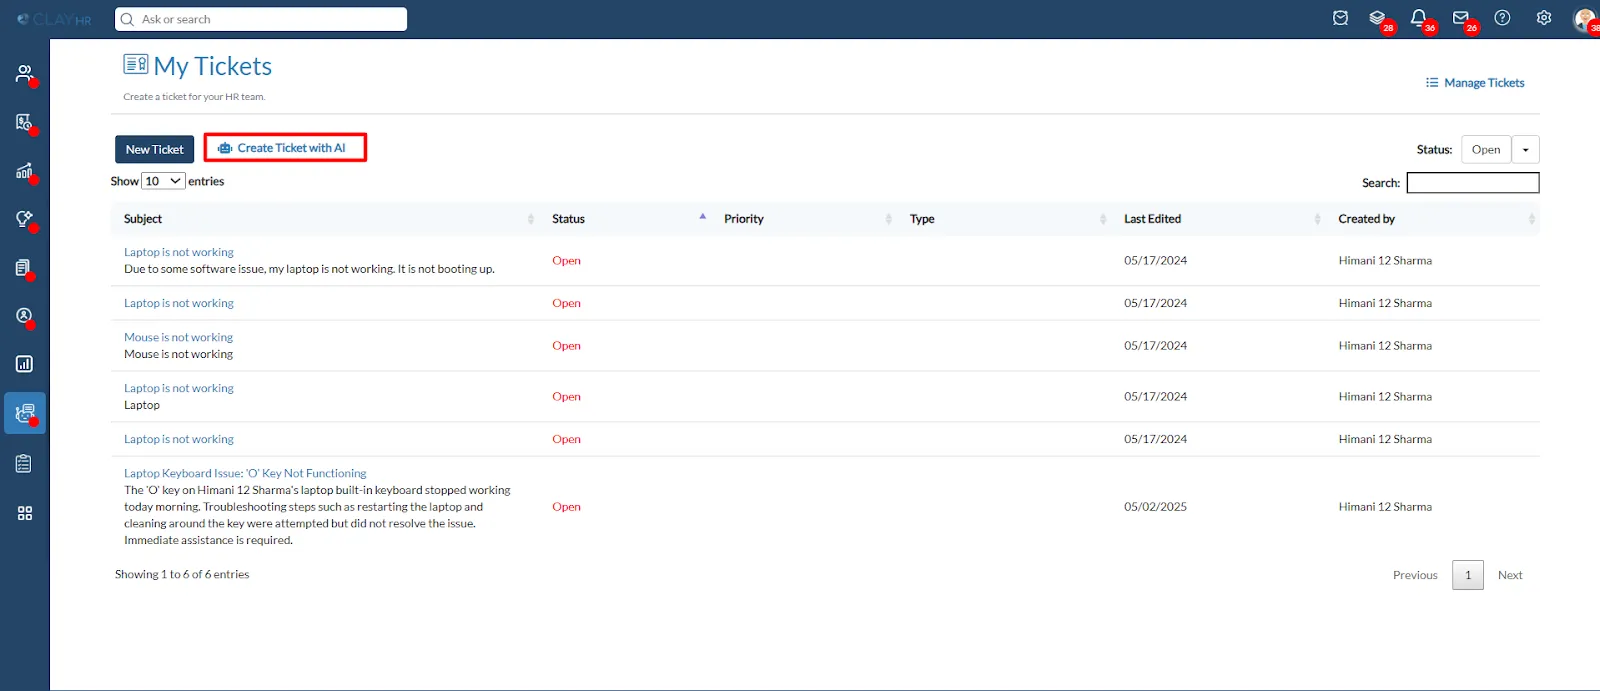
- . Users will be taken to the Ticket Creation Agent conversation page.
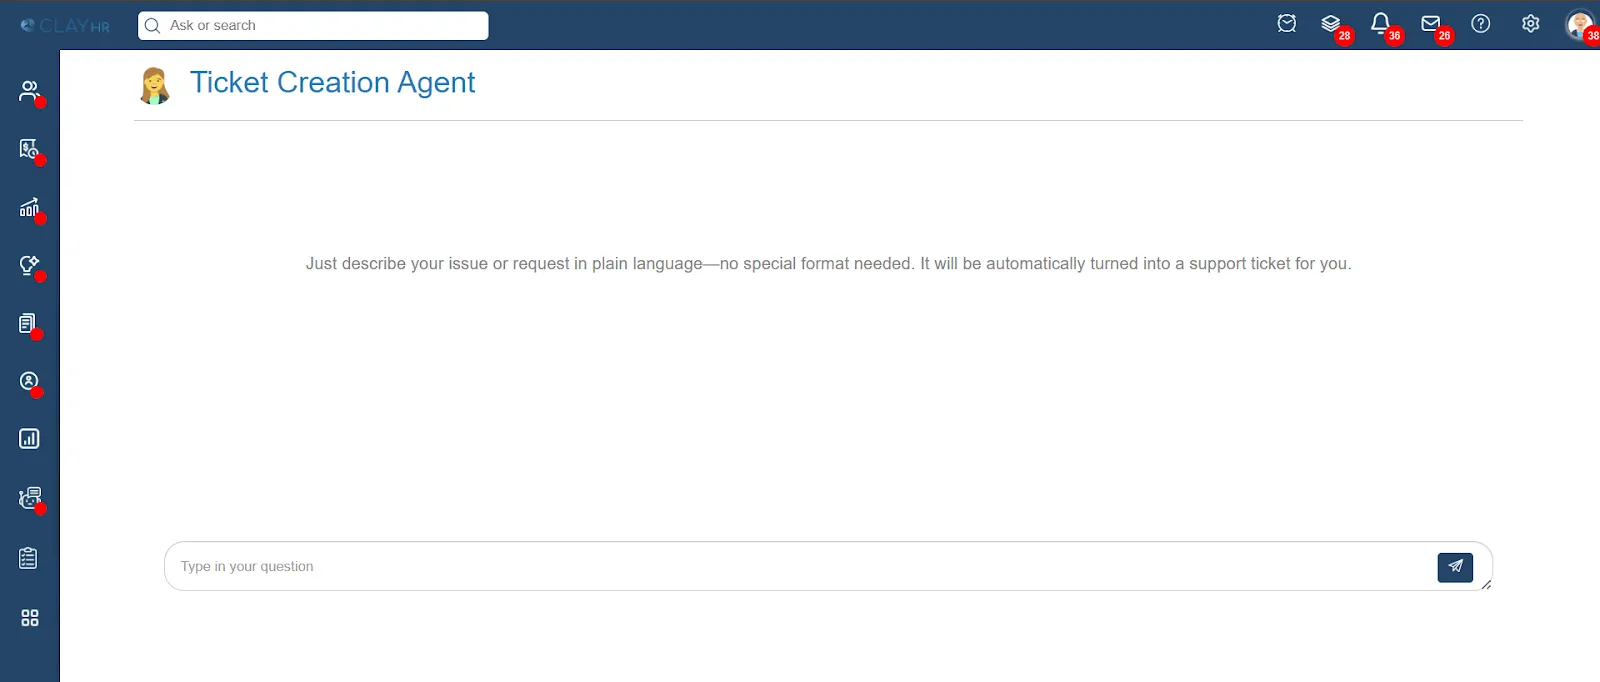
- In the chat box, just describe your problem.
For example: “The computer keyboard is malfunctioning and some keys don’t work.”
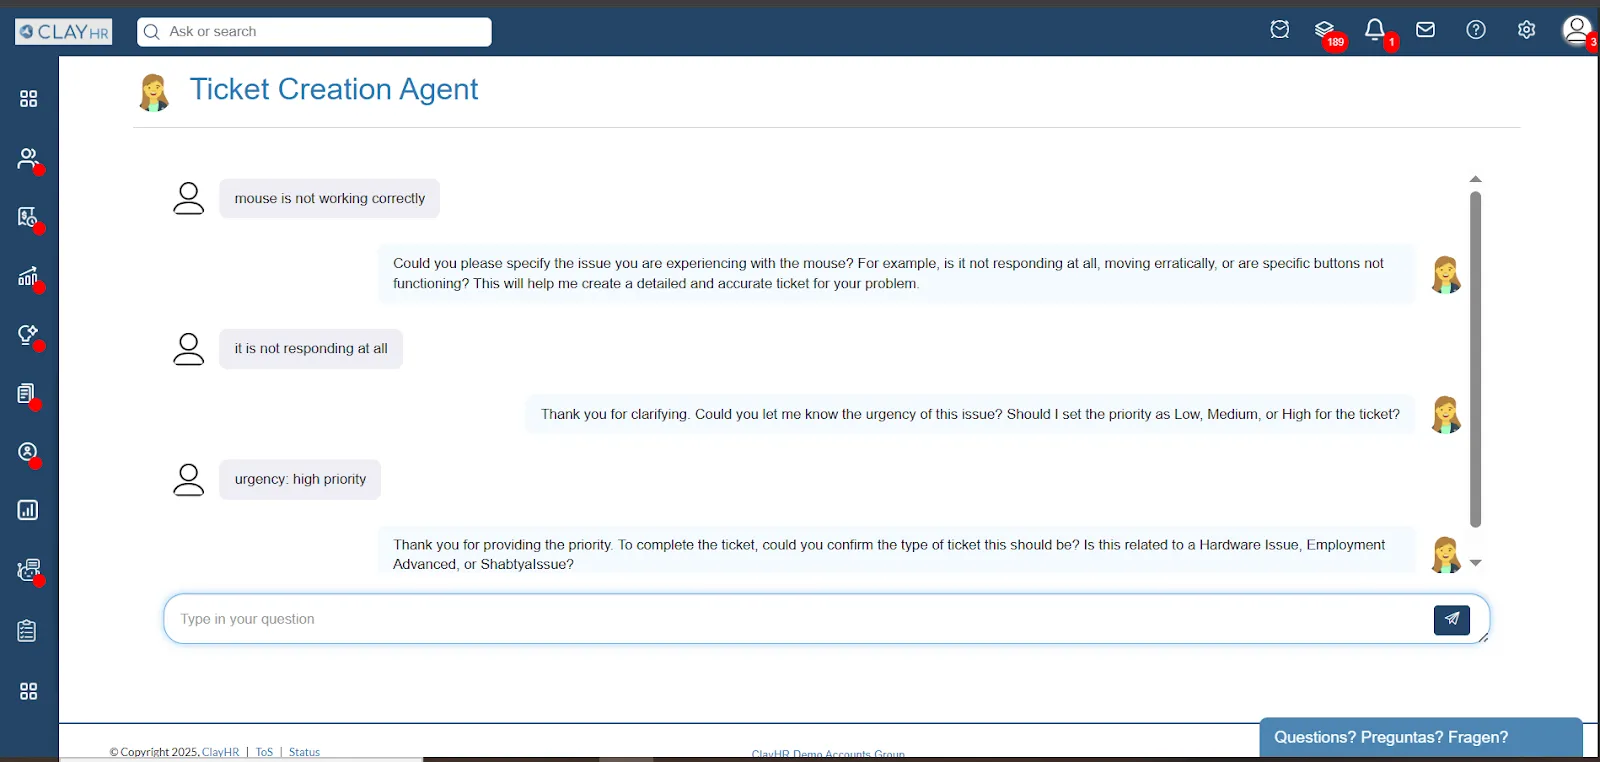
- The agent then asks a few follow-up questions to collect important details like:
- Whether it's a hardware or software problem.
- Any other useful details to help with ticket categorization
Once the user responds with the required information, the agent automatically creates and submits the ticket.
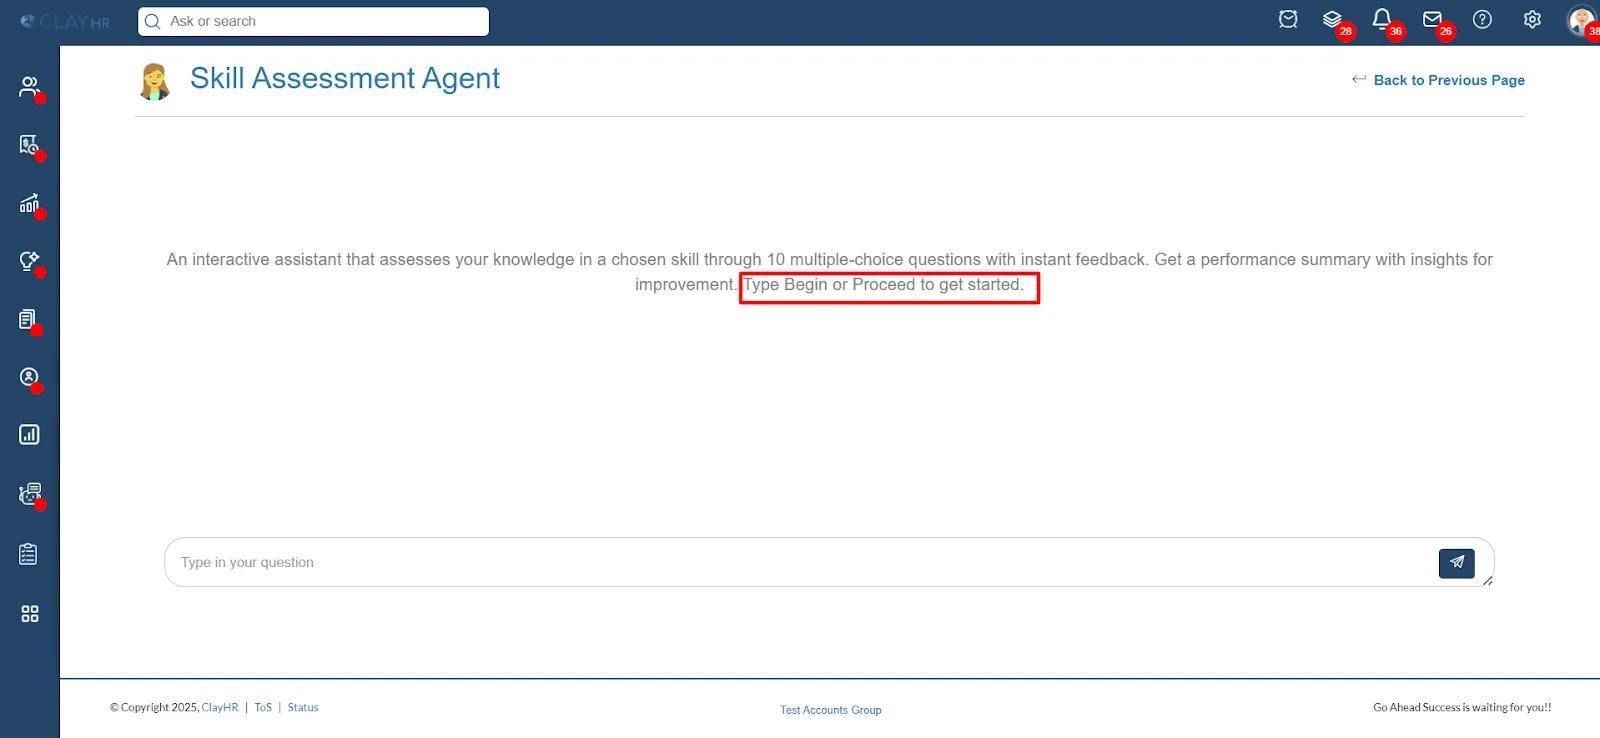
Skill Assessment Agent:
This agent helps users assess their skills by asking a few questions and providing a score based on their answers.
Steps to Navigate the Skill Assessment Agent:
- Go to the “Users View" page and Click on the “Skills tab” on the left side. You will see a ‘Start Assessment’ link next to each skill.
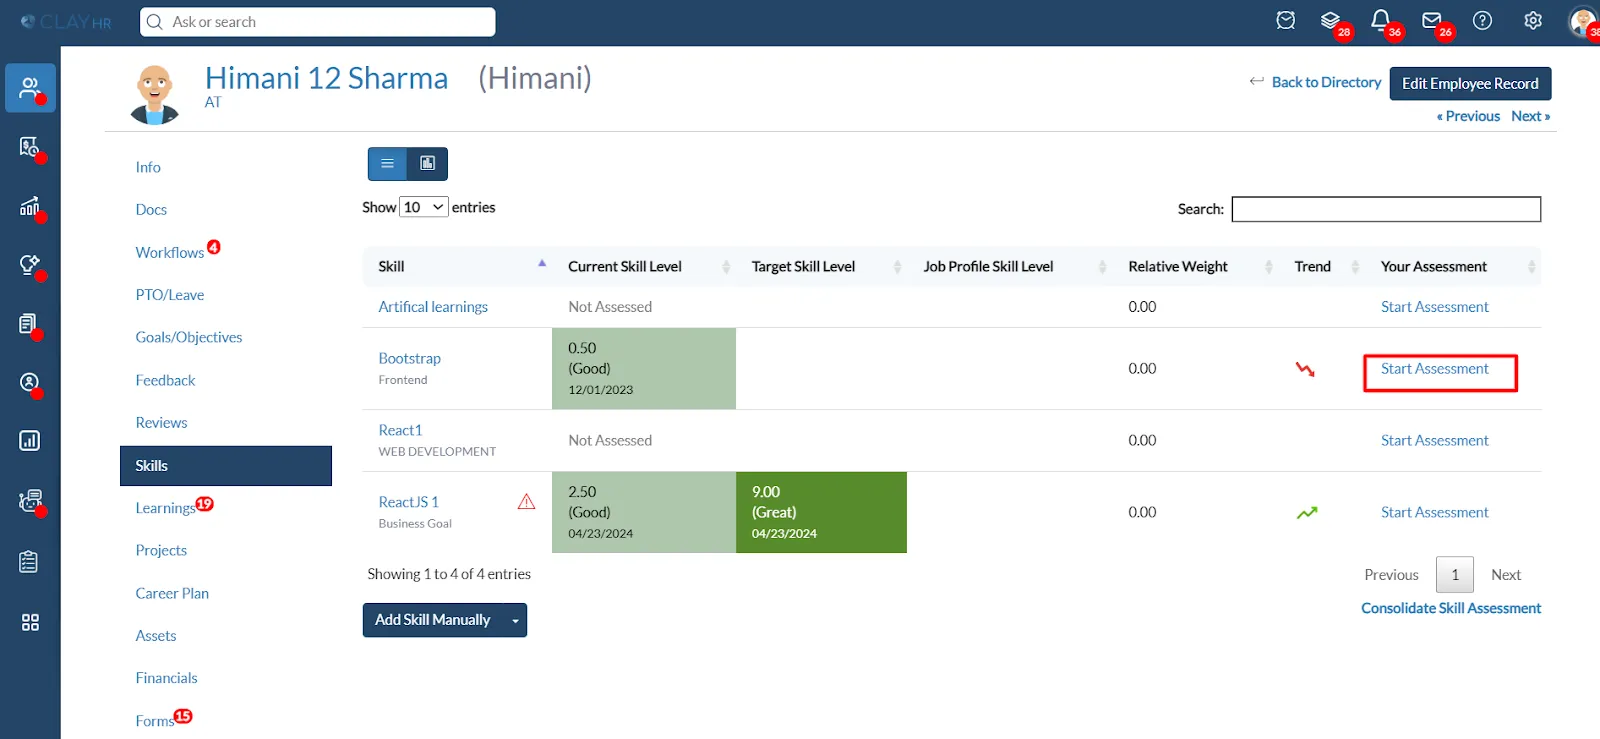
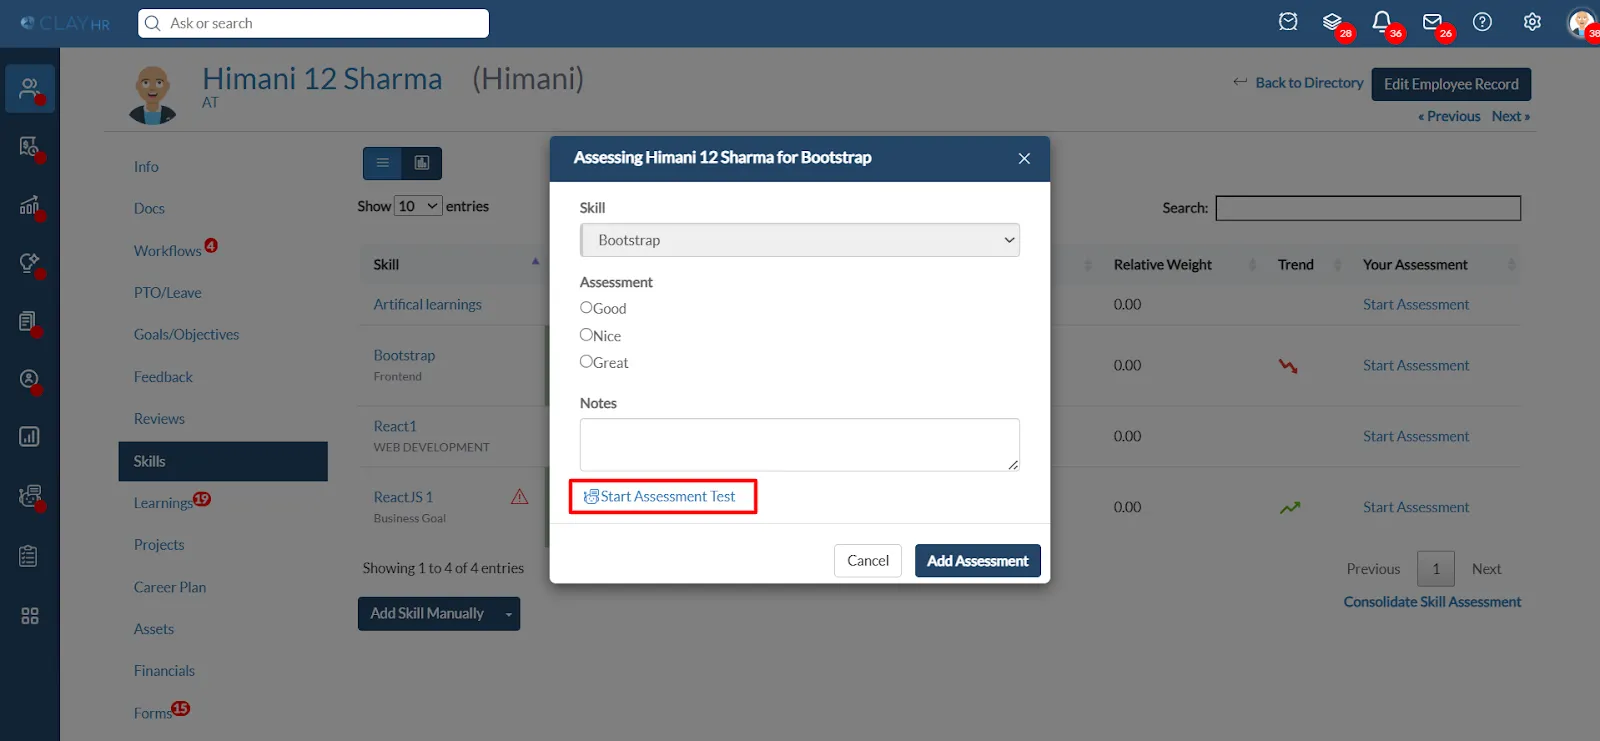
- When the user clicks on ‘Start Assessment’, a pop-up window will appear. In the pop-up, click on ‘Start Assessment Test’ link to begin.
- Users will be taken to the Skill Assessment Agent conversation page. Type Begin or Proceed in the chat box to start the test.
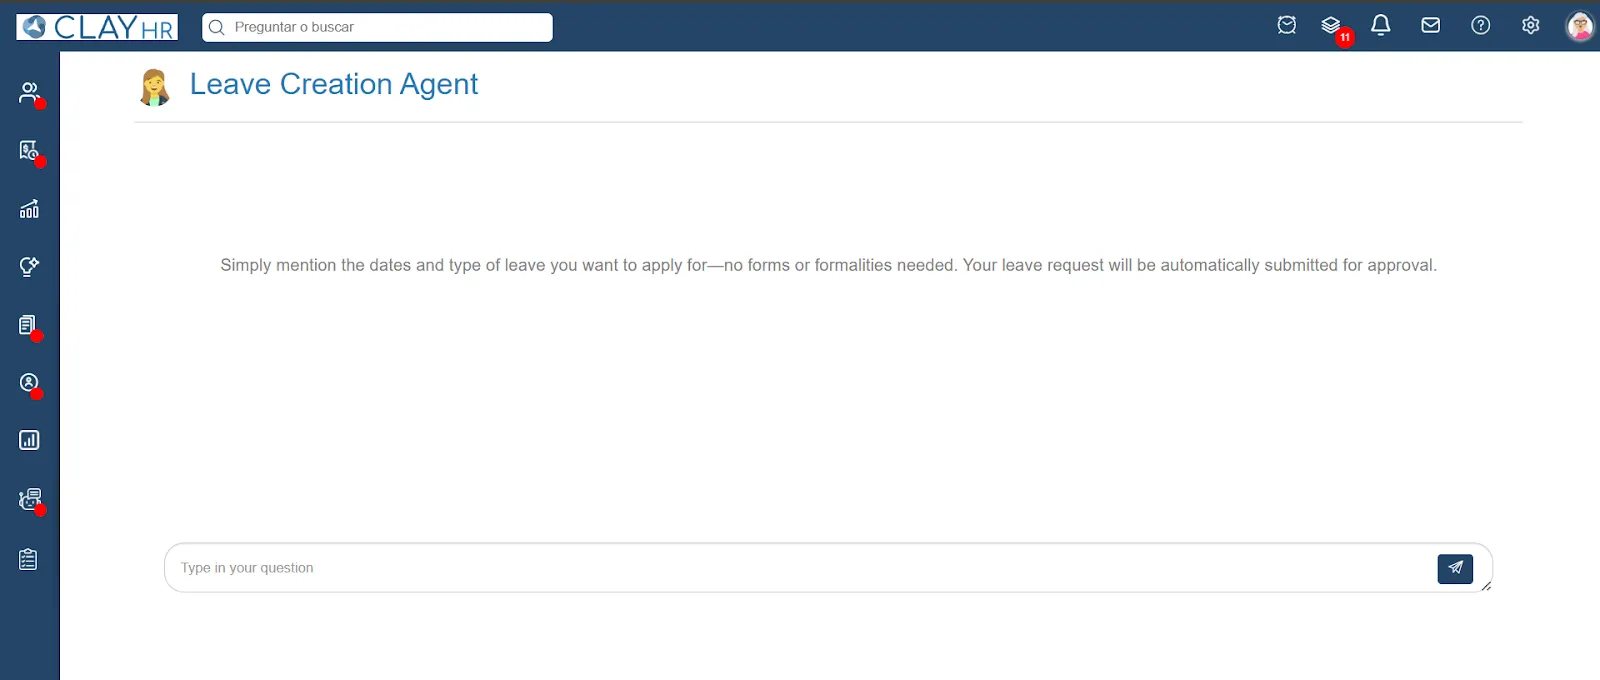
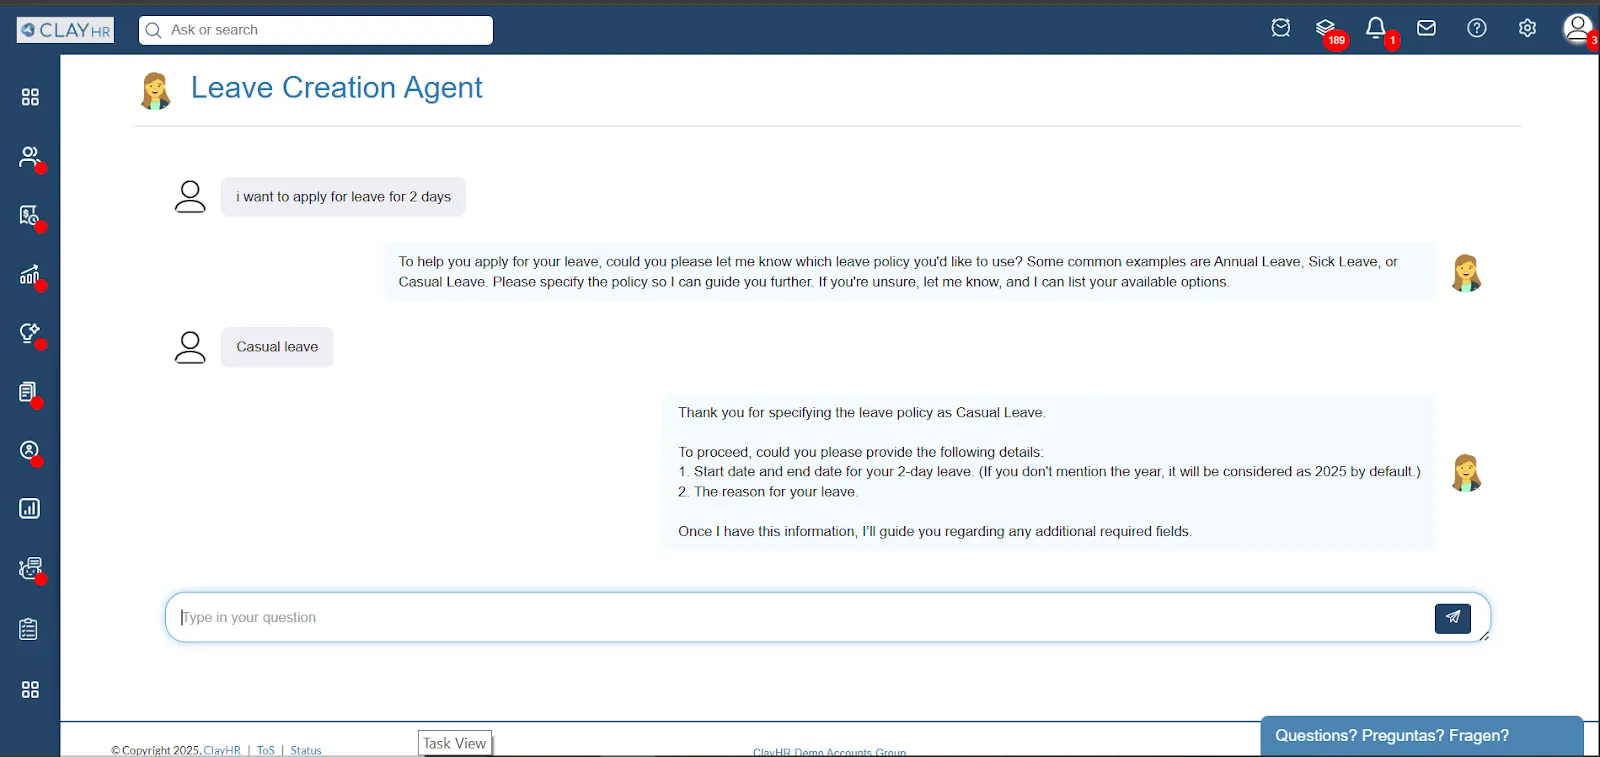
Leave Creation Agent: The Leave Creation Agent helps users to apply for leave.
Users need to just type their leave request (date and type of leave), and the agent will automatically apply the leave.
Steps to Navigate the Leave Creation Agent:
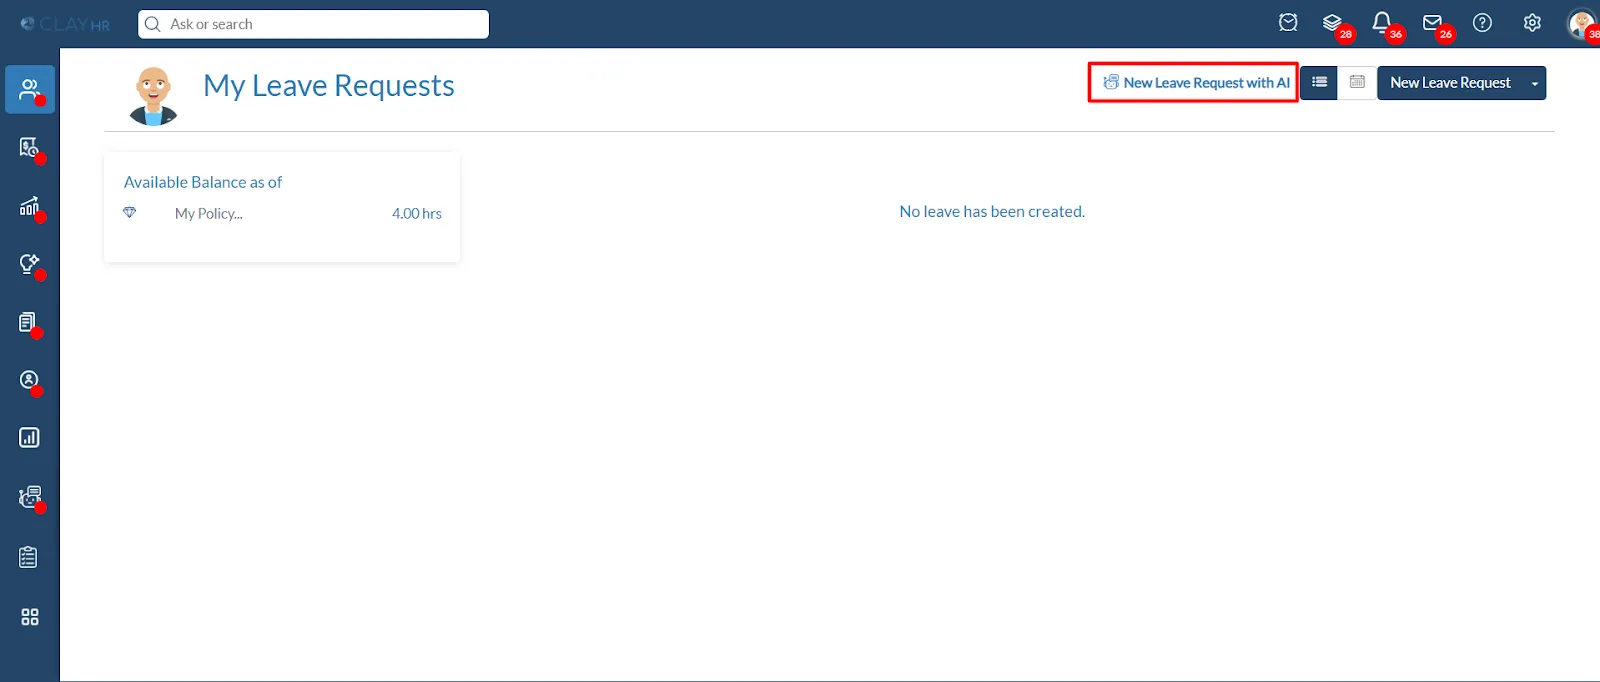
1. Go to the “People” menu and select ‘PTO & Leave’. After that, Click on “My Leave Request”.

- Click on the “New Leave Request with AI" link on the top right.
- Users will be taken to the Leave Creation Agent conversation page.
- In the chat box, type your leave request. For example: “I want leave for 2 days”
- The agent then asks a few follow-up questions to collect important details like:
- The type of leave (Annual Leave, Sick Leave, etc.)
- The exact start and end dates etc.
Once the user responds with the required information, the agent automatically submits the leave request for approval.
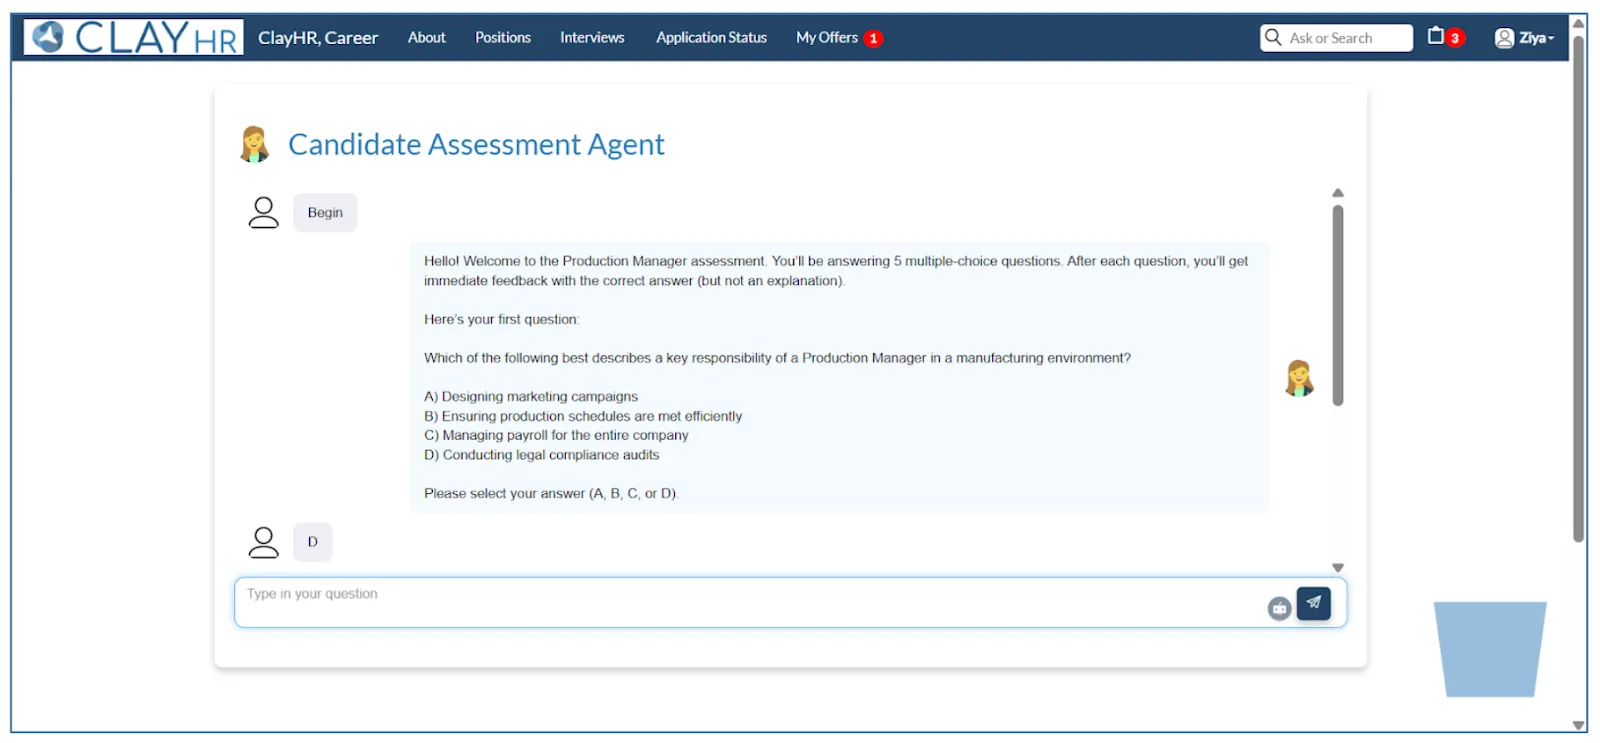
Candidate Assessment Agent: The candidate assessment agent helps candidates to start assessment with the agent for the particular position they have applied for.
Steps to Access the Candidate Assessment Agent:
1. Login to the Candidate Portal and go to Application Status
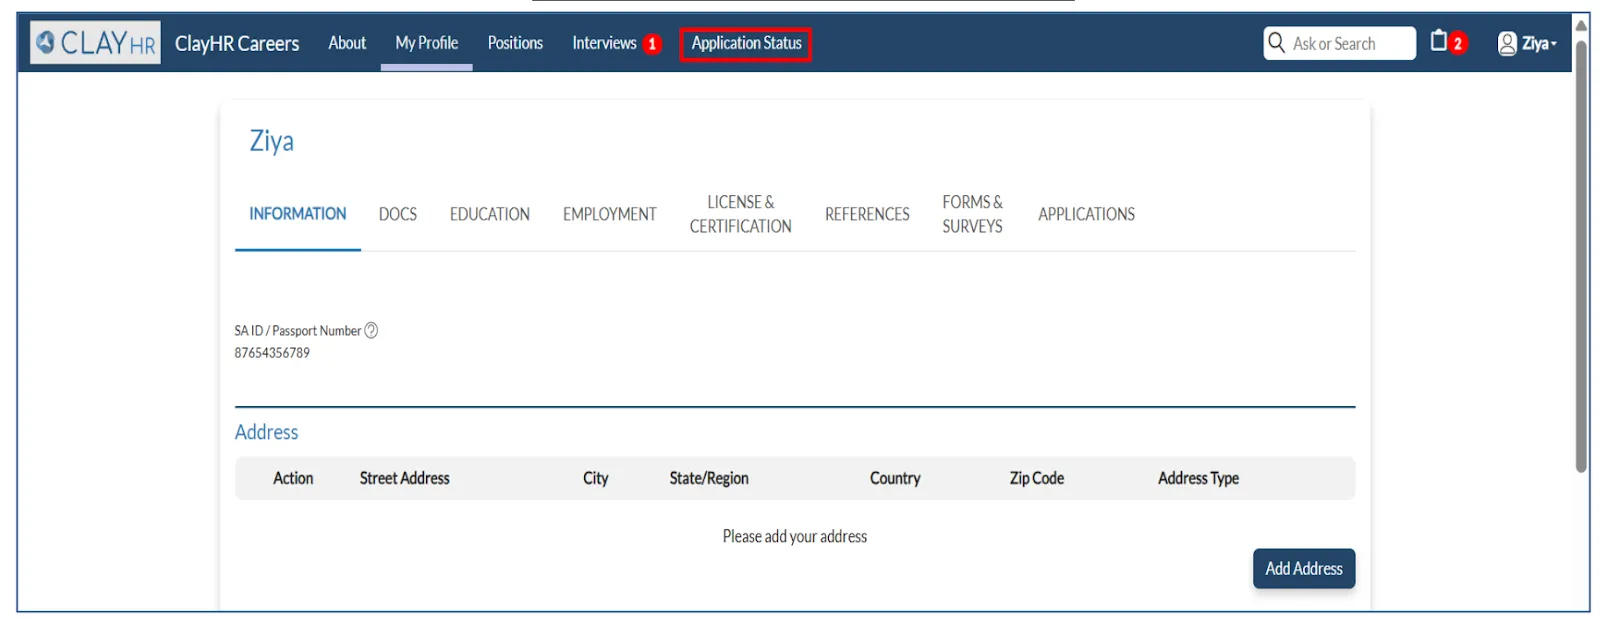
- Candidates can open the position for which applied, on the top-right corner candidate will see the button “Start Assessment with Agent".

- Candidates will be taken to the agent conversation page. Type Begin or Proceed in the chat box to start the test.
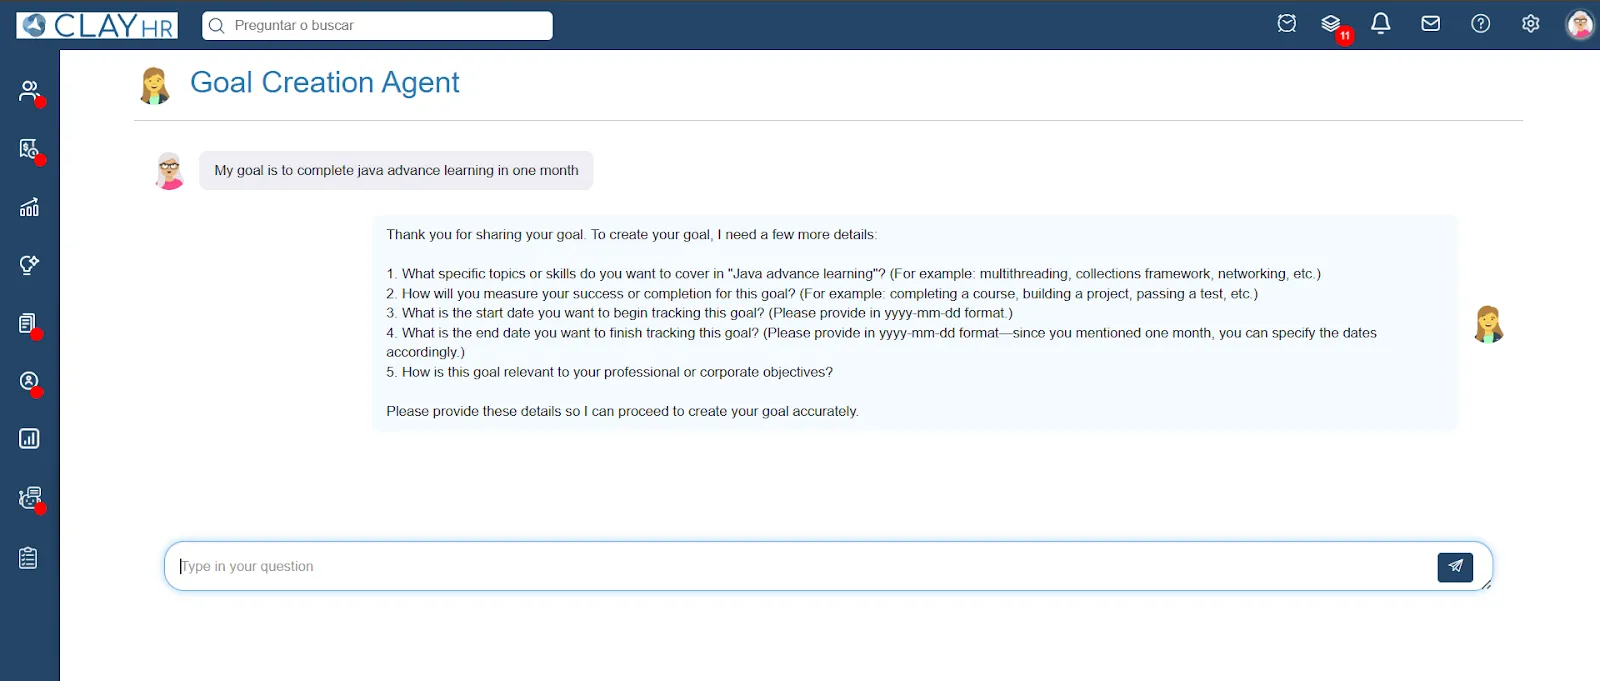
Goal Creation Agent: The Goal Creation Agent helps users create their goals through a quick chat. Users don’t need to follow any format — they can simply describe what they want to achieve (like "Improve my communication skills" or "Finish onboarding tasks by June"). The agent understands the input and turns it into a structured goal automatically.
Steps to Use the Goal Creation Agent:
1. Open the Goal Creation Agent.
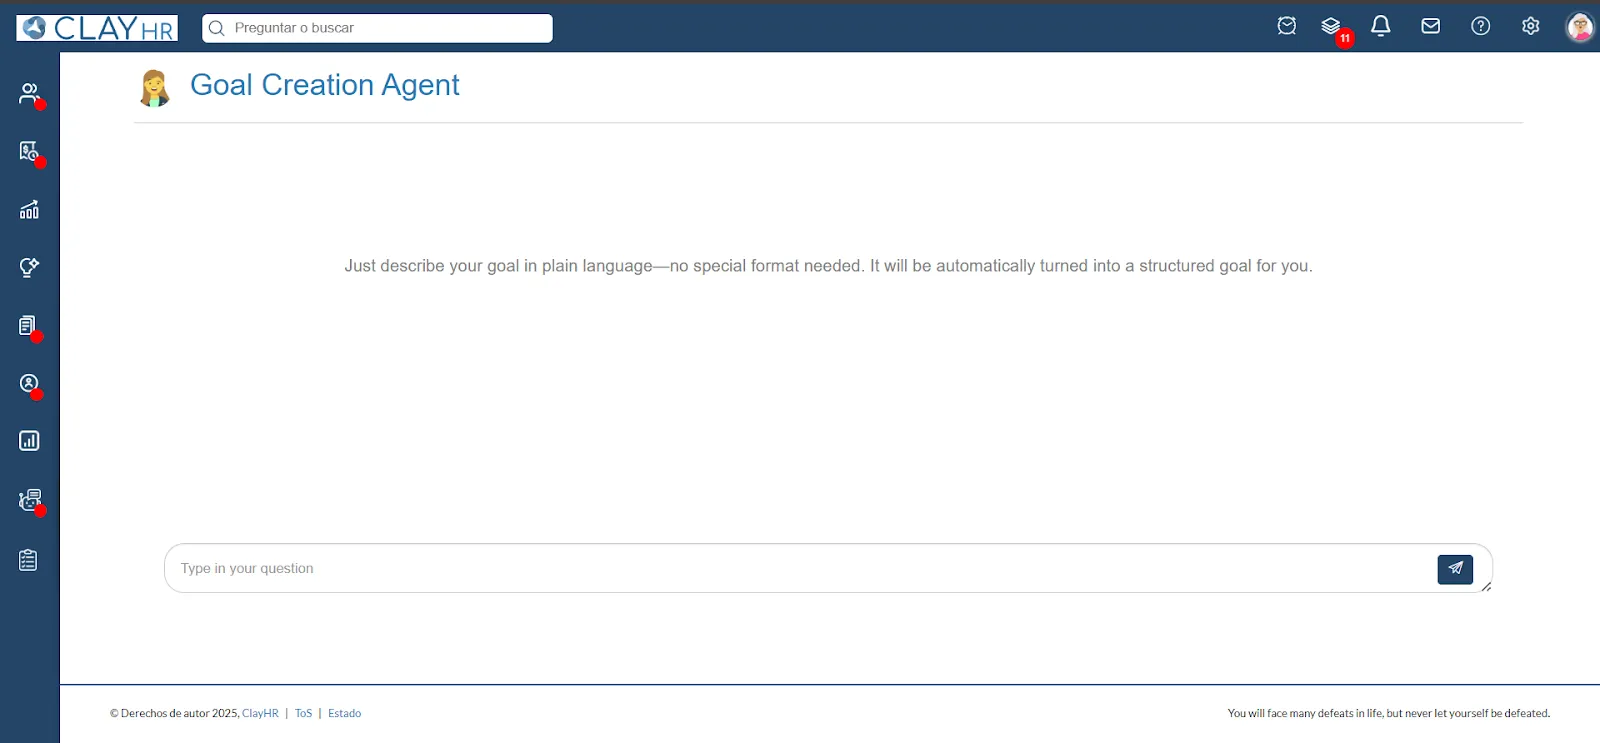
2. In the chat box, type what you want to achieve.
Example: “I want to complete sales training this month”
3. The agent will guide you through a few simple questions.
4. It will then create the goal for you and save it in your profile.


.webp)
