
How to Create and Configure the Homepage Dashboard
How to Configure a Home Dashboard
ClayHR empowers your workday with a dynamic home dashboard that gives you instant access to the information and tools that matter most. With flexible customization options, you can organize and display your data the way you prefer, making complex information easy to navigate and understand.
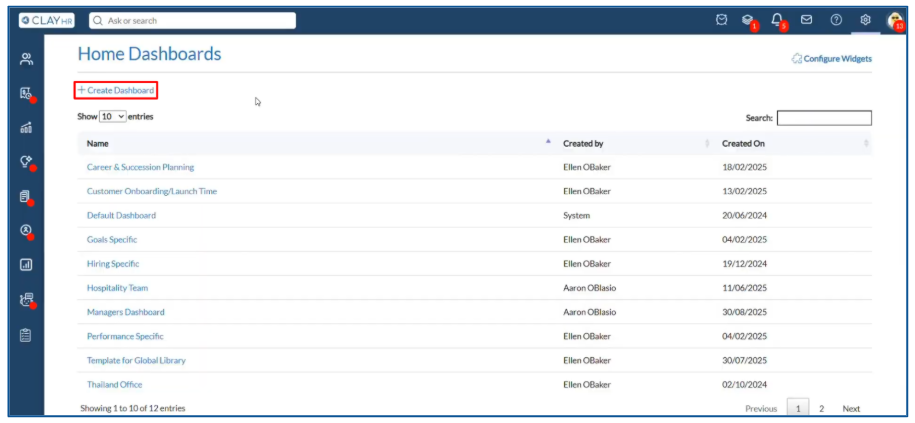
Create a New Home Dashboard
Here are the steps to create a new home dashboard:
- Hover over the gear icon on the top menu (right side of the page) and select “Look & Feel.”

- Select “Dashboard” from the left panel, then click on “Configure Dashboard.” You will be redirected to the dashboard home page.

- Click “Create Dashboard.”
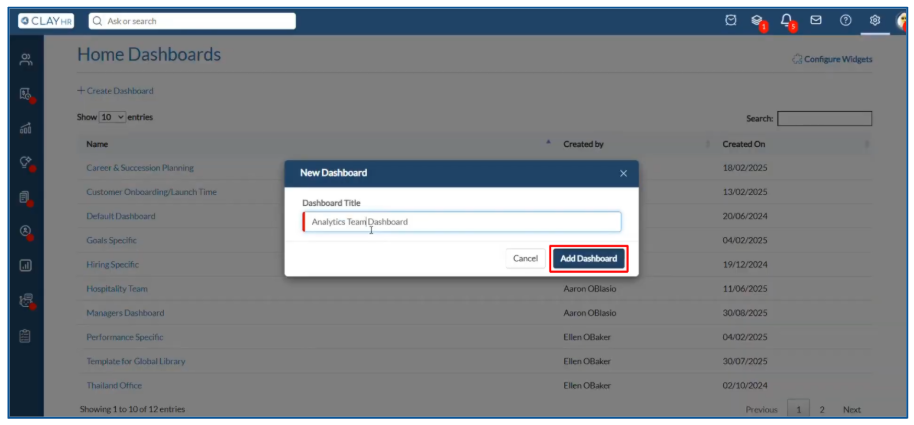
- Enter the name of your dashboard then click the “Add Dashboard” button. Your dashboard will be created successfully.
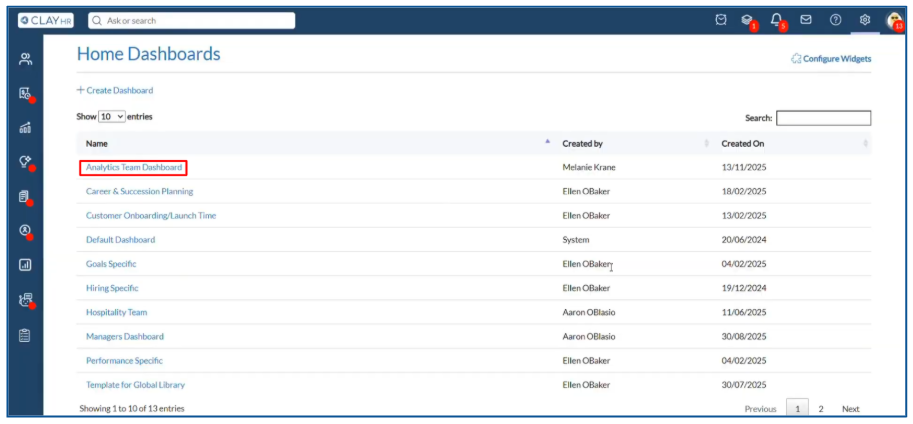
- Click the dashboard name from the home page. The dashboard configuration page will open.
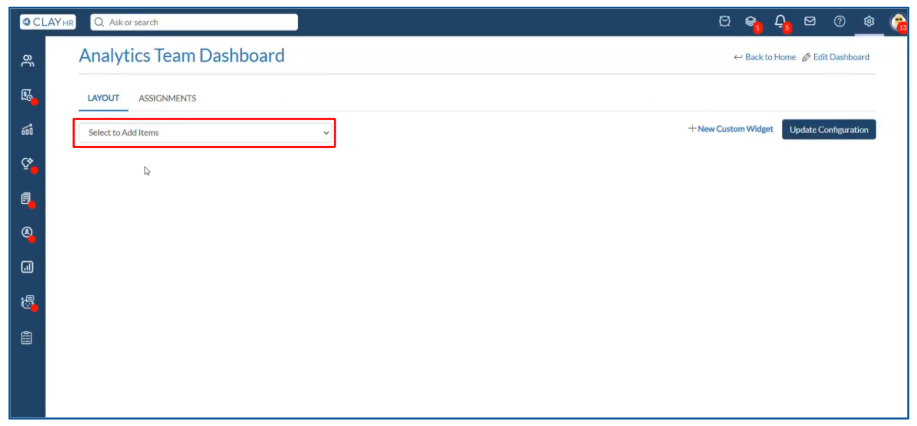
Add a Widget
You can add both standard and custom widgets to your home dashboard.
To add a widget:
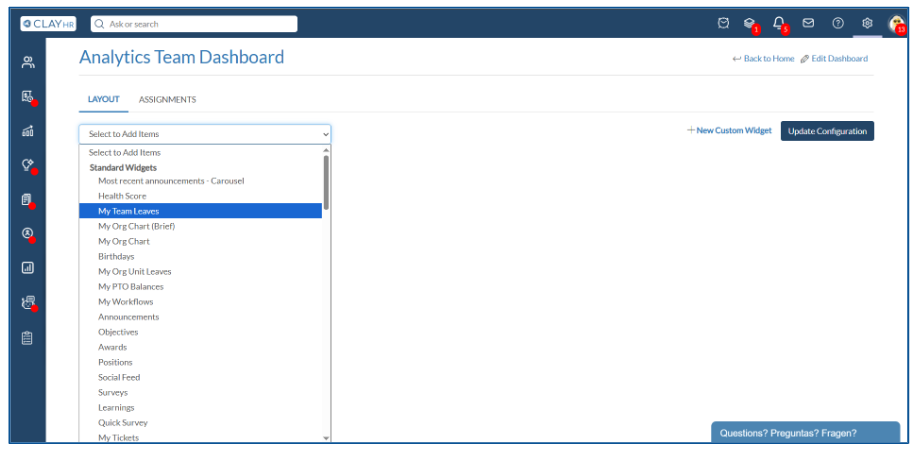
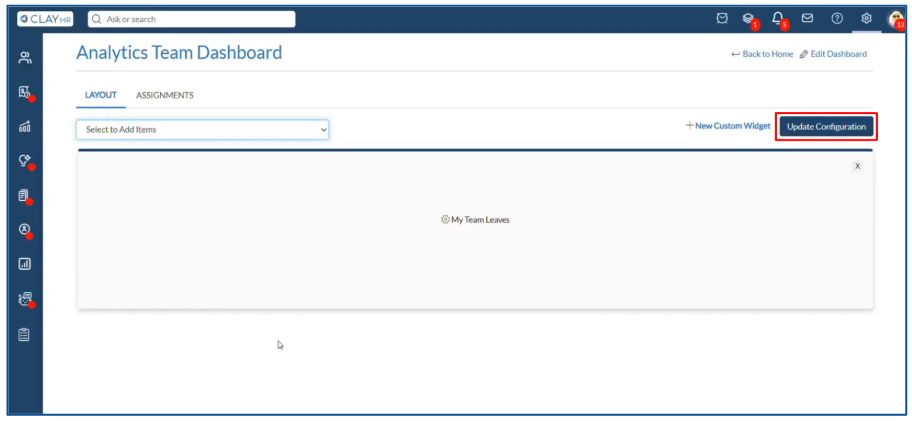
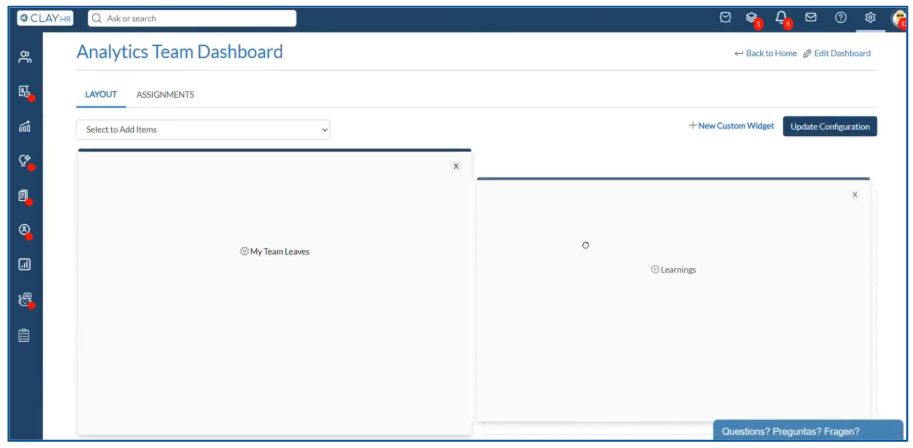
- Select the widget you want from the “Select to Add Items” dropdown.
- After adding all the widgets you need, click “Update Configuration” to save your changes.
Delete a Widget
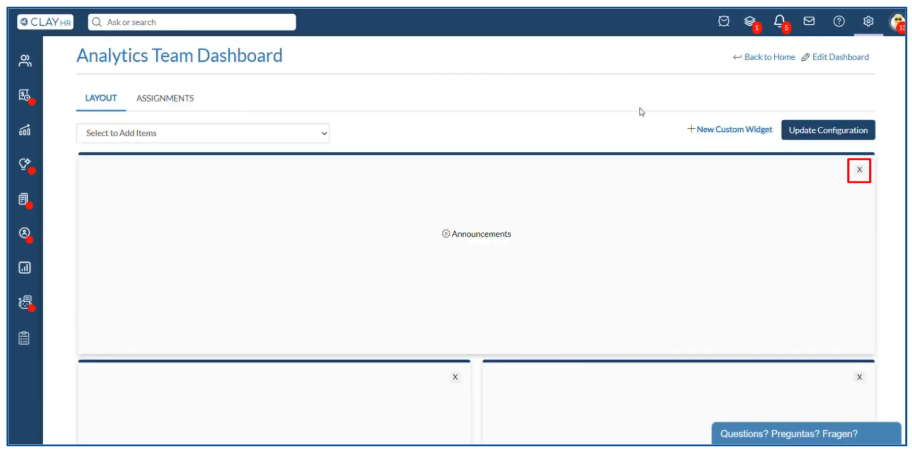
To remove a widget from a home dashboard:
- Click the cross (×) icon on the top-right corner of the widget.
- Then click “Update Configuration” to save your updated layout.
Setting up the Home Dashboard Layout
Users can adjust the size and position of each widget as needed.
- Resize a widget: Click and hold any corner or side of the widget, then adjust the width and height.
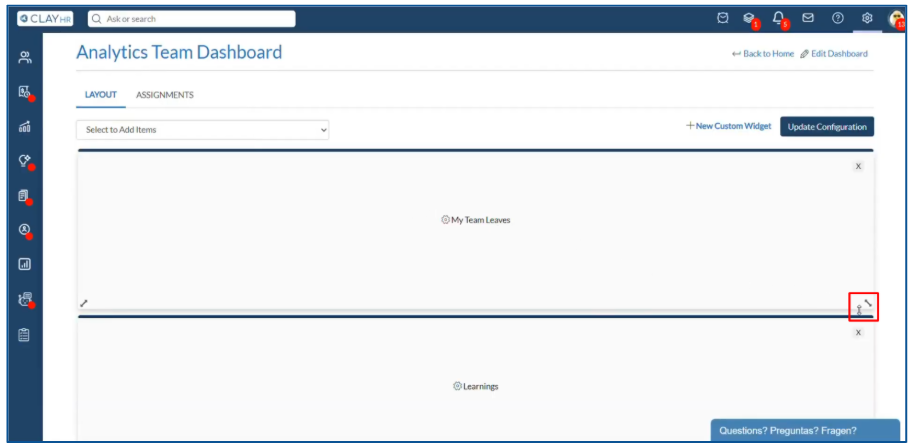
- Reposition a widget: Click and hold the widget, then drag and drop it to the desired location.
After you are done with your changes, click on the “Update Configuration” button to save them.
Assign Home Dashboard to Users
Here are the steps to assign a home dashboard to a user:
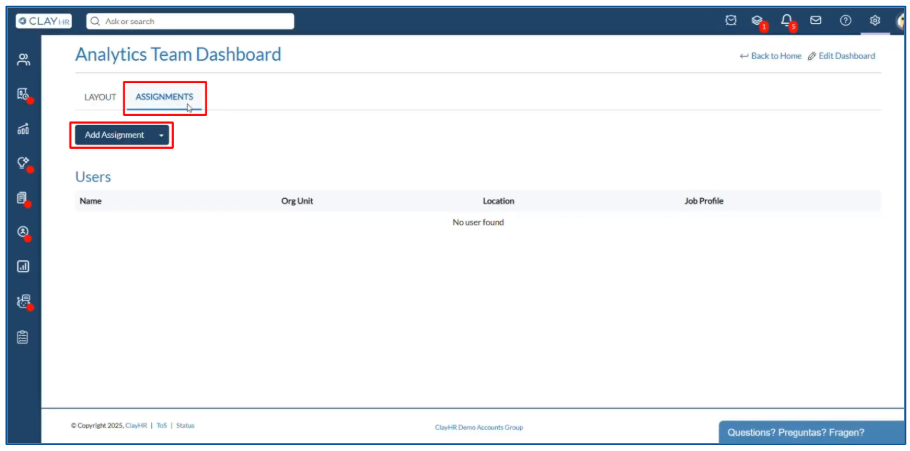
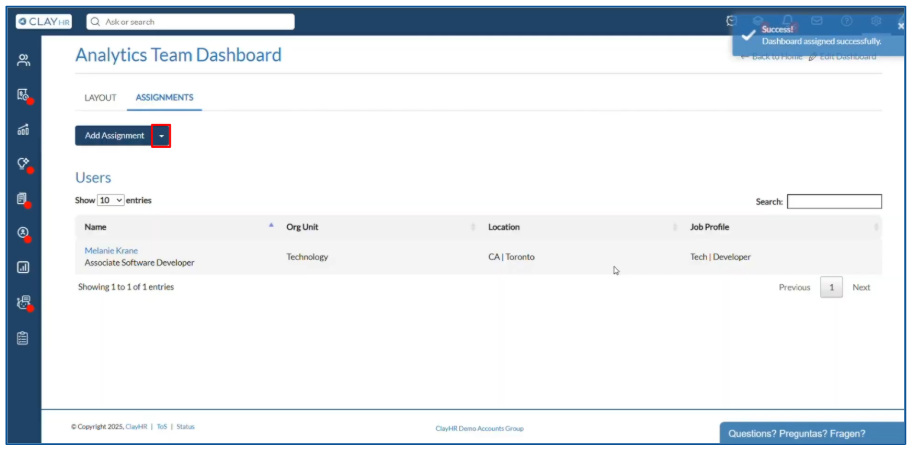
- Select the “Assignments” tab, then click “Add Assignment.” A pop-up window will appear.
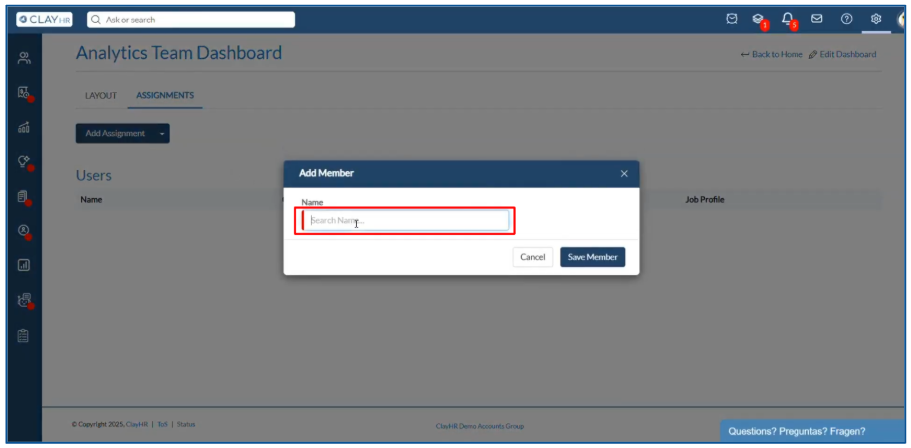
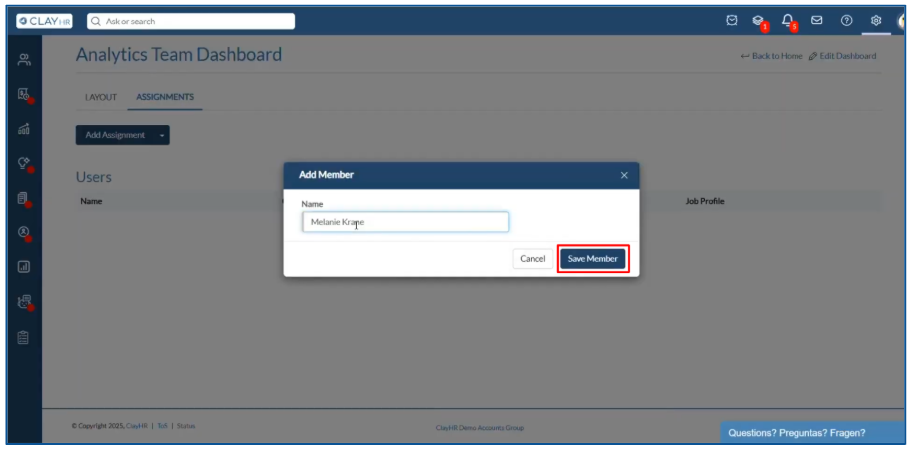
- Search for the user you want to give access to and select them from the dropdown.
- Click on the “Save Member” button. The dashboard will now be assigned to that user.
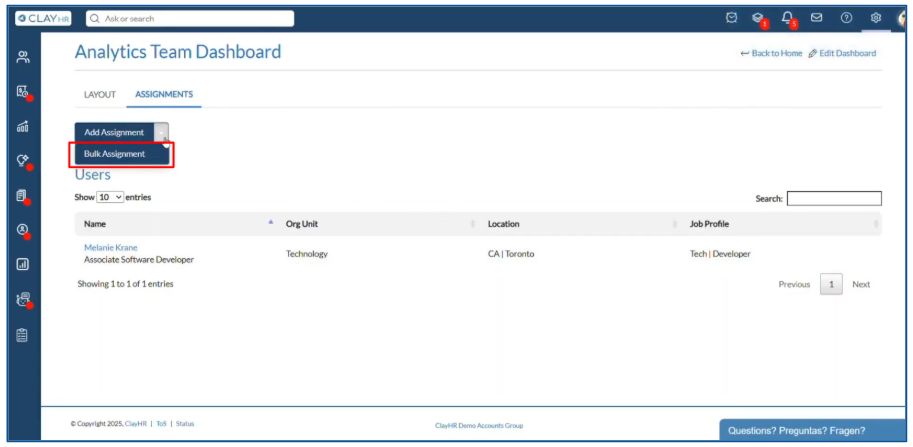
You can also assign a home dashboard to users in bulk using bulk assignment. To use bulk assignment, click the dropdown icon next to the “Add Assignment” button. The “Bulk Assignment” button will appear below. Clicking it will take you to the bulk assignment page.
Additional Settings
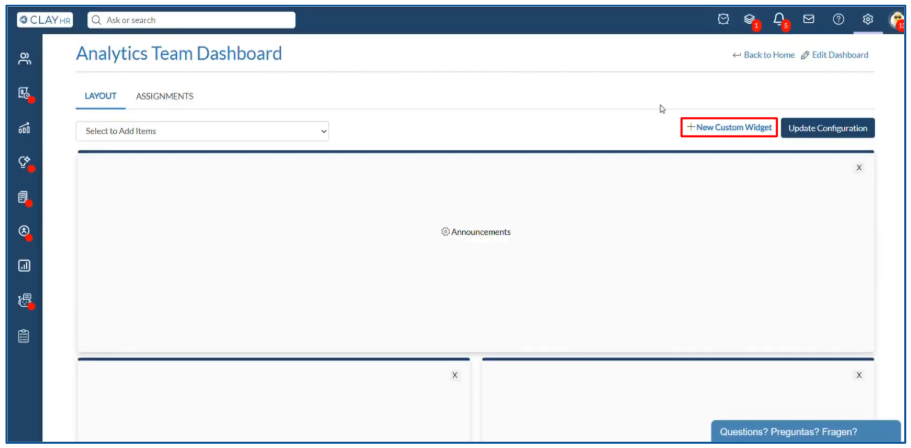
- On the dashboard configuration page, in the layout panel, you will find a “New Custom Widget” link to the left of the “Update Configuration” button. Clicking this will take you to the custom widget configuration page.
If you want to learn more about configuring custom widgets, click here.
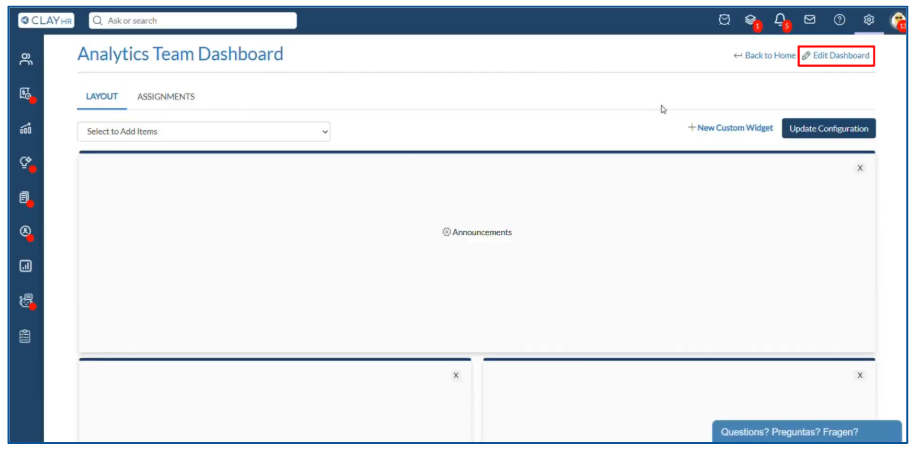
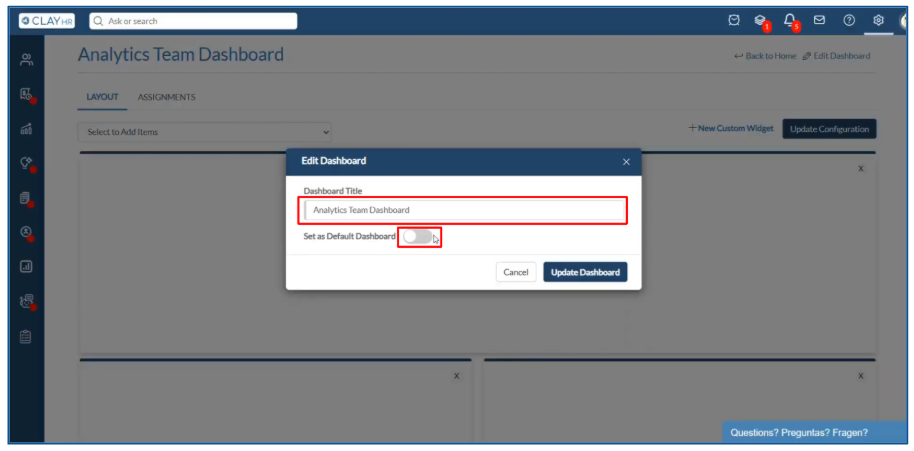
- On the top-right of the page, you will see an “Edit Dashboard.” Clicking this opens a pop-up window where you can:
- Edit the dashboard name in the “Dashboard Title” field.
- Choose whether to make this dashboard the default by enabling “Set as Default Dashboard.”


.webp)
